As this post comes just two weeks from Christmas, I think it is appropriate to start by wishing you all a very Merry Christmas and a Happy 2019! I wish you a happy, prosperous, healthy and very happy new year with a lot of cycling activities, be them for pleasure, commute, travel or sport.
Since about September I’ve been cycling regularly to work. September and October I’ve managed to cycle to work and back in average 3 times a week, but as this is the UK and the weather is not one of the best points here, that has gone down to mostly 1 time in the week, occasionally two.
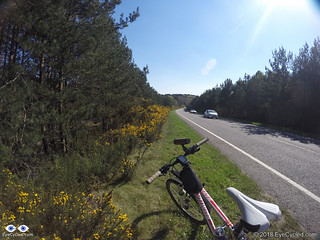
The distance from my door step to the office is of just under 17 Km (just over 10 miles) and it usually takes me just under an hour to get there. I then, obviously, have to cycle back in the evening, so each time I do it, it adds about 33 Km to my Garmin / Strava mileage and, best of all, lets me eat about 5 equivalent Big Mac burgers that day (not that I eat that much or that I eat McDonalds at all, but it should give you an idea – about 1,600 C calories against 300 C for a Big Mac apparently).
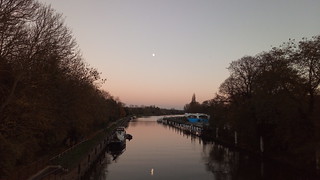
Some friends and colleagues have asked me about the ride, so in the cold, but beautiful morning of the 4th of December I decided to mount my Sony Action Cam on my helmet and record the ride.
Hope you enjoyed the video and the music.
I am very grateful to everyone who I shared my life with this year and for all the love, care and learning experiences we were able to exchange. God bless you all!
Now the Summer’s gone And December’s here And you’re looking back At all the things you’ve done this year And it’s cold outside ‘Say it’s going to snow So be thankful that you’ve somewhere warm to go
Cause when you stop to count your blessings It’s The Little Things Oh the simple things that money just can’t buy There’s always someone who would be grateful for The Little Things Oh the things we take for granted in our lives
Free to feel the sun Warm upon your face Just to walk outside Knowing you’re still safe Food enough to eat Water clean and a bed Four walls around you And a roof overhead
Just a warm embrace and a smiling face, just a place to be with enough to eat, to be free from pain sheltered from the rain , just The little things. To be given care, with enough to share, just hear you say you’re not far away. Free to walk or run watch the rising sun, It’s The little things.
Do you like these posts? Why, then, don’t you pay me a coffee to help with the blog hosting cost and as a caffeine incentive to keep me going through the long hours of the night?(Suggested amount: £2.00 or USD $3.00 or 2.50€ or whatever you want to give).
You may donate through my Patreon Page or through PayPal directly.
Please rate this post by clicking on the desired star (1 = Awful, 5
= Excellent)
I can’t blame you if you think EyeCycled is gone for good. I have not posted anything in ages 🙁
This is NOT an excuse… I don’t need to find excuses, I admit I have neglected EyeCycled. My justification is simply that I can’t find it in myself right now to spend the time EyeCycled demands to keep it going .
I continue to cycle and the bicycle is still one of the most important things in my life. At least 3 times a week I cycle to work and back (that is 20 miles / 33 Km each day) and once a week I drive 90% of the way and cycle the remaining 10% with my newly acquired Dahon folding bike. The problem is when I get home, especially on the days I ride 10 miles back, it is so late and I am so full of having spent all day in front of a computer screen that I simply cannot find in myself to spend and entire evening editing videos and writing blog posts. As I said, this is not an excuse, but I am just living this moment of my life right now.
I still have plans for EyeCycled and I do work occasionally on EyeCycled stuff. I am still working on videos from my Faith’s Way (Caminho da Fé) pilgrimage in Brazil last years and started a post on a bike ride I did in Little London (Londrina, Brazil) last year also. It is not that I completely stopped doing something. I am just doing it very slowly (very!).
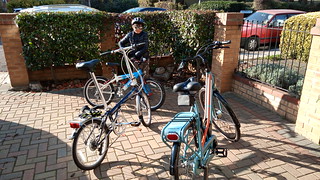
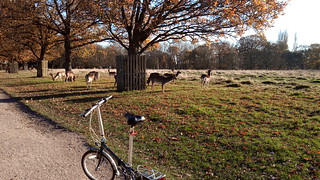
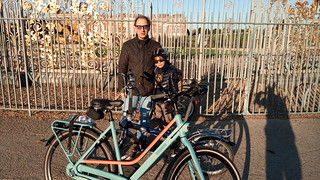
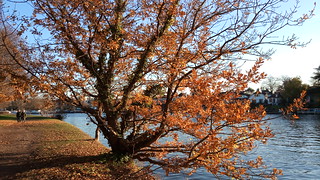
Today was a special day and I want to share it with you, so you know I am not lying. I rode with my youngest son and his Godfather from Twickenham to Teddington, where we met the rest of the family for brunch at a Polish Café and after that we rode to Bushy Park to see the deer and to Hampton Court Palace for a few pictures of this landmark and from the Thames. From there we rode to Kingston Upon Thames, did a little coffee / hot choc stop at the YMCA Hawker by the river and then back to where we started through the Teddington Locks. Those familiar with London will know or have heard of these places.
At almost 18 Km, it was my youngest son biggest bike and despite the fact he took a tumble at the Thames path (nothing serious, just distraction) he said he really enjoyed the ride. I am so proud of him…
Anyway, this is where this short post stops. I’ll leave you with the pictures and a few videos I recorded along the way and please, be patient with me. EyeCycled is not dead! 🙂
Thank you for your support!
Flickr API error: Invalid API Key (Key has invalid format)
Do you like these posts? Why, then, don’t you pay me a coffee to help with the blog hosting cost and as a caffeine incentive to keep me going through the long hours of the night?(Suggested amount: £2.00 or USD $3.00 or 2.50€ or whatever you want to give).
You may donate through my Patreon Page or through PayPal directly.
Please rate this post by clicking on the desired star (1 = Awful, 5
= Excellent)
Blog post about the 6th and 7th day published during the journey on the 23rd August 2016
This post complements the post I published on the 23rd of August 2016 in which I described the experiences I had on the 5th of August 2016 while riding between Châlons-en-Champagne and Brienne-le-Château, in France. I am not going to repeat the content of that post in this one again, but I will try to add a few highlights for each one of the stages below. I encourage you to read the previous post before continuing on this one.
Departure time from Châlons-en-Champagne:Around 08:54h.
Arrival at Brienne-le-Château:Around 17:56h
Duration of day’s Journey: 8h 53min
Expenses this day:Total = € 45.33
€35.33 for food, incl. items bought in a market for breakfast next day.
€10.00 – Accommodation (Municipal Pilgrims’ Hostel of Brienne-le-Château)
Overnight Location:Pilgrims’ Hostel. You need to first go to the Tourism Information Office to pay the fee and get the key to the hostel. The office is located at 34 rue de l’Ecole Militaire 10500 Brienne-le-Château. Tel. : +33 03 25 92 82 41
This was a long day in the Via Francigena. I covered several stages of the Lightfoot guide and rode almost 90 Km. It wouldn’t be productive to write again about something I have already written in this blog post, therefore if you didn’t have a chance to read the previous post click on this link, read the post and jump back here as that post does not include any of the videos for this day.
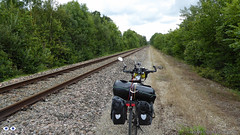
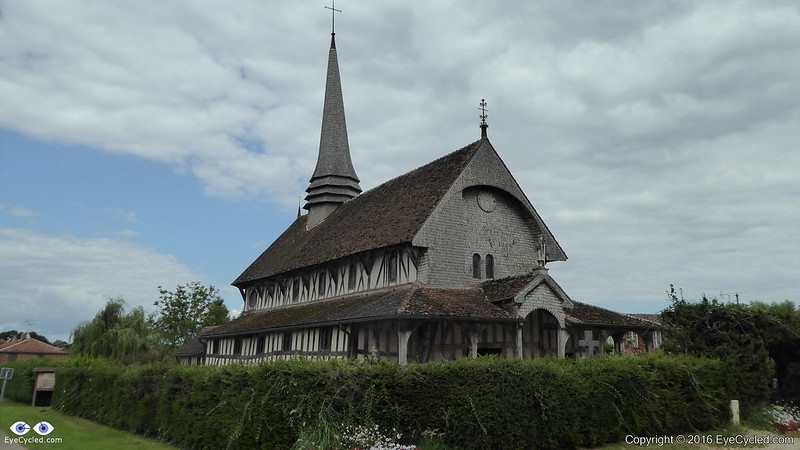
I will however mentioned again that if you are cycling this route using Google Maps for navigation, it is possible that the cycling route Google Maps will propose is the same one it did for me, in other words, along side the railway tracks after the tiny village of Arrembécourt (see video of stage 27). If you are travelling light and on a mountain bike, then that should be no problem, but if that isn’t the case and like mine your bike weights 50 Kg and is a hybrid or touring bike with touring tyres, then I would recommend that you continue the journey on the D6 towards Chavanges and take the D2 to Lentilles (the same one I took after the train track adventure). It’s a longer route, but stone free.As you arrive in Lentilles be sure to factor in some time to visit the 16th Century church built of wood and clay; the Church of St Jacques et St Philippe. Personally that small church had a bigger impact on me than many of the ostentatious cathedrals I have seen along the Via Francigena.
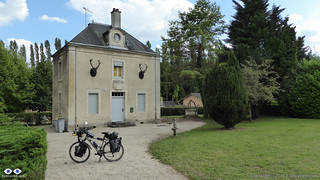
Another thing I want to mention before I finalize this text is the municipal pilgrims’ hostel in Brienne-le-Château and also how nice the lady in the tourism information office was to me. First of all, to stay in the pilgrims’ hostel you need to arrive in town at a time that the tourist information office is open, as you have to pay the fee and collect the hostel’s keys from there (although the hostel itself is about 2 Km away in the perimeter of town). Second, before going on the pilgrimage, like most people I did a lot of research about the route and the places to stay. I read in some blogs that some pilgrims thought the house to be haunted. I must confess, being the only pilgrim sleeping there that night made me apprehensive. The house is indeed a little spooky, but if there were other spiritual entities sharing the house with me that night they did not bother me. The house is old and used to be a hunters’ cabin so my guess is that, if there were to be any ghosts there, they would have been those of the animals that were killed (incl. the two deers whose heads are at the front wall of the house, assuming they are real)
If you want to see more pictures from this day, please take a look at my picture gallery (down below) from Flickr.
If you have any questions, don’t hesitate to comment or send me a message through the contact form.
Please subscribe to my Blog and/or to my YouTube channel if you don’t want to miss the next one and help me spread the word by liking and sharing my Facebook Page and Tweeter feed also.
Thank you for your time!
Do you like these posts? Why, then, don’t you pay me a coffee to help with the blog hosting cost and as a caffeine incentive to keep me going through the long hours of the night?(Suggested amount: £2.00 or USD $3.00 or 2.50€ or whatever you want to give).
You may donate through my Patreon Page or through PayPal directly.
Please rate this post by clicking on the desired star (1 = Awful, 5
= Excellent)
If this is the first post you read on this series, I recommend you take a look at the introduction post published on the 28th of February 2018. That post explains what the Faith’s Way is, my reasons for doing it and provides information that might be useful to you, if you decide you want to do it too.
As explained in the introduction post, I broke the entire journey into 21 stages, as per the official map of the Caminho. There will be 1 video for each stage of the journey, so the blog post for this day contains two videos. One covering the journey between Santa Rosa de Viterbo and Tambaú and the other covering the journey between Tambaú and Casa Branca.
You can download the official map of the Caminho from the website of the Friends of the Caminho Association. From there you can also download a list of credentialed accommodations for your journey. Most places in that list are simple family owned pilgrims’ hostels. Some in very rural locations (farms) others in more urban areas. Some establishments are hotels. Family owned Pilgrims’ hostels along the way have usually a set value that includes the meals as well, typically dinner and breakfast, but all hotels listed there will also offer a reduced pilgrim’s rate provided you present them your pilgrim’s credentials.
PS. Normally the care takers of the hostel offer dinner and breakfast together with the accommodation for R$ 70.00, but the day I was there was normal a normal day for them. Read the post below to understand why.
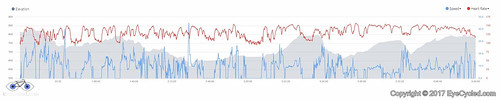
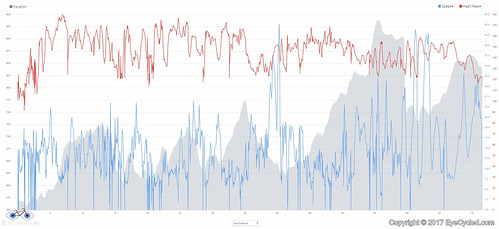
Total Elevation Gain on this track: 620m
Average Speed: 9.6 Km/h
Max Speed achieved: 57.8 Km/h
Average Heart Rate: 128 bpm
Max. Heart Rate: 163 bpm
Calories burned: 2,347 CAL
Click here to see the Garmin Connect page for this activity
Elevation, Speed and Heart Rate between Santa Rosa de Viterbo and Casa Branca
Stage 05: From Santa Rosa de Viterbo to Tambaú + Video.
The night at the Malim Hotel was good. There was no TV in my room, but these days, who needs a TV when you have WiFi? Breakfast was good and plentiful too and I took my time enjoying it. Even spent almost 30 minutes that morning talking to the receptionist of the hotel, trying to understand if the town had any relation to the town of Viterbo in Italy, which is also along another pilgrimage route known as Via Francigena, that I completed in 2016 (it does, btw, but that was explained in the previous post).
The official map of the Caminho indicated that the distance between Santa Rosa de Viterbo and Tambaú was of 36 Km which is one of the longest stretches of the Caminho. To be honest, I wasn’t really looking forward to the same long stretches of fine sand and dust from the day before, but I decided to leave the hotel and follow the yellow arrows to see how the way was and decide later if I was going to stick on the original path or try to find an alternative route, if one was available.
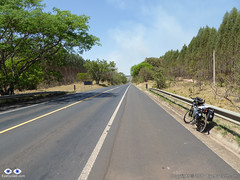
Regional SP-332 Highway between Santa Rosa de Viterbo and Tambaú
So, I rode on the Caminho path for about 5.0 Km, following the yellow arrows on the dirt road. The terrain, however, was as sandy and difficult as those in the day before, and I was a tired and bored with the poor performance of the previous 2 days, so I decided to look for an alternative in Google Maps. I knew, from talking to the hotel staff in the morning, there was a paved road to Tambaú that followed in parallel to the Caminho path. At the little village of Nhumirim, 5 Km from Santa Rosa de Viterbo, instead of turning left at the yellow arrow indicating the Caminho path (see in the video), I followed on for another 2 Km to take the SP-332, a regional highway, to Tambaú. Therefore I obviously cannot show you the original caminho path from Nhumirim to Tambaú and I’ll leave it up to you to decide what to do if you find yourself in that position, but I can tell you that I do not regret having done the remaining 23 Km on the highway. I felt safe on that road due to the wide hard-shoulders and the fact that most of the drivers respected the 1.5 m distance. That route also did cut 6 Km of the distance between Santa Rosa de Viterbo and Tambaú and allowed me to cover these 23 remaining Km in 1h and 20 min, an average of 17 Km/h which was almost double the average of the day before. If you are on a bike I would recommend this route to you, but if you are walking, even though I don’t how the way is, it would be probably safer to stick to the Caminho path.
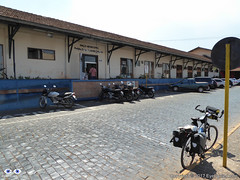
Tambaú Town Hall. It used to be Tambaú’s old railway station.
Another downside of not following the original path is that you don’t have the yellow arrows to guide you anymore, so you will have to find your own method of navigation. I decided to ride the the town hall of Tambaú as typically this is one of the places you can get information about the path and also stamp your credential, but that was not the case. As I got to the town hall the staff told me that Caminho pilgrims are usually served at the town’s tourism information office / dept which was, however, not far from that location. Tambaú is not a village, but it is not a big town either, so everything is relatively close.
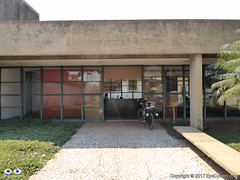
Tambaú’s Tourism Department is where you can get your pilgrim’s credential stamped.
After having my pilgrim’s credential stamped at the tourism information office and, as I had gotten to Tambaú much quicker than I expected (had I followed the original Caminho path), I could afford a longer rest time there. The office has a cold water fountain available for the pilgrim’s at the lower level and I had a little snack I had brought with me. Even had time to do a quick chat with my children back in the UK. I had the feeling that Tambaú would have been a nice place to spend the night, but it was too early for me, so after 30 min or so, I resumed the journey following the yellow arrows towards Casa Branca, the next destination in the path. For those willing to stay in Tambaú the Eliana Hotel is right in front of the Tourism Information Office and is a credentialed hotel with special rates for pilgrims (requires the pilgrims’ credentials).
The 30 min rest I had in Tambaú helped a lot in terms of motivation for the next stage of the path. I left with the decision that I would return to the original caminho path and follow the yellow arrows all the way to Casa Branca, regardless of how bad it was. I also don’t regret that decision, but I could, again, have saved 3.87 Km of the journey and, perhaps, prevented one of the 3 tumbles I had during the pilgrimage, had I taken the paved road between Tambaú and Casa Branca. One of my goals was to be able to show the Caminho da Fé to others as it is. I did, however, highlight that point in the video where you can take the decision of staying on the shorter paved road or taking the longer dirt tracks to Casa Branca,
As I mentioned above, it was in this part of the journey which I took the 2nd of the 3 tumbles I had throughout my journey to Aparecida. Some of the dirt roads and tracks of the original caminho are farm tracks with a lot of fine sand and the sand banks are sometimes difficult to spot in the distance. All it takes is a moment of distraction for you to kiss the ground. In my case I was going down a little hill, picked up some speed and when the front wheel hit a sand bank it skidded to the right. Thankfully there were no injures or damage on this little accident. I also highlighted this incident in the video.
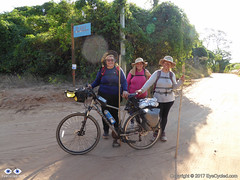
Pilgrims on foot, about 10 Km before Casa Branca
About 10 Km before Casa Branca I met 3 female pilgrims on foot who started their journey in Tambaú earlier that day. They wanted to walk all the way to Aparecida, but were considering of doing it over several different moments i.e. walking a portion of the pilgrimage, going home, then coming back a few days later to the point they stopped, walking another portion and repeating this until they got to Aparecida. This is also a valid pilgrimage option for those who don’t have the time to do it all in one go. I met one of these 3 ladies as I arrived at the pilgrims’ hostel later that evening as she wasn’t feeling well and took the rural bus to town. Her 2 friends decided to walk the rest of the caminho to Casa Branca and only arrived late that night.
Right after arriving in Casa Branca the gimbal’s batteries died, so a small portion of the video at the end was recorded with the camera mounted on the handlebar, hence the increased shakiness of the image.
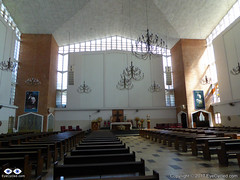
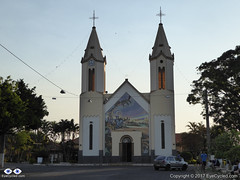
Catholic Church of our lady of the exile in Casa Branca
As I arrived at the Catholic Church of our lady of the exile in Casa Branca, where the pilgrim’s hostel is, I was told to go talk to Mr José or Mrs Maria, his wife. They are the care takers of the pilgrims’ hostel and for a flat rate of R$ 70.00 they usually offer dinner and breakfast to the pilgrims, in addition to the accommodation. This night in particular, Mr José told me that his wife would not be able to cook dinner as their son had been kidnapped by criminals that day, who stole his motorcycle and spanked beat him causing him to be admitted into the local hospital. Mrs Maria was understandably very nervous and stressed about that all situation. Their son later appeared and despite the beating he was OK. Because of the lack of dinner Mr José charged us with only R$ 50.00 for the accommodation and breakfast the next day.
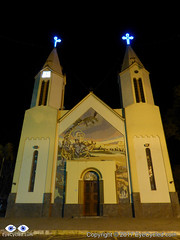
Night view of the Catholic Church of our lady of the exile in Casa Branca
After getting settled and having a shower, Mr José show me to the laundry area and I placed all my dirty clothes in the simple washing machine available there. Soap was also provided as well as indoor hanging lines.
The 3 pilgrim ladies and I ordered food to be delivered from a supplier recommended by Mr José, which cost exactly the R$ 20.00 we would have to paid him for dinner. Food arrived quickly, was plentiful, warm and delicious. A big plastic cup of delicious freshly squeezed orange juice came with it, as per my order. Although the room I was in had 3 beds I was the only pilgrim to sleep in it that night, The other 3 pilgrim ladies shared another room and I believe we were the only pilgrims in the hostel that night. My room had a private bathroom/toilet (suite) as well as a small separate living area with a table and a TV and although reception was not excellent it allowed me to watch the evening news while I was having dinner.
The weather that night was excellent. Not very warm, but not cold either, perfect for a little walk around the church grounds and for some night pictures.
If you have any questions, don’t hesitate to comment or send me a message through the contact form. Please subscribe to my Blog and/or to my YouTube channel if you don’t want to miss the next one and help me spread the word by liking and sharing my Facebook Page and Tweeter feed also. Thank you all for your time and “Bom Caminho!”.
Do you like these posts? Why, then, don’t you pay me a coffee to help with the blog hosting cost and as a caffeine incentive to keep me going through the long hours of the night?(Suggested amount: £2.00 or USD $3.00 or 2.50€ or whatever you want to give). You may donate through my Patreon Page or through PayPal directly.
Please rate this post by clicking on the desired star (1 = Awful, 5
= Excellent)
I think I can safely say that, if you are here, reading this post, you are a cyclist or at least enjoy the sport. If I am wrong, however, don’t go away… 🙂
I value your time and attention. But have you ever done a long touring trip on a bike? One that lasted several days and hundreds or perhaps even thousands of miles / kilometres?
That is exactly what Martin Zlámal from the Czech Republic is doing now. He is riding his bike from the village he was living near Manchester in the UK to his family home in the Czech Republic, a trip of over 1,000 miles / 1,600 Km.
Martin at the Frimley4 Business Park on his way to Guildford
I met Martin through Warmshowers.org, a free worldwide hospitality exchange for touring cyclists. I have been a member of Warmshowers.org for 3 years and 3 months and never had any touring cyclist requested to be hosted by me. I guess I am just not in any major touring route. As a guest I was only successful using it once, as well, in Pavia, Italy during my cycling pilgrimage on the Via Francigena to Rome. I sent dozens of requests over the years, but I guess, since the platform acts just as an interface between people, its practical success depends more of the willingness of their members to actually host and be hosted than the technology itself.
It is a great idea though and I wish we could learn to live and share our resources more often. Only those that have traveled long distances by bike fully understand the value of things we normally always take for granted. A nice warm shower to clean all the dirt and the sweat of a long day of cycling and a comfy bed. Of course, what each host can do for their guests vary with the resources they have available for themselves or are willing to share with them (a warm meal, laundry of the dirty clothes, etc).
This is where I said Good bye to Martin, half way between Bracknell and Guildford.
The day we can make this idea work every single time, will be for me the day I will become completely certain that our civilization will not only survive, but strive, because that would be the day empathy will be common place and not fear, greed or selfishness.
Regardless of if you are a cyclist or not, I’d like to encourage you to become a member of Warmshowers.org and help those on the road, providing at least the basic comforts that every human being should have.
The link below opens the “Relive” video for the short ride I’ve done with Martin from Bracknell to Frimley Green which is 25 Km from Guildford, the first destination of his trip today. Martin plans to ride all the way down to the Ferry port of New Haven, take the ferry to Dieppe, in France, and then ride to Paris on the Avenue Verte, a disused railway line that was converted into a cycle way and leads right into Paris. The route he will then take to the Czech Republic is still open, so if you have suggestions or can help him further, please feel free to leave a comment, as I am sure he will be checking back on this.
Do you like these posts? Why, then, don’t you pay me a coffee to help with the blog hosting cost and as a caffeine incentive to keep me going through the long hours of the night?(Suggested amount: £2.00 or USD $3.00 or 2.50€ or whatever you want to give). You may donate through my Patreon Page or through PayPal directly.
Please rate this post by clicking on the desired star (1 = Awful, 5
= Excellent)
In two days (19th May) the UK is going to celebrate the Royal Wedding of Prince Henry of Wales (or Harry, as he is more popularly known); Princess Diana’s second Son. He is marrying actress Rachel Meghan Markle at the St George’s Chapel in Windsor Castle where the Queen and Prince Philip live for most of the year. I will not get into any details about their wedding as the media has been and will be covering the event extensively and in every minute detail. On the days prior to and on the wedding day, I expect the town of Windsor will be completely taken by government officials, security personal, diplomats, rich people, not so rich, but curious people and tourists, so for me in particular Windsor is a “no go” destination in the period.
Thankfully, the 7th of May was a bank holiday in the UK and it was a gorgeous day. The sun was shining, the skies were clear and the temperature was ideal for a bike ride. So, as I mentioned the royal wedding at the end of the video, I decided to call this ride the “Royal Wedding Ride to Windsor Castle” and I took the opportunity to start it from Bracknell’s, new town centre, called “The Lexicon“, so I could show it to you all as well (the old town centre was demolished a few years ago to give way to the construction of The Lexicon, an investment estimated at approx. £750 million).
Windsor is a regular cycling destination for me. If you look through the blog you’ll see I have recorded several rides to Windsor over the last 3 years. Actually, let me do this job for you…
On the 19th of July 2015 I published a post containing a 9 min 37 sec time-lapse video starting from Bracknell’s train station, but using a different route which takes me by the entrance of the Legoland Park in Windsor and then through some private roads of a farm which I suspect belongs to the crown.
On the 20th of September 2015 I published a post containing a 1h long video in “normal mode” of my ride from my home in Bracknell to Windsor Castle. On this post I also published a 10 min video of my walking around the centre of Windsor starting from Windsor Castle where the video above stopped.
On the 18th October 2015 I again posted another post of a mid-autumn bike ride to Windsor containing the video of the ride from Bracknell to Windsor and the way back from Windsor to Bracknell . The first video is only 2 min and 31 sec long as it was a 5 second interval time-lapse recording. I did use the same route and rode from home to the old Bracknell Town Centre, but on my way back to Bracknell, I used the same Legoland Park route as on the post of the 19th of July one.
On the 8th of February 2016 I published a post containing 2 videos: An 8 min and 37 sec time-lapse video from Bracknell’s South Hill Park, using pretty much the same route as the one I used in this post, and also a video of the way back to Bracknell , using the same Legoland Park route as on the way back of the above post.
These post show only the rides to Windsor that I recorded. The distance between my home to Windsor is, for me, the perfect training length and I have often also used Windsor as a destination to do “full load” test rides in advance of long touring trips such as the one I did to Rome in 2016.
If you have any questions, don’t hesitate to comment or send me a message through the contact form. Please subscribe to my Blog and/or to my YouTube channel if you don’t want to miss the next one and help me spread the word by liking and sharing my Facebook Page and Tweeter feed also.
Thank you for your time!
Do you like these posts? Why, then, don’t you pay me a coffee to help with the blog hosting cost and as a caffeine incentive to keep me going through the long hours of the night?(Suggested amount: £2.00 or USD $3.00 or 2.50€ or whatever you want to give). You may donate through my Patreon Page or through PayPal directly.
Please rate this post by clicking on the desired star (1 = Awful, 5
= Excellent)
I haven’t posted about anything other than my cycling pilgrimages for a while and I must confess I got a bit bored of writing only about them, but if you’re looking forward to seeing more of them, don’t worry, they will continue.
This week, however, I wanted to share something different with you.
… Something simple… … Something every one can do, regardless of age and physical fitness… … something “homie”…
Few weeks ago, my friend Richard, who is the father of one of my son’s school colleagues, met me at their school and we started talking about my time in Brazil last year and my cycling in general. He said he had been wanting to take up cycling again, something he had always enjoyed, but with the burdens of modern life sometimes gets neglected. Does this sound familiar?
So, we’ve been riding together once a week for a few weeks now and I truly enjoy his company.
There are many things that motivate people to start cycling. For some is the feeling of freedom, being on your bike, not depending of any external engine or fuel other than strength of your legs and enjoying the wind in your face and so on.
For others is the (desire or need of) physical exercise or some time to relax. No one can deny the benefits of cycling for the well being of a person, physical and mental.
One other thing, however, that motivates people, me in particular, is the ability a bicycle has to reach practically any place a person on foot would and to do that faster than walking, hence cover more ground.
You can travel by bike for days, cover great distances and explore fantastic places along the way. With the appropriate bike you can take that very uneven and narrow path full of gravel, stones and sand of MTB trails or ride among the pine trees of a forest, get muddy, go up or down hill and find nature at it’s best, untouched and clean, keeping it as such.
But who said such places cannot be found all around you? Have you explored every inch of a radius of 20 miles / 30 Km around you?
I’ve been cycling regularly in Bracknell, the town I live, since 2012 (and “unregularly” well before that). Bracknell is not a big town, but is not a village either. The Bracknell Forest area covers a region of 109.4 km², so there is plenty to explore. I’ve moved to Bracknell in 1995 and although I’ve spent a few years away, working on jobs abroad, my time in Bracknell is getting close to 16 years now, altogether.
Richard has lived in Bracknell for 23 years, so together we have almost 40 years of Bracknell Forest experiences. One would expect we would know every corner of this place by now. Yet, every time we go out we find something new, some place neither one of us has ever been before.
I am willing to bet, this isn’t unique to us. I bet wherever you (the person reading this post), live you will also find places nearby you’ve never been before. It’s been said that the place we least know is the place we live in. Some of us will have probably explored more while on holidays than in the places we live in.
May I suggest you add a little bit of spice in your everyday life, get on your bike and go looking for places nearby you’ve never been to? That street you’ve never been to before, just a few blocks away, might have houses with an interesting design or architecture or gardens full of flowers that are visible from the road. Maybe there is a little river, stream or creek nearby with clean water and perhaps even fishes or toads in it. Or perhaps the local forests or parks have wild life you’ve never expected, or a lake or tracks that lead to wonderland. You’ll never know how deep the rabbit hole goes if you don’t take the initiative and peek inside.
When I get out on my bike I normally leave home with a general idea of the direction I want to go. I try to cover the 4 cardinal directions (North, East, South and West) on a rotatory basis. On this ride I wanted to go south. My initial idea was to ride to Crowthorne and then perhaps go in the direction of Finchasmtead, but as we started our ride, Richard told me he had never heard of the Devil’s Highway.
Devil’s Highway, huh? Did that spark your attention? Well, it should! The richest feature of a web page is the ability to link to other pages, so I will not go into much detail, since I’ll be leaving the links for you to jump to the information, if interested.
According to the writer Gregory Norminton, “The name is rooted in superstition: for in the Dark Ages, it must have seemed that only the devil could build anything so straight and strong.”
The Devil’s Highway is actually the remnants of an old Roman road connecting Londinium (London) to Pontes (Staines) and then Calleva Atrebatum (Silchester).
So, in this ride Richard got to know a bit of the history of the Devil’s Highway, but to my surprise we also found a place in Sandhurst I had never been before. I was trying to reach the gate to the Wildmoor Heath Boardwalk, as this was another place Richard didn’t know about. I had been there only once before and got a bit lost trying to find the gate. In the process of getting lost we rode through the Snaptrails park, “an attractive 3.5 hectare Green Flag awarded park located to the west of Owlsmoor in Sandhurst“, according the the official Bracknell Forest County page and I must agree. We would have never found this park if we weren’t lost and on bikes.
We managed to find the Wildmoor Heath Boardwalk as well, just took a little longer and on our way back home we rewarded ourselves a pint at “The Prince”, a local pub in Crowthorne .
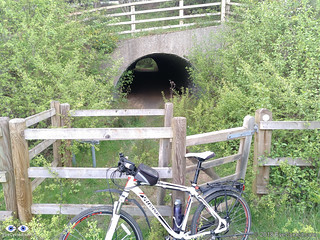
I am a member of a local Facebook group called “We Love Bracknell“. Bracknell residents post all sorts of things in this group and on the 23rd of April someone posted a picture of a “tunnel” or an underpass that apparently not a lot of people knew existed, including myself. To me that is too tempting of a challenge and I made myself a mental note that on my next ride, which was 3 days later, I would try to find this tunnel.
According to some comments left by the poster, he seemed to think this tunnel was build as a way to enable local farmers to move livestock (cattle, horses, etc) from one side of the A329M motorway to the other. Whether that is true or not it is hard to say, but it does certainly make sense for an otherwise forgotten structure that links no place to nothing.
I looked in Google Maps and the images suggested it was possible to reach the tunnel from the fields behind the Coppid Beech Hotel. That wasn’t easy and I don’t recommend to anyone attempting to find this structure from this side. There are point of very narrow tracks covered by thorny branches from both sides, which can easily rip your skin off if you are not careful and made it impossible for us to continue on our bikes. We had to abandon the bikes and tried to find it on foot. We managed to get to just approx. 100m from the tunnel’s entrance on top of the A329M’s railway bridge, but when we looked further in that direction we both thought the path would lead to the Jennett’s Park round-about as the tunnel’s entrance wasn’t visible due to vegetation covering it.
Not knowing we were so close, we gave up and tried to reach the tunnel through the small roads and lanes behind HP’s headquarters (Moor Ln). We’ve spoken to a number of people along the way and their response about the existence of this tunnel was 50/50. A couple we spoke to confirmed the tunnel existed, but that the access to it was very difficult, as we found out. Another gentleman working at a car repair shop also confirmed the tunnel, yet his mate working besides him had never heard of it. Further down the road we hit a locked gate. I asked another gentleman that was nearby and he said he had lived for 30 years in that location and had never heard of such tunnel.
Well, I knew it existed because of the picture in Facebook and the challenge started to become even more tempting under such conditions. It feels like a gold race.
Due to the locked gate, we gave up trying to reach the tunnel from that side and took the railway overpass behind the Dell building towards Jennett’s Park. There is a gate to Peacock Meadows at the point were Peacock Lane becomes narrower (at the last round about to Jennett’s Park) and that gate leads to the field at the end of which you’ll find the tunnel, near the power distribution tower. You can only see the tunnel when you get close to the tower as it is covered in vegetation on this side as well.
At the end of the day the tunnel wasn’t so exciting after all, but as Mr Spock of Star Trek once said “After a time, you may find that having is not so pleasing a thing after all as wanting. It is not logical, but is often true“. The search for the tunnel was in itself the reward. Not surprisingly, before looking for the tunnel the tunnel we rode around Bracknell just to increase the mileage of our ride and we decided to take a shared pedestrian / bicycle path from Harvest Ride called Quelm Lane, which I had ridden on a few times before, but Richard didn’t. What I didn’t know was that along this path there is a park called Braybrooke Recreation Ground with a calming lake. The park’s football field is visible from the path at one point, but the lake isn’t. When Richard asked what else was in that park we decided to investigate and it was well worth it.
After finding the tunnel we decided to head home through Jennett’s Park, but there was one last thing to show Richard. The Copse in the middle of the Peacock Meadows field in Jennett’s Park. I had been there many times before, but at different moments of the year. I was surprised by the sheer beauty of the carpet of bluebells in this small forest of the field. Not only visually appealing, but a wonderful smell as well… Truly a feast for the senses.
We both rode back home we an immense sense of satisfaction
If you have any questions, don’t hesitate to comment or send me a message through the contact form. Please subscribe to my Blog and/or to my YouTube channel if you don’t want to miss the next one and help me spread the word by liking and sharing my Facebook Page and Tweeter feed also. Thank you for your time!
Do you like these posts? Why, then, don’t you pay me a coffee to help with the blog hosting cost and as a caffeine incentive to keep me going through the long hours of the night?(Suggested amount: £2.00 or USD $3.00 or 2.50€ or whatever you want to give). You may donate through my Patreon Page or through PayPal directly.
Please rate this post by clicking on the desired star (1 = Awful, 5
= Excellent)
If this is the first post you read on this series, I recommend you take a look at the introduction post published on the 28th of February 2018. That post explains what the Faith’s Way is, my reasons for doing it and provides information that might be useful to you, if you decide you want to do it too.
In this post I will cover the 2nd day of this 12 day, 600 Km, journey between the town of Cravinhos and the town of Santa Rosa de Viterbo, both in the federal state of São Paulo.
As explained in the introduction post, I broke the entire journey into 21 stages, as per the official map of the Caminho. There will be 1 video for each stage of the journey, so the blog post for this day contains two videos. One covering the journey between Cravinhos and São Simão and the other between São Simão and Santa Rosa de Viterbo.
You can download the official map of the Caminho from the website of the Friends of the Caminho Association. From there you can also download a list of credentialed accommodations for your journey. Most places in that list are simple family owned pilgrims’ hostels. Some in very rural locations (farms) others in more urban areas. Some establishments are hotels. Family owned Pilgrims’ hostels along the way have usually a set value that includes the meals as well, typically dinner and breakfast, but all hotels listed there will also offer a reduced pilgrim’s rate provided you present them your pilgrim’s credentials.
A good night of sleep was all it took to recover from the exposure to sun, the dust and sand and the mistakes of the previous day. The breakfast table at the hotel had plenty of the most important things to sustain me for the entire day (among others ham, cheese, scrambled eggs, variety of jam and bread, fruit and cereal).
I had washed the clothes of the day before in the bathroom and they were all dry. The hotel has a backyard where I was able to also wash the bike with a hose and add some oil to the chain. Pilgrims in a hurry to get to their destination, perhaps would have to wake up very early in the morning to accomplish all these tasks before leaving, but fortunately that was not my case. I woke up around 8:00 am and only left the hotel at around 10:30am.
After leaving the hotel the challenge was to get back on track and I did not see any yellow arrows pointing the direction from the hotel. The plan was to ride back to town and continue from the point I had made my mistake the day before, but well before the town centre I rode by the other hotel in the official list of accommodations, the Girassol Hotel, right before the petrol station I stopped to ask for directions.
I never cease to be impressed by how easy it is to make friends in Brazil. At the petrol station I met fellow pilgrim João Candosim who pointed me to the yellow arrow some 100m after the petrol station and later became a Facebook friend.
If you watch the video of the prior stage and the one for this stage, you’ll see that from a certain point the images should become familiar as I followed the same route all the way to the “Frango Assado” petrol station at the edge of the Anhangüera Motorway (SP-330).
A note of advice, especially for pilgrims on bicycles, is to be aware of the stray dogs as you leave town. They all came running to me barking a lot, but I believe none of them had the intention of attacking me. They were just letting me know that this was their territory. I dismounted the bike and looked at them without fear and they soon calmed down.
I did a quick pit-stop to get some cold water at the same petrol station I asked for direction the day before and met a couple of “bicigrinos” (bicycle pilgrims) like me who were also planning to ride to Aparecida from that point. They had left from Ribeirão Preto that morning and were riding on the motorway (which in Brazil is allowed) despite being on full suspension mountain bikes, which would be ideal for the dirt tracks of the Caminho. There is no right or wrong. Each person’s pilgrimage is their own.
After the petrol station I continued on the dirt track and few kilometres later I got the a place with a small statue of our lady. Was a nice and well preserved place, ideal for some rest, water and a little prayer. I also replaced the gimbal batteries and to my bad luck forgot the spare batteries there. They were later found by fellow pilgrims, but sending them back to me was not economically viable.
I was replacing the gimbal batteries after each 90 min of use, which was enough time for the batteries to charge inside my handlebar bag were I was carrying a big 25,000 mAh power bank. Having lost the spare batteries meant that for the rest of the journey I would have to stop using the gimbal, while the only remaining batteries were charging (charge times varied from between 45 min to 1h). I continued recording the journey with the GoPro without the gimbal while the batteries were charging, but this meant a huge increase in the shakiness of the images, which you’ll probably notice in the video.
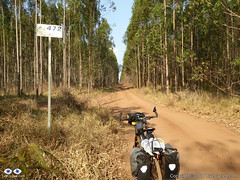
A good portion of this dirt track was along the motorway and there were some interesting views along the way, including the view of burned fields which are unfortunately common this time of the year due to high temperatures, lack of rain and other less natural reasons.
Up to the point where I crossed under the motorway there were significant less sand and dust than the day before (firmer ground), but after that point the tracks become very sandy and dusty again, to the point that, if you are on a bike, you’ll probably have to dismount and push quite often. In this stage you’ll have to ride or walk on a state highway (SP-253) for a few kilometres before continuing on a dirt track along the paved road. I felt safe on that road as it has a nicely flat and wide hard shoulder to ride on and most drivers were opening a distance between me and their cars as they crossed.
Just before arriving in São Simão you’ll have to cross railway tracks and I waited so long taking pictures that by the time I was ready to cross them I had to with for the incoming cargo train to pass, which took several minutes as it was a very long train.
The town of São Simão is small and the yellow arrows were close to each other, practically eliminating the possibility of getting lost. Before arriving at the São Simão Hotel, the one option for accommodation on the official guide and the place where you can get your pilgrim’s credential stamped, I stopped to talk to a couple of gents that were washing some cars and asked if I could throw some water on the bike to get rid of the dust. They asked me where I was coming from and where I was going to. They had heard of the Caminho da Fé, but neither one of them knew that the yellow arrows were in their town were there to guide the pilgrims to Aparecida do Norte. Now they know 🙂
The São Simão Hotel was a welcoming place. Got my pilgrim’s credentials stamped and filled my water bottles with cold water. They also offered me some fruit, but I declined.
Stage 04: From São Simão to Santa Rosa de Viterbo + Video
As I left the São Simão Hotel I did a small detour to visit the grandmother of a fellow pilgrim who I got to know through the Facebook group of the Friends of the Caminho Association. Once I explained who I was and why I was there, Mrs Vera Burin and her daughter Angelica welcomed me, a stranger, almost as if I was a member of the family. This is one of the most amazing aspect of the Brazilian culture. The ability to trust and welcome strangers. A bit like how the Irish view them, “a stranger is just a friend that you’ve never met before“. The difference between Brazil and Ireland, however, are the obvious dangers due to the high level of criminality, mainly in big cities. Yet, people still trust and help each other. I like to leave my sincere “thank you” not only to Mrs Ver and her daughter Angelica, but also to her grandson, André who told me about them and asked me to go say “Hi”. Unfortunately I was a bit of in a hurry at the time and had to decline their invitation for coffee, but it was wonderful to have met them.
As a pilgrim, however, I’ve been the receiver of other people’s generosity in other occasions too and every time this has happened it strengthen my belief that most people in the world are good and that the good in the world by far outweigh the bad. Perhaps it is because there is so much good that we have difficulty in eliminating the bad in our societies.
As the batteries of the gimbal were still charging in the handlebar bag I decided to place the camera in the waterproof casing and mount it on the handlebar. That increased the level of shakiness a lot, so in later recordings, when the use of the gimbal was not possible I started to mount the camera on the helmet as I believed the shaking would not bad as bad on my head as it was on the handlebar. The difference was not significant though. I also tried to use the gimbal more on rougher surfaces, so when I was riding on paved roads I’ve often stopped using the gimbal and put the batteries to charge instead.
Leaving the town of São Simão you will walk or ride for about 3 Km on the SP-253 highway. The hard shoulder on this road wasn’t as wide as before São Simão, but the drivers appeared to be respecting a healthy distance between them and my bike. Care is however advised.
After about 3 Km on the SP-253 you turn left crossing over the road to get back to dirt roads again and a considerable amount of sand and dust. By that time the gimbal batteries were fully charged and I was able to mount the camera on the chest mount again.
At some points the dirt road becomes quite narrow and some of these roads had a much higher level of traffic than the previous dirt roads I had to ride on. As cars and trucks passed me they lifted a lot of fine dust which made breathing harder than usual due to my asthma. A lot of coughing at some points on this road (some highlighted on the video). Also pushing the bike was necessary in quite a few portions of this track as the sand was simply too deep to even attempt to ride (no traction at all). In spite of this, there were also some beautiful portions of this track among pine trees and forest which offered some shade and helped protect from the sun a little.
As you approach Santa Rosa de Viterbo you’ll re-join the SP-253 again, which makes it worth noting that for those who don’t want to follow the “official” Caminho way, the journey will be a lot shorter and quicker if you stick to the road. It may be also more dangerous to cycle or walk on the road though, so that will be a decision you’ll often will have to make if you want to comfort of paved roads against the challenges of cycling off-road. As you arrive in the outskirts of Santa Rosa de Viterbo you’ll be happy to know that there is a 1.5 km segregated bike lane alongside the road right into the town which makes cycling a lot safer.
The Malim Hotel is the only place listed in the official accommodation guide. The guide indicates there are two options of accommodation in the hotel: A R$ 60.00 option and a R$ 85.00 option, but I believe the guide was a bit out-of-date, perhaps due to inflation or price rises. It is always a good option to call ahead and ask what the going rate is if you want to avoid any surprises. I paid R$ 75.00 for a small room with a private bathroom, but no air-con or TV. Fancier rooms will cost you about R$ 90.00.
Finding the hotel is easy. You just have to stick to the main street and the hotel will be on the left hand side.
The hotel has a bike rack on the back which is protected, but you need to be able to lock the bike in place as staff will not be looking out for your bike. It felt like a safe place to me, but I locked the bike and removed anything of value from it anyway. On the back there is also a hose and a place for you to wash your bike, if you need to.
After a good shower and some rest I left the hotel on foot and walked for about 10 min to a restaurant called Issagawa Neto & Cia that was recommended by the hotel’s reception. There weren’t many open places to eat at that time and the town is quite small. You’ll have to option of set 3 course meals for as little as R$ 17.50 with a soft drink and the food is tasty and plentiful. You will leave with your bellies full.
Went back to the hotel, browsed the web a little and checked email. The Hotel has free WiFi and the signal was good in the room I was in.
Although there were a few mosquitos in the room I was able to sleep very well. Always good if you can take a can of odourless repellent with you. In some places mosquitos may be an issue especially in hot nights and rural areas. That’s how my second day ended.
If you have any questions, don’t hesitate to comment or send me a message through the contact form. Please subscribe to my Blog and/or to my YouTube channel if you don’t want to miss the next one and help me spread the word by liking and sharing my Facebook Page and Tweeter feed also. Thank you all for your time and “Bom Caminho!”.
Do you like these posts? Why, then, don’t you pay me a coffee to help with the blog hosting cost and as a caffeine incentive to keep me going through the long hours of the night?(Suggested amount: £2.00 or USD $3.00 or 2.50€ or whatever you want to give). You may donate through my Patreon Page or through PayPal directly.
Please rate this post by clicking on the desired star (1 = Awful, 5
= Excellent)
In this video I celebrate the 3 years of EyeCycled.com
The domain was first registered on the 18th of March 2015, but the first blog post didn’t happen until the 4th of April that year. If you look through the blog’s archive you will find earlier blog posts, but that happened because I back dated the publication date to the time in which those things had actually happened and not the date I was publishing the posts.
What led me to create EyeCycled.com was a pilgrimage: The Camino de Santiago de Compostela. To me that was a significant life changing event. It was, at that point the longest bike ride I had done in life. The experience was so profound that I have not stopped ever since.
I am not sure what EyeCycled.com will become in the future. I have not drafted any plans for it, intentionally so. I wish it could become more and it could be something that not only keeps me busy, but sustains me as well. I try, however, to limit my expectations, and let it grow organically. I may not find as much time to write blog posts and edit videos as I would like to, but I’ll do my best at ensuring EyeCycled.com is here to stay.
To those that supported my work I am very thankful.
Also thankful to those I had the pleasure to ride my bicycle with or that I met throughout this time.
Regardless of your beliefs, whether you believe there is a God or not, I wish you all well and that you receive God’s blessings and live a long, prosperous, healthy and very happy life.
Do you like these posts? Why, then, don’t you pay me a coffee to help with the blog hosting cost and as a caffeine incentive to keep me going through the long hours of the night?(Suggested amount: £2.00 or USD $3.00 or 2.50€ or whatever you want to give).
You may donate through my Patreon Page or through PayPal directly.
Please rate this post by clicking on the desired star (1 = Awful, 5
= Excellent)
If this is the first post you read on this series, I recommend you take a look at the introduction post published on the 28th of February 2018. That post explains what the Faith’s Way is, my reasons for doing it and provides information that might be useful to you, if you decide you want to do it too.
In this post I will cover the 1st day of this 12 day, 600 Km, journey between the town of Sertãozinho, were I started my pilgrimage, and the town of Cravinhos, both in the federal state of São Paulo.
As explained in the introduction post, I broke the entire journey into 21 stages, as per the official map of the Caminho. There will be 1 video for each stage of the journey, so the blog post for this day contains two videos. Once covering the journey between Sertãozinho and Dumont and another between Dumont and Cravinhos.
You can download the official map of the Caminho from the website of the Friends of the Caminho Association. From there you can also download a list of credentialed accommodations for your journey. Most places in that list are simple family owned pilgrims’ hostels. Some in very rural locations (farms) others in more urban areas. Some establishments are hotels. Family owned Pilgrims’ hostels along the way have usually a set value that includes the meals as well, typically dinner and breakfast, but all hotels listed there will also offer a reduced pilgrim’s rate provided you present them your pilgrim’s credentials.
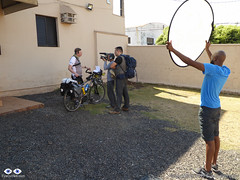
As planned the night before I woke up early and went downstairs to have breakfast with the TV crew of Globo TV. They took a lot of shoots of the crew having breakfast and helped me with some pictures. Before leaving we shoot the interview outside at the hotel’s car park, which, for several reasons, such as external noise and mistakes, required many takes. For example, during the interview I mentioned that the recordings were going to be done in Time-lapse format with a GoPRO 4, and the mere mentioned of the brand invalidated the take (advertising).
From everything that was recorded during the interview in that morning, only a tiny portion was actually aired. In my 3 seconds of fame in national television I appear saying the Caminho was mostly done on dirt tracks, hence the reason it was going to be difficult. At first this sounds kind of obvious, but what was missing there was the fact that we were speaking about my previous pilgrimages to Santiago de Compostela and Rome (Via Francigena) and how most of them were on paved roads, so, since the Faith’s Way is mostly on dirt tracks, I considered this pilgrimage would be a lot harder than the previous ones, even though the distance was shorter. That’s OK though. Glad to have had the exposure I did.
After the interview the drone operator followed me in their car and did some aerial shoots of me as well as instructed me to do certain things, which otherwise wouldn’t be in my nature to do, such as to raise my arms at the statue of our lady by the town’s gate. Due to these activities I actually left Sertãozinho quite late, at around 10:30am. About 1 Km after the small statue of our lady were the last aerial shot was taken by the drone operator (you’ll see it in the video), I crossed underneath the motorway and took a small road out of town which soon turned into a dirt road.
A guy on a motorbike rode parallel to me for a few meters and the biker asked me questions such as were I was going and if I was alone. I was honestly very reluctant to talk to him as many robbers use this method to steal. Thankfully that wasn’t the case and my ride to the small town of Dumont was uneventful, despite the very thin sand and dust on the roads as it hadn’t rained for over 2 months there.
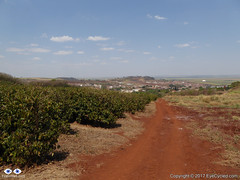
Almost the entire path is done among sugar cane plantations, so the views aren’t that great, but there are places worth a few pictures along this way.
Coffee Plantation on the left and the small town of Dumont in the background
As I arrived in Dumont I stopped for some pictures and to determine were to stamp my pilgrim’s credential. I figured out that the pilgrims’ hostel in the list of accommodations was actually outside of town and moved on.
This hostel is maintained by the Veronezi family in their property outside of town. As I arrived at the Veronezi farm, I turned left and went to the meat shop (Casa Veronezi) were the lose stones at the car park caused me to fall off my bike for the 1st time. It was a really stupid fall due to the fact the front wheel skidded on the lose stones on the ground and my right foot got stuck in the pedal straps. Unfortunately I ended up tearing my Castelli leg warmer in the process, a little piece of cycling wear I was very fond of 🙁
Met with Alvaro at the meat house who directed me to the hostel were I met his mother Ms Helena Veronezi. Alvaro runs the meat house while Mrs Helena takes care of the pilgrims and runs the hostel. Very nice people. Ms Helena stamped my credentials and offered me water and fruit. As I left the Veronezi’s I was told there would be a locked gate by their fish pond, but that I should just ask their daughter to open the gate for me at the bar near the lake, so I did.
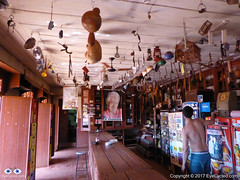
Zé Goleiro Bar
Continuing on dirt tracks among the sugar cane plantations I got to Zé Goleiro bar (José, the Goalkeeper’s bar), an establishment that has been there in the middle of nowhere since 1937 which is now run by Zé Goleiro´s son as Zé Goleiro died in 2009. Very interesting place with a lot of stuff hanging from the ceiling.
The map of the Caminho indicates the distance between Dumont and Cravinhos is of 37 Km, but the map doesn’t indicate the point in Cravinhos where those 37 Km end. The two establishments listed in the accommodation guide for Cravinhos are somewhat on the outskirts of the town, especially the one I decided to spend the night in, the Cravinhos Park Hotel, which out of the two appeared to be the better one and did accept credits cards also (although not highlighted in the guide).
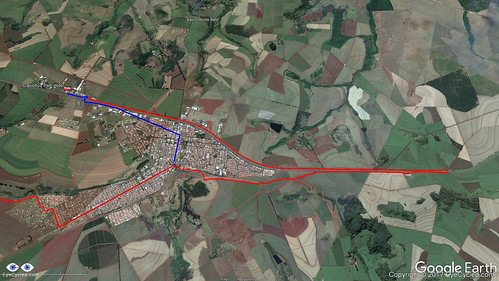
As I got to Cravinhos, I made the mistake of assuming the yellow arrows would lead me to these establishments. Unless I’ve missed an arrow somewhere, they didn’t seem to. I honestly only saw yellow arrows pointing in the direction I went.
Red line is the path I took. Blue line is the path I should have taken.
Unfortunately, as stubborn as I am, I continued blindly following the arrows out of town, only stopping at a petrol station some 7 to 8 Km out of town to ask for directions. To be honest, there wasn’t anyone available to ask for directions outside of town anyway, but I should have turned back earlier.
Once the staff at the petrol station told me how far back I would have to ride to get to the hotel I was faced with the decision of going back or moving forward. I decided to go back because it was already getting dark and according to the map the nearest town was 31 Km away, perhaps a little nearer since I had already done about 7 Km out of town, so I decided to go back. This led me to ride an additional 18.69 Km, in other words, I rode 55.69 Km in total between Dumont and Cravinhos that day. So take notice of that, if you plan to start your pilgrimage from Sertãozinho as I did.
I have arrived at the hotel in the dark of night, which wasn’t cool, but it all belongs to the adventure. In a pilgrimage you should always expect the unexpected.
If you have any questions, don’t hesitate to comment or send me a message through the contact form. Please subscribe to my Blog and/or to my YouTube channel if you don’t want to miss the next one and help me spread the word by liking and sharing my Facebook Page and Tweeter feed also.
Thank you all for your time and “Bom Caminho!”.
Do you like these posts? Why, then, don’t you pay me a coffee to help with the blog hosting cost and as a caffeine incentive to keep me going through the long hours of the night?(Suggested amount: £2.00 or USD $3.00 or 2.50€ or whatever you want to give).
You may donate through my Patreon Page or through PayPal directly.
Please rate this post by clicking on the desired star (1 = Awful, 5
= Excellent)


 As this post comes just two weeks from Christmas, I think it is appropriate to start by wishing you all a very Merry Christmas and a Happy 2019! I wish you a happy, prosperous, healthy and very happy new year with a lot of cycling activities, be them for pleasure, commute, travel or sport.


You must be logged in to post a comment.