Calling all pilgrims out there… I’ve created two new collections based on hand-drawn images:
The Scallop Shell collection: The scallop shell, is linked to the Camino de Santiago and Saint James, but it became now a universal pilgrimage symbol, instantly identifying pilgrims on any route.
EyeCycled Store Caminho da Fé collection by EyeCycled
The “Caminho da Fé” (Faith’s Way) collection: The “Caminho da Fé” or Faith’s Way is Brazil’s best known pilgrimage route, so I don’t expect that a lot of non-Brazilians would be interested, yet the number of foreign pilgrims walking or cycling this route to the Basilica of Our Lady Aparecida, the 2nd largest in thr world, has been increasing year over year.
EyeCycled Store Caminho da Fé collection by EyeCycled
The collections include items like t-shirts, pullovers, a sticker, a mug and a few others.
They don’t come with Chinese merch prices because they are sold and managed by Spring, an American business who prints them to order and takes care of the entire end-to-end transactions. I only get a small commission from every sale.
If you like them and would like to proudly display the symbol of your pilgrimage, you’d be helping me maintain my Website/Blog running.
This is the 12th and last post on a series about the Via Beata pilgrimage. In this post we explore the tranquil countryside surrounding St Davids, reflect on the final leg of the adventure, and celebrate the completion of the Via Beata series. It also dives into the story of St Davids: The man, the City and the awe-inspiring Cathedral that marks the end of our journey.
This post has been written in English only. For other languages, please use the Google Translation drop-down option on the right menu (desktop version).
The 28 min long video below was created as a bonus to the Via Beata series to show the beauty of St Davids and its surroundings. The images and videos that were used in the video were taken/recorded between the 4th and the 7th of August 2021.
I created 3 Google Maps for the Via Beata series. The 1st one was introduced to you on the Via Beata introduction post and I added it below again for your convenience. For more details please re-visit the introduction post where you will also be able to download the GPX file for the entire route.
The other two entitled “St Davids Cathedral to Whitesands Beach” and “Circular walk from St Davids Cathedral to the Ruins of St Non” are our 1st and 2n day walks respectively.
As the items in the map don’t appear to be clear, I’ve add a little picture below that might help.
3. Walk from St Davids Cathedral to Whitesands Beach
For those who want to walk or ride the Via Beata or a similar route from East to West as a Coast to Coast adventure, this map shows the small 2.88 Km or 1.79 miles route from the cathedral to Whitesands beach, the largest and best known beach around St Davids (but not the only one). This would also be an amazing place to end your journey, or if you prefer to start it there and do it in the other direction from West to East. We are aware of a couple of cyclists who choose to do it this way.
In the interest of full disclosure we walked to Whitesands on this day from our hotel, but I’ve created a map as if we had walked from the cathedral, which, on our walk back we did. This is an easy walk with barely any elevation at all, but when you walk back you’ll have to go up a little hill from sea level to reach St Davids again. Keep in mind that on a nice day like this day these narrow roads can be quite busy given Whitesands beach is quite popular among visitors as you’ll see in the pictures and video.
I recommend you watch the video above for a detailed description of the walk.
On this day we actually walked a little further to a beach called Porthmelgan Beach. It was in Porthmelgan Beach that Katy jumped on the water as she was very keen to swim on the north sea in the East and on the Irish Sea in the west.
Simply Instructions for the map below.
You can see some of the pictures of this walk through the Map itself, but for convenience I’ve added below a gallery with all pictures Katy and I took of this walk.
Click on the thumbnail to expand picture and read about that moment. The navigation numbers below each gallery refer to the number of viewable pages in the gallery. Where possible I provided some context in every picture taken. These pictures are not to be sold or used without prior consent.
If you read to this point, I’d like to invite you to donate us a coffee for this work. We don’t sell the information, nor get any money through monetising or advertisement at the moment, so donations are this blog’s only source of income. If enough money is obtained through your generous donations that will enable us to pay for the renewal of EyeCycled.com, the hosting of the information and as a added motivation for us to keep doing this. We are very thankful for anything you can spare.
4. Circular walk from St Davids Cathedral to the Ruins of St Non
The walk on the 2nd day was a little more demanding and long. It was a total distance of 13.7 Km or 8.51 miles mostly on the coastal path. The main intention of this walk was the visit the ruins of St Non’s Chapel, which is considered to be the birthplace of St David the patron saint of Wales. St Non (or Nonita) was his mother. Tradition holds that Nonita was raped by one of the princes of the country and that the product of that rape was David. It’s said that after conceiving she remained celibate and lived on bread and water alone. When a preacher found himself unable to preach in the presence of her unborn child, this was taken as a sign that the child would himself be a great preacher. I’ll leave a link to the St Nons Wikipedia page in the description below if you’re interesting in knowing more.
This time we did start and end the walk at the cathedral. I recommend you watch the video above for a detailed description of the walk.
Before you reached the ruins you will walk passed the Holy Well of St Non. The well is said to have sprung up during a thunderstorm when St Davids was born about 500 A.D. The water of holy wells is often thought to have healing qualities, through the numinous presence of its guardian spirit or Christian saint. I don’t think you can purchase the healing by throwing coins in the well though, but these would be pennies well spent if it works for you.
The ruin of the Chapel of St Non are just a few steps further down the track and it is held by tradition to mark the birthplace of St David, although the ruin cannot be accurately dated. The ruin is thought to be on the site of St Non’s house and to be one of the oldest Christian buildings in Wales. In medieval times the chapel was one of the main sites visited by Christian pilgrims. Following the Protestant Reformation, pilgrimages stopped and the chapel was converted into a house before being used as a garden.
After the visit to the ruins our walk continued on the coastal path until we reached the RNLI St Davids Lifeboat Station where we thought we had walked enough and decided to walk back into town.
Along the walked we passed Porthclais Harbour with its many private boats anchored and the ruins of the old Limekilns from which between 1650 and 1900 Lime was taken by horse and cart for spreading on the fields and a little was used for mortar.
This walk was on the 5th of August 2021. Since I was never a resident of Wales I can’t really tell you if the weather you see in the pictures and video is normal for this time of the year and if the vegetation shown is always present at this time, but I can tell you and that the colours are amazing, although without a doubt the pictures don’t do it justice.
Simply Instructions for the map below.
I hope these 2 walks were interesting enough to instil in you a desire to visit St Davids and do the same yourself.
You can see some of the pictures of this walk through the Map itself, but for convenience I’ve added below a gallery with all pictures Katy and I took of this walk.
Click on the thumbnail to expand picture and read about that moment. The navigation numbers below each gallery refer to the number of viewable pages in the gallery. Where possible I provided some context in every picture taken. These pictures are not to be sold or used without prior consent.
The series of Blog posts and videos were the result of hundreds of hours of hard work. We didn’t do this with the objective of making any money out of it, but if they are useful to you and you’d like to recognise the value of this work, please consider sponsoring EyeCycled.com or providing a one-off donation to keep the blog going.
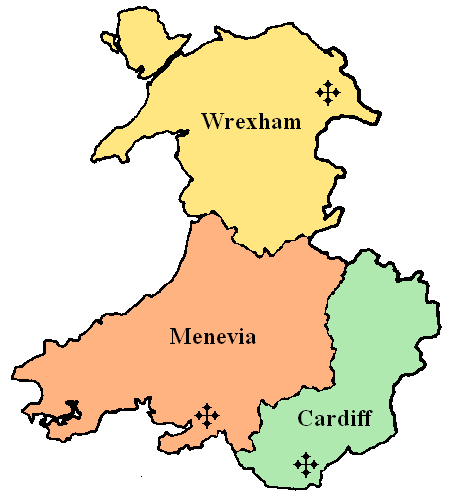
The diocese of Menevia was a Latin Church diocese of the Catholic Church in Wales.
Despite of all the coastal beauty above, St Davids Cathedral is quite possibly the biggest attraction of the city of St Davids, which is said to be the smallest city in the UK. I don’t think, however, it is possible to speak about the cathedral without writing something about the man and the city 1st. David was a native of Wales and a Welsh Christian who served as the Bishop of Menevia (which was name given to this region by the Romans). Menevia was a Diocese that covered an area of 9,716 km2 in the west of modern day Wales.
His birth date is uncertain, but believed to be between 462 and 512. He is believed to be the son of Non and the grandson of Ceredig ap Cunedda, king of Ceredigion. He is also believed to have died in 601 by more recent estimates.
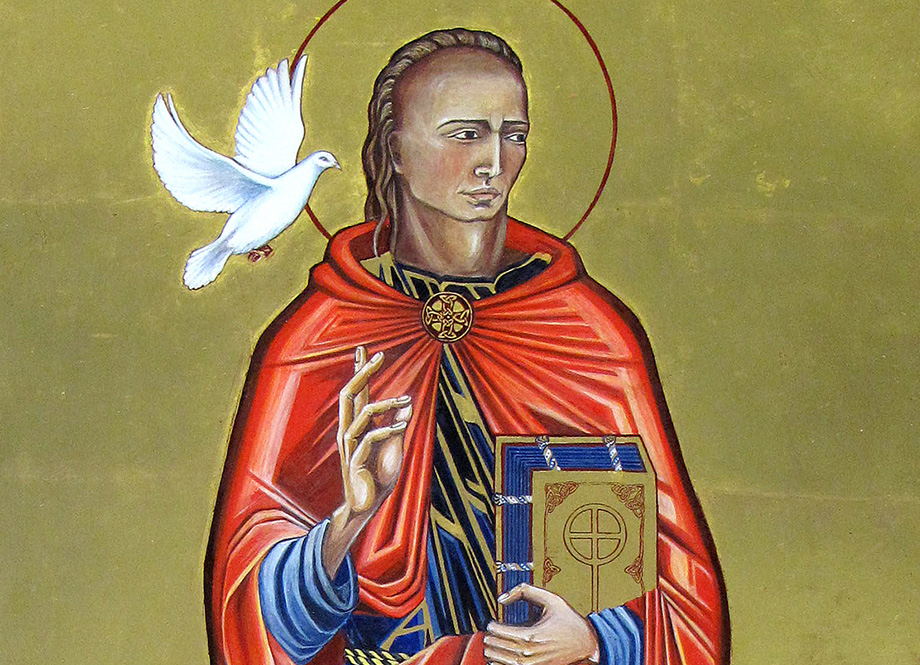
Image of St David
Much of what is known about St David is from a biography by Rhygyfarch written in 1090, but modern historians are sceptical of some of its claims. He became reno
wned as a teacher and preacher, founding monastic settlements and churches in Wales, one of which was a monastery which later became the city of St Davids and where the current cathedral stands today.
His best-known miracle is said to have taken place when he was preaching in the middle of a large crowd and the ground on which he stood is reputed to have risen up to form a small hill. A white dove, which became his emblem, was seen settling on his shoulder. This is ironically referred as the most superfluous miracle as Wales is already a very hilly place.
David was buried at St David’s Cathedral where his shrine became a popular place of pilgrimage throughout the Middle Ages.
The monastic community which became St Davids and where the cathedral stands today was attacked many times by raiders, including the Vikings so the area saw the erection and destruction of many buildings over the centuries. It wasn’t until In 1115, with the area under the Norman control of King Henry I of England, that Bishop Bernard of St Davids started the construction of a new cathedral. In 1123, Pope Calixtus II made St Davids a centre of pilgrimage and decreed that “Two pilgrimages to St Davids is equal to one to Rome, and three pilgrimages to St Davids is equal to one to Jerusalem”. I am not sure if this decree still stands today, but in 2016 I did my own 2,000 Km pilgrimage from Canterbury to Rome and I can tell you from my own experience that these are quite different.
The present day cathedral was begun in 1181 and completed not long after. Problems beset the new building and in 1220 the new tower collapsed. In 1247 or 48 the cathedral also suffered damage due to an earthquake.
Many unfamiliar with the history of the United Kingdom may not know that there was a period in time in which the monarchy was destitute of power and the country was ran as a republic called the Commonwealth of England under Oliver Cromwell which greatly affected many cathedrals and churches, and this was particularly felt in St Davids. The cathedral was all but destroyed by Cromwell’s forces and the lead was stripped from the Bishops Palace roof of which today only the ruins remain just outside the Cathedral’s grounds.
There is a pronounced slope to the floor of the cathedral, amounting to a height difference of nearly four metres between the east and west ends, and the building is still shifting minutely.
In more recent decades the cathedral underwent a number of restoration and reconstruction projects, which included creating a visitor centre within the bell tower, enlarging the peal of bells from eight to ten and the completion of the cathedral’s cloisters to house the cathedral choir, vestries, an education suite, rooms for parish use and a refectory as a reminder of the monastic beginnings.
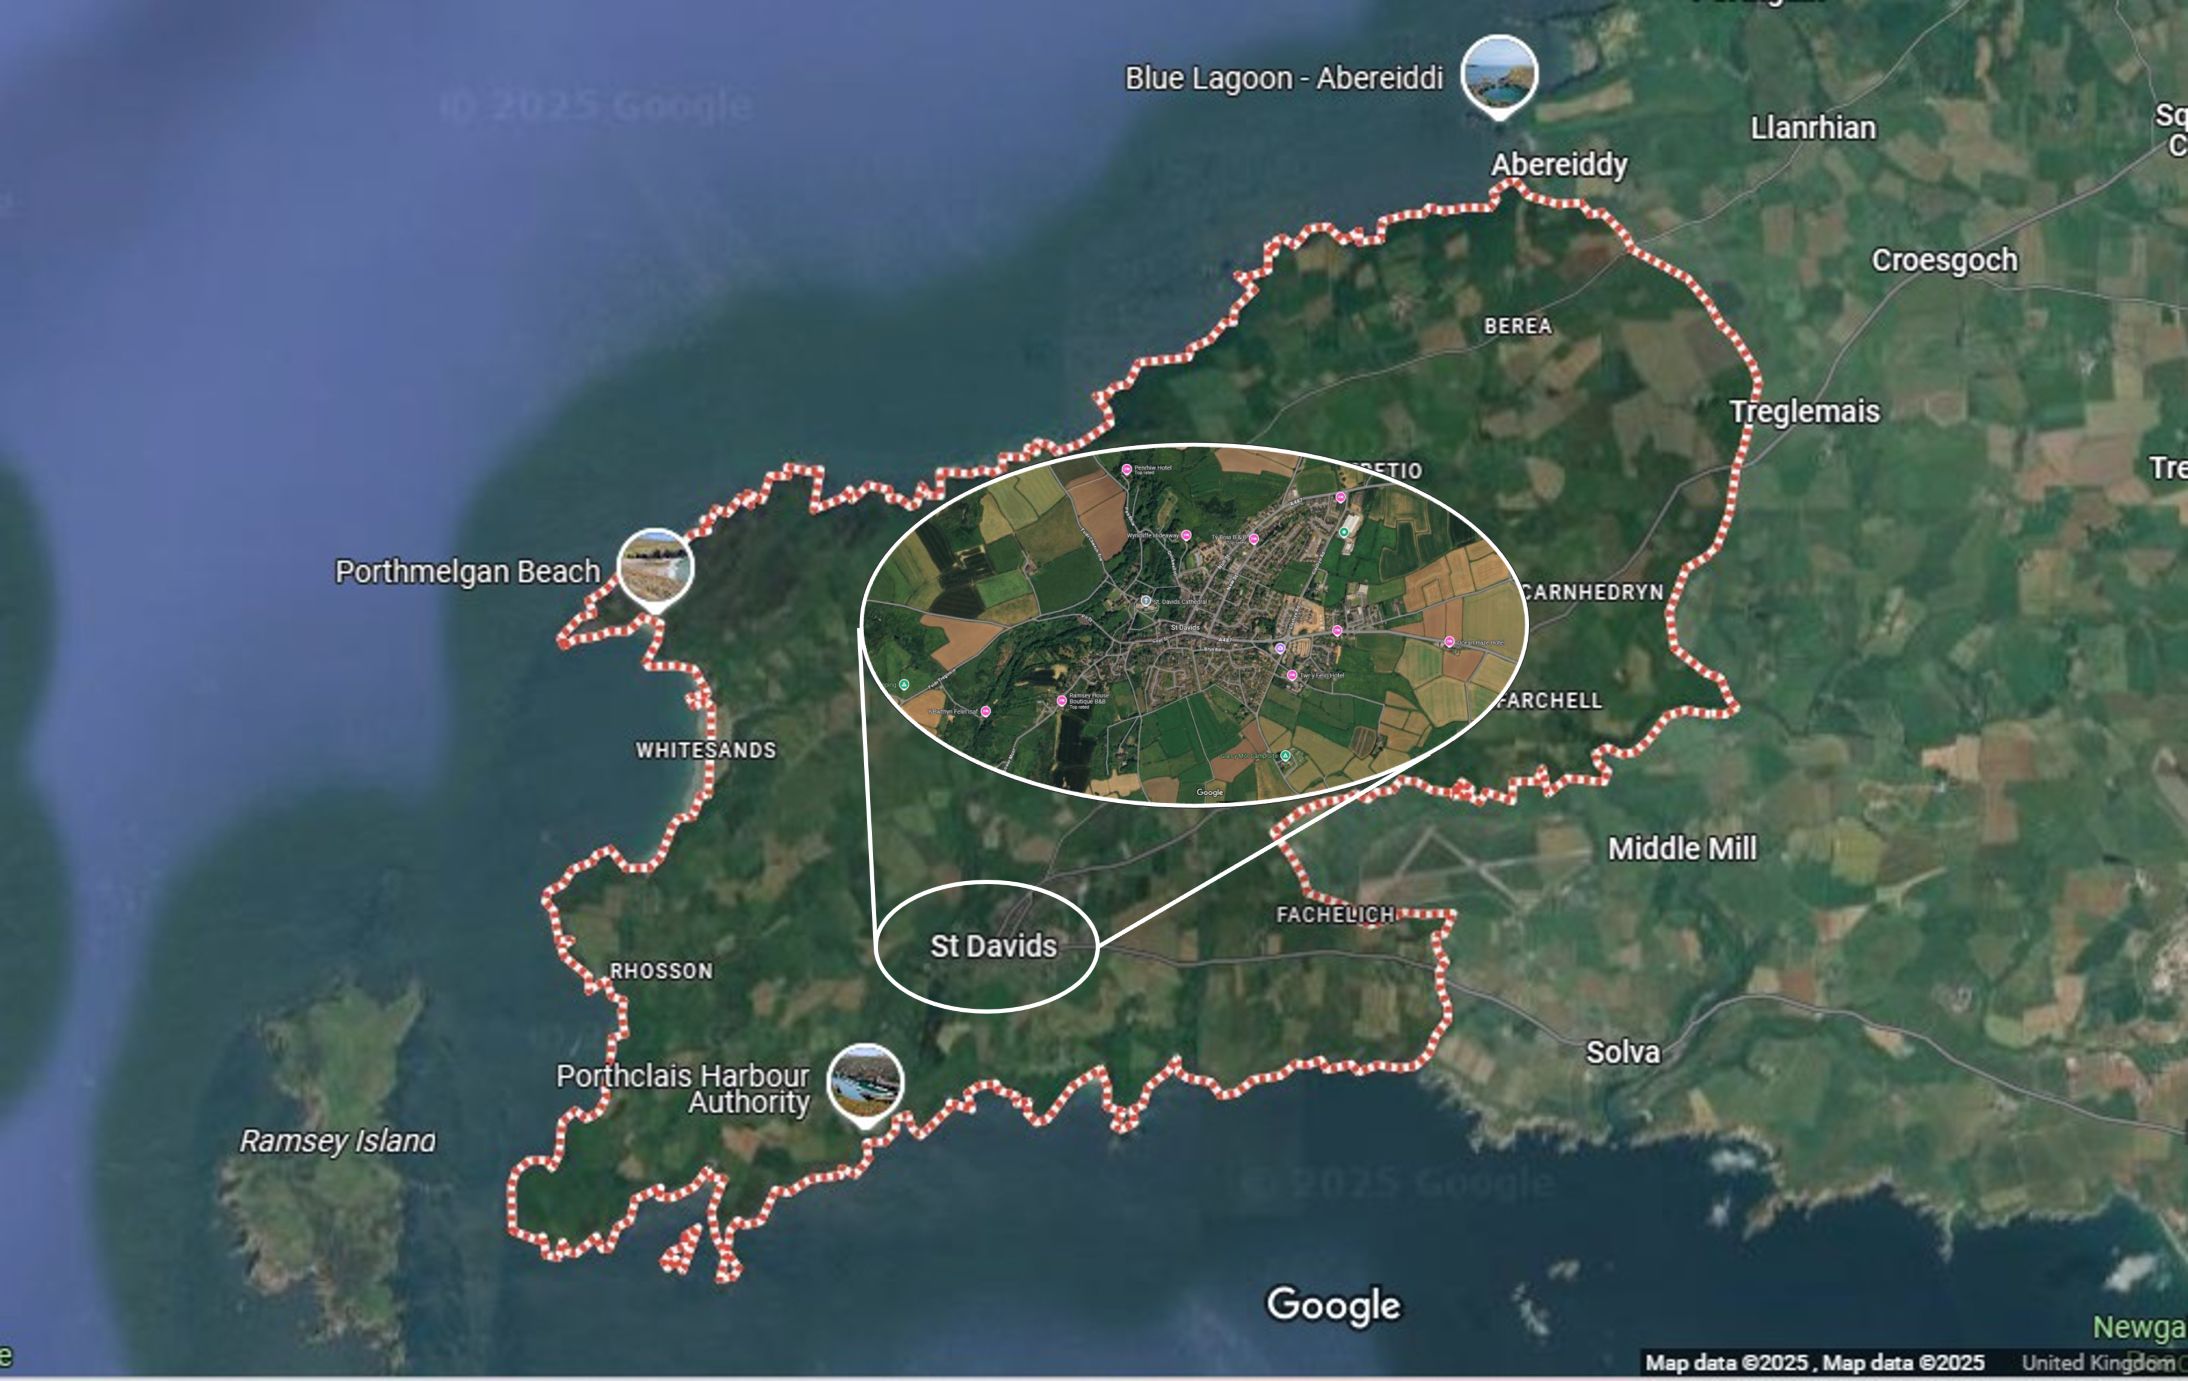
St Davids is considered to be the United Kingdom’s smallest city by population with 1,751 residents in 2021 in the city and urban areas. St Davids was given city status in the 12th century, but lost this status in 1886. In 1994 the city status was restored at the request of the late Queen Elizabeth II.
St Davids Borders and City
You can learn a lot more about St Davids: The man, the cathedral and the city by visiting some of the links I’ll leave in the resources section below.
The gallery below contains every picture Katy and I took of the cathedral (mostly) and the city.
Click on the thumbnail to expand picture and read about that moment. The navigation numbers below each gallery refer to the number of viewable pages in the gallery. Where possible I provided some context in every picture taken. These pictures are not to be sold or used without prior consent.
The easiest way is to use the form below and send us a message, but you can also leave comments both here as well as in YouTube or our social media accounts. Keep in mind we do this as a hobby, not as a job, so our responses might be delayed. We aim to provide a response within a week, but it can happen that we are travelling or otherwise unavailable for longer than that. If you didn’t receive a response within 2 weeks, but send us a follow-up message.
Do you like these posts? Why, then, don’t you pay me a coffee to help with the blog hosting cost and as a caffeine incentive to keep me going through the long hours of the night?(Suggested amount: £2.00 or USD $3.00 or 2.50€ or whatever you want to give).
You may donate through my Patreon Page or through PayPal directly.
Please rate this post by clicking on the desired star (1 = Awful, 5
= Excellent)
This is the 11th post on a series about the Via Beata pilgrimage by bike concluded on the 3rd of August 2021.
This post has been written in English only. For other languages, please use the Google Translation drop-down option on the right menu (desktop version).
The map below shows a “cleaned-up” version of our route between Lowestoft and East Harling on this day. By “cleaned-up” I mean, where I considered necessary, I edited the “real-life” track to exclude some of the mistakes or issues we encountered along the way, such as navigation errors, closed gates or other impassable obstacles (with a bike), etc. The objective being to prevent you from making these same mistakes or benefiting from the experience we acquired while riding on this route. Keep in mind everything changes… life is dynamic, roads and paths are closed for maintenance or become impassable for a number of reasons, access to certain locations may become restricted, etc. Use it at your own risk.
In addition to the raw GPX route shown in the map above, which you may download through the link below the map, I have also created a Google Maps version of the entire route in the EyeCycled Google Account.
To visualise the Google Map of the Via Beata route and main Waypoints please click on the link below (opens in a new tab).
These are the pictures we took on this day of the journey. Where possible we provided some context in every picture taken. These pictures are not to be sold or used without prior consent.
Click on the thumbnail to expand picture and read about that moment. The navigation numbers below each gallery refer to the number of viewable pages in the gallery.
5. Links to useful online resources for this day of the journey.
We are giving you our experiences here for free, but it is up to you if you want to replicate them or not. Each journey is different and you may want to plan a custom one for you. Hopefully some of your journey may match ours, but for any portions that don’t these are useful online resources for this day.
The first castle on this site is thought to have been built by Gerald of Windsor between 1110 and 1115, and it changed hands several times over the following century between English and Welsh forces.
The stone construction of what is left today began in 1223 under William Marshal, the 2nd Earl of Pembroke. It was abandoned by 1400 and left to ruin.
The Ffald y Brenin religious retreat, is a Christian retreat centre & house of prayer for Wales and all nations. Hundreds of visitors come to visit or stay every year. They have simple accommodation available but you'll need to pre-book and because it is a religious retreat you'll be expected to adhere to their daily routine of peace and quiet and perhaps also participate in their daily prayers. Keep this in mind if you are not a religious person.
This was the last way-station of our pilgrimage. It is located at the Ffald y Brenin religious retreat and is a simple cross at the top of the hill and one interesting aspect of it for those who have done the French Camino to Santiago de Compostela is that is reminiscent of the Iron Cross between Foncebadón and Manjarín in Spain.
St Davids cathedral was the destination of our pilgrimage. There is no rule that says it cannot be the start, but we believe most pilgrims do the Via Beata from East to West.
The easiest way is to use the form below and send us a message, but you can also leave comments both here as well as in YouTube or our social media accounts. Keep in mind we do this as a hobby, not as a job, so our responses might be delayed. We aim to provide a response within a week, but it can happen that we are travelling or otherwise unavailable for longer than that. If you didn’t receive a response within 2 weeks, but send us a follow-up message.
Do you like these posts? Why, then, don’t you pay me a coffee to help with the blog hosting cost and as a caffeine incentive to keep me going through the long hours of the night?(Suggested amount: £2.00 or USD $3.00 or 2.50€ or whatever you want to give).
You may donate through my Patreon Page or through PayPal directly.
Please rate this post by clicking on the desired star (1 = Awful, 5
= Excellent)
This is the 10th post on a series about the Via Beata pilgrimage by bike concluded on the 3rd of August 2021.
This post has been written in English only. For other languages, please use the Google Translation drop-down option on the right menu (desktop version).
The map below shows a “cleaned-up” version of our route between Lowestoft and East Harling on this day. By “cleaned-up” I mean, where I considered necessary, I edited the “real-life” track to exclude some of the mistakes or issues we encountered along the way, such as navigation errors, closed gates or other impassable obstacles (with a bike), etc. The objective being to prevent you from making these same mistakes or benefiting from the experience we acquired while riding on this route. Keep in mind everything changes… life is dynamic, roads and paths are closed for maintenance or become impassable for a number of reasons, access to certain locations may become restricted, etc. Use it at your own risk.
In addition to the raw GPX route shown in the map above, which you may download through the link below the map, I have also created a Google Maps version of the entire route in the EyeCycled Google Account.
To visualise the Google Map of the Via Beata route and main Waypoints please click on the link below (opens in a new tab).
These are the pictures we took on this day of the journey. Where possible we provided some context in every picture taken. These pictures are not to be sold or used without prior consent.
Click on the thumbnail to expand picture and read about that moment. The navigation numbers below each gallery refer to the number of viewable pages in the gallery.
5. Links to useful online resources for this day of the journey.
We are giving you our experiences here for free, but it is up to you if you want to replicate them or not. Each journey is different and you may want to plan a custom one for you. Hopefully some of your journey may match ours, but for any portions that don’t these are useful online resources for this day.
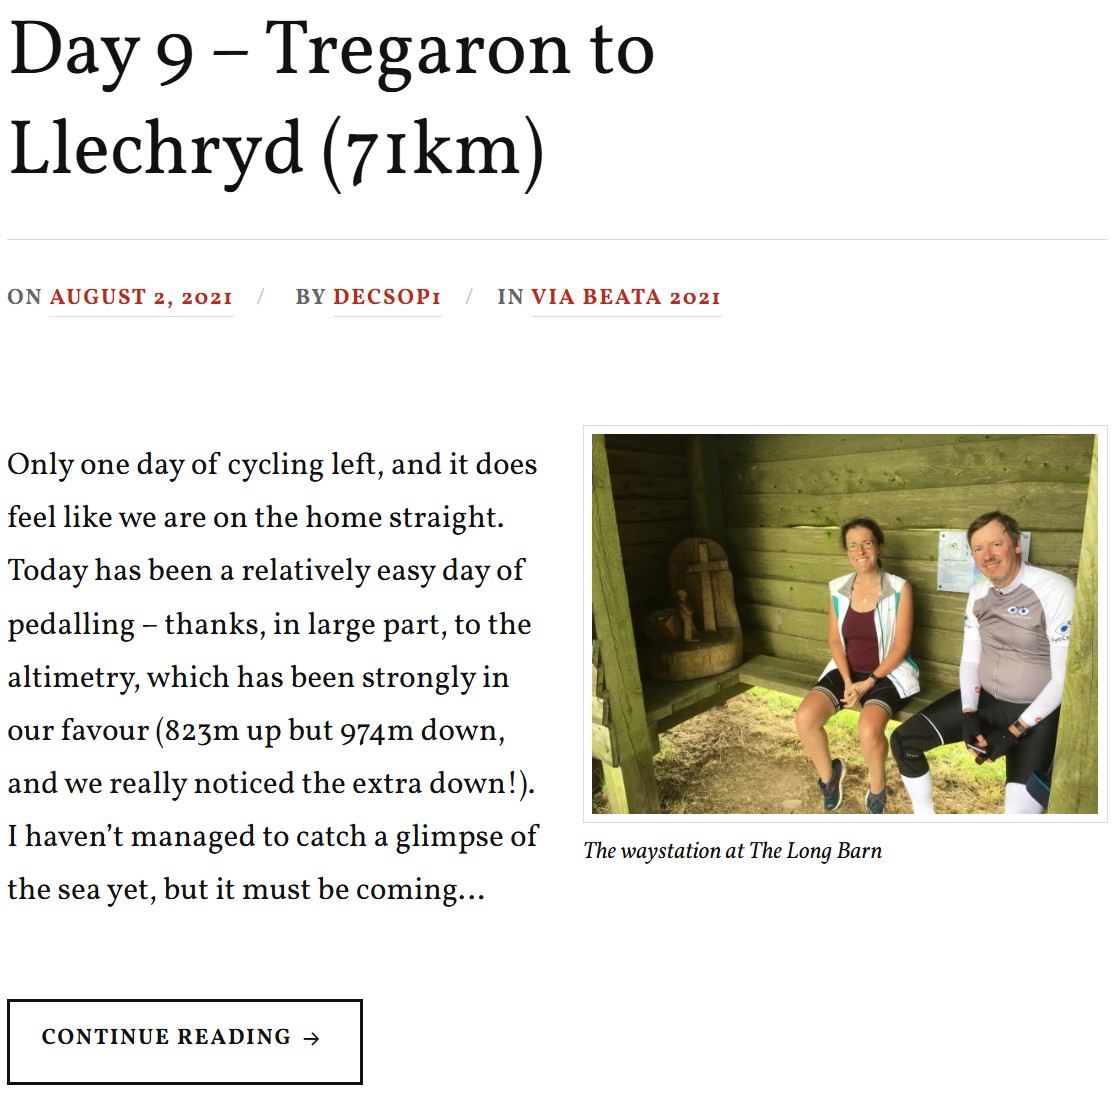
Located at the Long Barn Hostel, this was the penultimate waystation of our pilgrimage journey. It's a small wooden sculpture with the engraved phrase "I will remove from them their heart of stone and give them a heart of flesh", which is a bible passage from Ezekiel 36:26.
The long barn is a private establishment belonging to Eva and Tom. Eva gave us coffee and an excellent brownie, and we chatted for quite a while. She showed us around the accommodation and, of course, the waystation. We very much recommend the Long Barn to you, whether you're a pilgrim or just a tourist. They can accommodate small groups as well as large groups of up to 30 people on shared accommodation and bunk beds.
We actually did not visit this way-station. The tracklog of our route indicates we must have passed right by it, but we've probably forgotten to look for it.
The easiest way is to use the form below and send us a message, but you can also leave comments both here as well as in YouTube or our social media accounts. Keep in mind we do this as a hobby, not as a job, so our responses might be delayed. We aim to provide a response within a week, but it can happen that we are travelling or otherwise unavailable for longer than that. If you didn’t receive a response within 2 weeks, but send us a follow-up message.
Do you like these posts? Why, then, don’t you pay me a coffee to help with the blog hosting cost and as a caffeine incentive to keep me going through the long hours of the night?(Suggested amount: £2.00 or USD $3.00 or 2.50€ or whatever you want to give).
You may donate through my Patreon Page or through PayPal directly.
Please rate this post by clicking on the desired star (1 = Awful, 5
= Excellent)
This is the 9th post on a series about the Via Beata pilgrimage by bike concluded on the 3rd of August 2021.
This post has been written in English only. For other languages, please use the Google Translation drop-down option on the right menu (desktop version).
The map below shows a “cleaned-up” version of our route between Lowestoft and East Harling on this day. By “cleaned-up” I mean, where I considered necessary, I edited the “real-life” track to exclude some of the mistakes or issues we encountered along the way, such as navigation errors, closed gates or other impassable obstacles (with a bike), etc. The objective being to prevent you from making these same mistakes or benefiting from the experience we acquired while riding on this route. Keep in mind everything changes… life is dynamic, roads and paths are closed for maintenance or become impassable for a number of reasons, access to certain locations may become restricted, etc. Use it at your own risk.
In addition to the raw GPX route shown in the map above, which you may download through the link below the map, I have also created a Google Maps version of the entire route in the EyeCycled Google Account.
To visualise the Google Map of the Via Beata route and main Waypoints please click on the link below (opens in a new tab).
These are the pictures we took on this day of the journey. Where possible we provided some context in every picture taken. These pictures are not to be sold or used without prior consent.
Click on the thumbnail to expand picture and read about that moment. The navigation numbers below each gallery refer to the number of viewable pages in the gallery.
5. Links to useful online resources for this day of the journey.
We are giving you our experiences here for free, but it is up to you if you want to replicate them or not. Each journey is different and you may want to plan a custom one for you. Hopefully some of your journey may match ours, but for any portions that don’t these are useful online resources for this day.
Sustrans is the custodian of the National Cycle Network – the UK-wide network of over 12,000 miles of signed paths and routes for walking, wheeling, cycling and exploring outdoors.
The UK's National Cycle Network, or NCN for short, began in 1977 when volunteers transformed a disused railway line into the Bristol and Bath bike path. This led to the creation of SUSTRANS, an acronym for Sustainable Transport, in 1983 and the development of the NCN between 1995 and 2000. By 2005 it had already reached 10,000 miles of sign-posted routes throughout the UK.
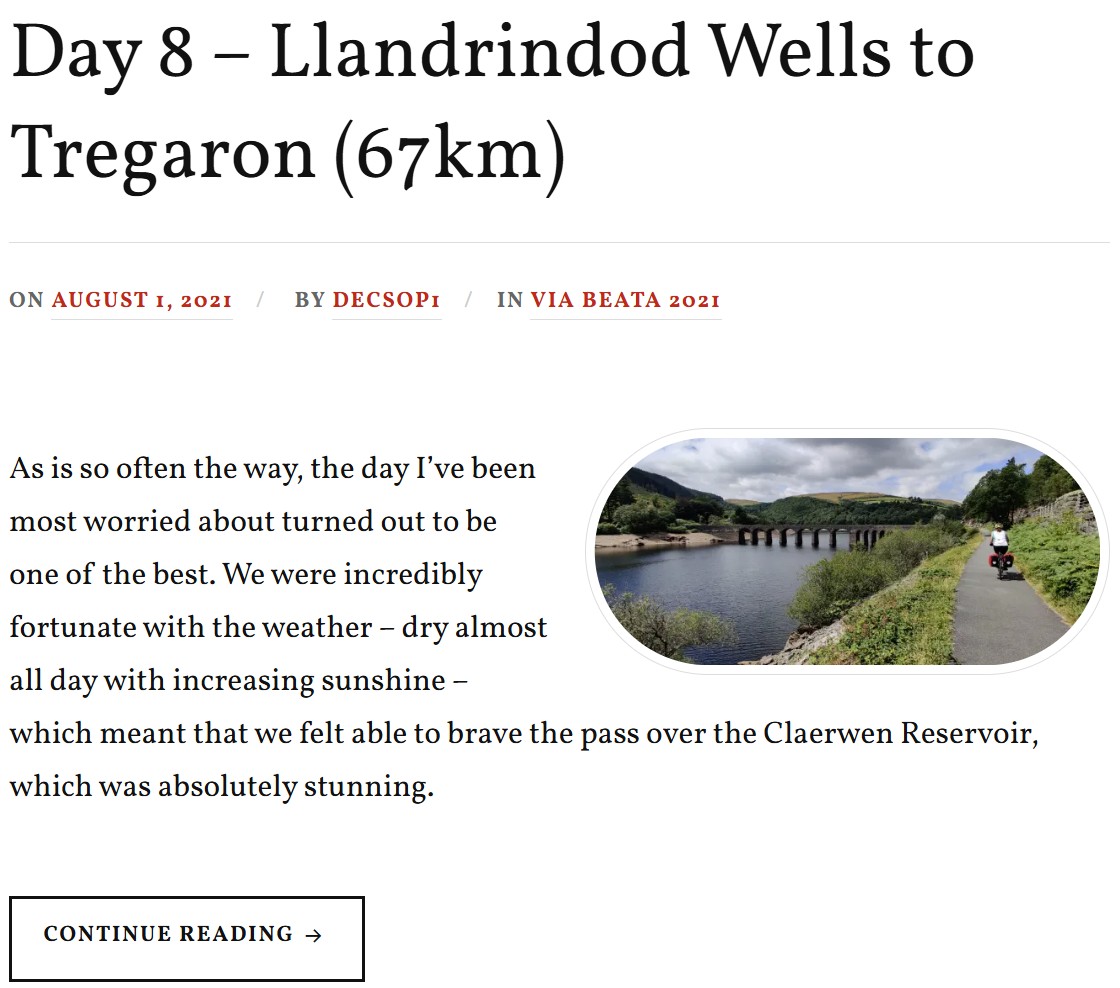
The Claerwen reservoir formed by the Claerwen dam mainly built to supply fresh water to the city of Birmingham, the UK's 2nd largest city. The dam was finished in 1952 and was given a late Victorian effect so that it blended in with the earlier dams in the valley. Officially opened by Queen Elizabeth II in 1952, it was one of her first royal engagements as monarch.
Strata Florida is Latin for 'Vale of Flowers' and the Abbey received this name from the white-robed Cistercian monks that established themselves on the lush meadows beside the banks of the river Teifi in 1201.
The easiest way is to use the form below and send us a message, but you can also leave comments both here as well as in YouTube or our social media accounts. Keep in mind we do this as a hobby, not as a job, so our responses might be delayed. We aim to provide a response within a week, but it can happen that we are travelling or otherwise unavailable for longer than that. If you didn’t receive a response within 2 weeks, but send us a follow-up message.
Do you like these posts? Why, then, don’t you pay me a coffee to help with the blog hosting cost and as a caffeine incentive to keep me going through the long hours of the night?(Suggested amount: £2.00 or USD $3.00 or 2.50€ or whatever you want to give).
You may donate through my Patreon Page or through PayPal directly.
Please rate this post by clicking on the desired star (1 = Awful, 5
= Excellent)
This is the 8th post on a series about the Via Beata pilgrimage by bike concluded on the 3rd of August 2021.
This post has been written in English only. For other languages, please use the Google Translation drop-down option on the right menu (desktop version).
The map below shows a “cleaned-up” version of our route between Lowestoft and East Harling on this day. By “cleaned-up” I mean, where I considered necessary, I edited the “real-life” track to exclude some of the mistakes or issues we encountered along the way, such as navigation errors, closed gates or other impassable obstacles (with a bike), etc. The objective being to prevent you from making these same mistakes or benefiting from the experience we acquired while riding on this route. Keep in mind everything changes… life is dynamic, roads and paths are closed for maintenance or become impassable for a number of reasons, access to certain locations may become restricted, etc. Use it at your own risk.
In addition to the raw GPX route shown in the map above, which you may download through the link below the map, I have also created a Google Maps version of the entire route in the EyeCycled Google Account.
To visualise the Google Map of the Via Beata route and main Waypoints please click on the link below (opens in a new tab).
These are the pictures we took on this day of the journey. Where possible we provided some context in every picture taken. These pictures are not to be sold or used without prior consent.
Click on the thumbnail to expand picture and read about that moment. The navigation numbers below each gallery refer to the number of viewable pages in the gallery.
5. Links to useful online resources for this day of the journey.
We are giving you our experiences here for free, but it is up to you if you want to replicate them or not. Each journey is different and you may want to plan a custom one for you. Hopefully some of your journey may match ours, but for any portions that don’t these are useful online resources for this day.
The easiest way is to use the form below and send us a message, but you can also leave comments both here as well as in YouTube or our social media accounts. Keep in mind we do this as a hobby, not as a job, so our responses might be delayed. We aim to provide a response within a week, but it can happen that we are travelling or otherwise unavailable for longer than that. If you didn’t receive a response within 2 weeks, but send us a follow-up message.
Do you like these posts? Why, then, don’t you pay me a coffee to help with the blog hosting cost and as a caffeine incentive to keep me going through the long hours of the night?(Suggested amount: £2.00 or USD $3.00 or 2.50€ or whatever you want to give).
You may donate through my Patreon Page or through PayPal directly.
Please rate this post by clicking on the desired star (1 = Awful, 5
= Excellent)
This is the 7th post on a series about the Via Beata pilgrimage by bike concluded on the 3rd of August 2021.
This post has been written in English only. For other languages, please use the Google Translation drop-down option on the right menu (desktop version).
The map below shows a “cleaned-up” version of our route between Lowestoft and East Harling on this day. By “cleaned-up” I mean, where I considered necessary, I edited the “real-life” track to exclude some of the mistakes or issues we encountered along the way, such as navigation errors, closed gates or other impassable obstacles (with a bike), etc. The objective being to prevent you from making these same mistakes or benefiting from the experience we acquired while riding on this route. Keep in mind everything changes… life is dynamic, roads and paths are closed for maintenance or become impassable for a number of reasons, access to certain locations may become restricted, etc. Use it at your own risk.
In addition to the raw GPX route shown in the map above, which you may download through the link below the map, I have also created a Google Maps version of the entire route in the EyeCycled Google Account.
To visualise the Google Map of the Via Beata route and main Waypoints please click on the link below (opens in a new tab).
These are the pictures we took on this day of the journey. Where possible we provided some context in every picture taken. These pictures are not to be sold or used without prior consent.
Click on the thumbnail to expand picture and read about that moment. The navigation numbers below each gallery refer to the number of viewable pages in the gallery.
5. Links to useful online resources for this day of the journey.
We are giving you our experiences here for free, but it is up to you if you want to replicate them or not. Each journey is different and you may want to plan a custom one for you. Hopefully some of your journey may match ours, but for any portions that don’t these are useful online resources for this day.
Hereford Cathedral is a historic Church of England cathedral. It dates back to the 8th century, with the current building begun in 1079. The cathedral features Norman and Gothic architecture and houses the largest library of chained books in the world. Its most famous treasure is the Mappa Mundi, a medieval map of the world created around 13 hundred. The cathedral is dedicated to St. Mary the Virgin and St. Ethelbert the King.
Hereford is a cathedral city in Herefordshire. It's located on the River Wye and has a population of 53,112 as of the 2021 Census. The city has a rich history, with notable landmarks like the Cathedral and the Old House. Hereford was once the site of a castle which rivalled that of Windsor in size and scale. The castle was used as a base for repelling Welsh attacks and was a secure stronghold for King Henry IV when on campaign in the Welsh Marches. The castle was dismantled in the 18th century and landscaped into an area called Castle Green. The city also hosts various cultural events and has a strong educational presence with several colleges and schools.
Hotel, Campground and Event space in the beautiful Wye Valley. This is the Hotel we stayed at the end of this day's journey. We enjoyed our stay here and have no issues recommending it to you.
The easiest way is to use the form below and send us a message, but you can also leave comments both here as well as in YouTube or our social media accounts. Keep in mind we do this as a hobby, not as a job, so our responses might be delayed. We aim to provide a response within a week, but it can happen that we are travelling or otherwise unavailable for longer than that. If you didn’t receive a response within 2 weeks, but send us a follow-up message.
Do you like these posts? Why, then, don’t you pay me a coffee to help with the blog hosting cost and as a caffeine incentive to keep me going through the long hours of the night?(Suggested amount: £2.00 or USD $3.00 or 2.50€ or whatever you want to give).
You may donate through my Patreon Page or through PayPal directly.
Please rate this post by clicking on the desired star (1 = Awful, 5
= Excellent)
This is the 6th post on a series about the Via Beata pilgrimage by bike concluded on the 3rd of August 2021.
This post has been written in English only. For other languages, please use the Google Translation drop-down option on the right menu (desktop version).
The map below shows a “cleaned-up” version of our route between Lowestoft and East Harling on this day. By “cleaned-up” I mean, where I considered necessary, I edited the “real-life” track to exclude some of the mistakes or issues we encountered along the way, such as navigation errors, closed gates or other impassable obstacles (with a bike), etc. The objective being to prevent you from making these same mistakes or benefiting from the experience we acquired while riding on this route. Keep in mind everything changes… life is dynamic, roads and paths are closed for maintenance or become impassable for a number of reasons, access to certain locations may become restricted, etc. Use it at your own risk.
In addition to the raw GPX route shown in the map above, which you may download through the link below the map, I have also created a Google Maps version of the entire route in the EyeCycled Google Account.
To visualise the Google Map of the Via Beata route and main Waypoints please click on the link below (opens in a new tab).
These are the pictures we took on this day of the journey. Where possible we provided some context in every picture taken. These pictures are not to be sold or used without prior consent.
Click on the thumbnail to expand picture and read about that moment. The navigation numbers below each gallery refer to the number of viewable pages in the gallery.
5. Links to useful online resources for this day of the journey.
We are giving you our experiences here for free, but it is up to you if you want to replicate them or not. Each journey is different and you may want to plan a custom one for you. Hopefully some of your journey may match ours, but for any portions that don’t these are useful online resources for this day.
Warwick is a historic market town in Warwickshire known for its rich history and its landmarks include the Castle and racecourse. The town has ancient origins, with evidence of human activity dating right back to the Neolithic period.
Warwick Castle was originally built by William the Conqueror in 1068 and was developed from a wooden fort into a stone structure in the 12th century. The castle played a significant role in English history, serving as a stronghold during the Hundred Years War, and was later converted into a country house by Sir Fulke Greville in the early 17th century. Today, it is a popular tourist attraction operated by Merlin Entertainments, featuring historical exhibits, live shows, and seasonal events.
The easiest way is to use the form below and send us a message, but you can also leave comments both here as well as in YouTube or our social media accounts. Keep in mind we do this as a hobby, not as a job, so our responses might be delayed. We aim to provide a response within a week, but it can happen that we are travelling or otherwise unavailable for longer than that. If you didn’t receive a response within 2 weeks, but send us a follow-up message.
Do you like these posts? Why, then, don’t you pay me a coffee to help with the blog hosting cost and as a caffeine incentive to keep me going through the long hours of the night?(Suggested amount: £2.00 or USD $3.00 or 2.50€ or whatever you want to give).
You may donate through my Patreon Page or through PayPal directly.
Please rate this post by clicking on the desired star (1 = Awful, 5
= Excellent)
This is the 5th post on a series about the Via Beata pilgrimage by bike concluded on the 3rd of August 2021.
This post has been written in English only. For other languages, please use the Google Translation drop-down option on the right menu (desktop version).
The map below shows a “cleaned-up” version of our route between Lowestoft and East Harling on this day. By “cleaned-up” I mean, where I considered necessary, I edited the “real-life” track to exclude some of the mistakes or issues we encountered along the way, such as navigation errors, closed gates or other impassable obstacles (with a bike), etc. The objective being to prevent you from making these same mistakes or benefiting from the experience we acquired while riding on this route. Keep in mind everything changes… life is dynamic, roads and paths are closed for maintenance or become impassable for a number of reasons, access to certain locations may become restricted, etc. Use it at your own risk.
In addition to the raw GPX route shown in the map above, which you may download through the link below the map, I have also created a Google Maps version of the entire route in the EyeCycled Google Account.
To visualise the Google Map of the Via Beata route and main Waypoints please click on the link below (opens in a new tab).
These are the pictures we took on this day of the journey. Where possible we provided some context in every picture taken. These pictures are not to be sold or used without prior consent.
Click on the thumbnail to expand picture and read about that moment. The navigation numbers below each gallery refer to the number of viewable pages in the gallery.
5. Links to useful online resources for this day of the journey.
We are giving you our experiences here for free, but it is up to you if you want to replicate them or not. Each journey is different and you may want to plan a custom one for you. Hopefully some of your journey may match ours, but for any portions that don’t these are useful online resources for this day.
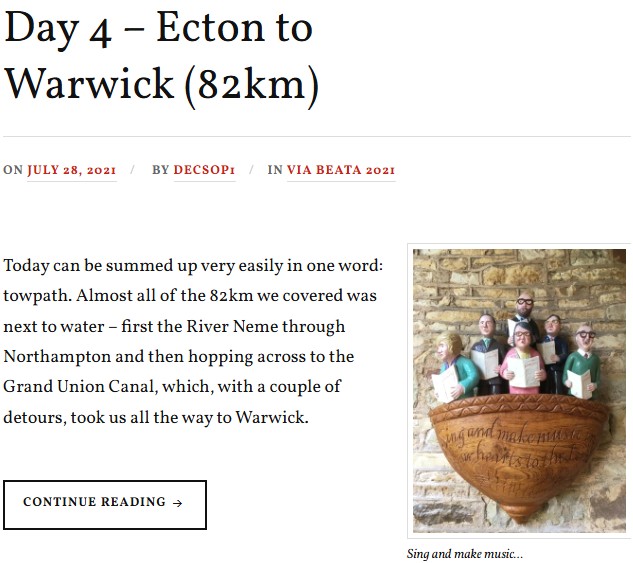
The Grand Union canal is the principal navigable waterway between London and the Midlands. It starts in London and one arm runs to Leicester and another ends in Birmingham, with the latter stretching for 137 miles (220 km) with 166 locks from London. We actually rode in parts of both arms on this day.
The River and Canal trust holds the guardianship of 2,000 miles of canals and rivers in England and Wales, together with reservoirs and a wide range of heritage buildings and structures.
Place right by the Grand Union Canal in the village of Weedon Bec where we had lunch. The chicken burger was superb and as we were not driving we could enjoy a worry free pint of beer with it.
The easiest way is to use the form below and send us a message, but you can also leave comments both here as well as in YouTube or our social media accounts. Keep in mind we do this as a hobby, not as a job, so our responses might be delayed. We aim to provide a response within a week, but it can happen that we are travelling or otherwise unavailable for longer than that. If you didn’t receive a response within 2 weeks, but send us a follow-up message.
Do you like these posts? Why, then, don’t you pay me a coffee to help with the blog hosting cost and as a caffeine incentive to keep me going through the long hours of the night?(Suggested amount: £2.00 or USD $3.00 or 2.50€ or whatever you want to give).
You may donate through my Patreon Page or through PayPal directly.
Please rate this post by clicking on the desired star (1 = Awful, 5
= Excellent)
This is the 4th post on a series about the Via Beata pilgrimage by bike concluded on the 3rd of August 2021.
This post has been written in English only. For other languages, please use the Google Translation drop-down option on the right menu (desktop version).
The map below shows a “cleaned-up” version of our route between Lowestoft and East Harling on this day. By “cleaned-up” I mean, where I considered necessary, I edited the “real-life” track to exclude some of the mistakes or issues we encountered along the way, such as navigation errors, closed gates or other impassable obstacles (with a bike), etc. The objective being to prevent you from making these same mistakes or benefiting from the experience we acquired while riding on this route. Keep in mind everything changes… life is dynamic, roads and paths are closed for maintenance or become impassable for a number of reasons, access to certain locations may become restricted, etc. Use it at your own risk.
In addition to the raw GPX route shown in the map above, which you may download through the link below the map, I have also created a Google Maps version of the entire route in the EyeCycled Google Account.
To visualise the Google Map of the Via Beata route and main Waypoints please click on the link below (opens in a new tab).
These are the pictures we took on this day of the journey. Where possible we provided some context in every picture taken. These pictures are not to be sold or used without prior consent.
Click on the thumbnail to expand picture and read about that moment. The navigation numbers below each gallery refer to the number of viewable pages in the gallery.
5. Links to useful online resources for this day of the journey.
We are giving you our experiences here for free, but it is up to you if you want to replicate them or not. Each journey is different and you may want to plan a custom one for you. Hopefully some of your journey may match ours, but for any portions that don’t these are useful online resources for this day.
Little Gidding is a Way-Station but also the fourth and final poem of T. S. Eliot's Four Quartets, a series of poems that discuss time, perspective, humanity, and salvation which is one of Katy's favourite poems.
Stanwick Lakes Country Park comprises of 750 acres (304 hectares) of former gravel pits.
Prior to the construction of a bypass road, a Roman villa was excavated between 1984–1992 and several mosaics were found. In 2013, one of the mosaics was returned after being studied and is now on display in the Park's Visitor Centre. There are still extensive archaeological remains in this area, including a mid-late Anglo-Saxon and medieval settlements abandoned before 1450.
The easiest way is to use the form below and send us a message, but you can also leave comments both here as well as in YouTube or our social media accounts. Keep in mind we do this as a hobby, not as a job, so our responses might be delayed. We aim to provide a response within a week, but it can happen that we are travelling or otherwise unavailable for longer than that. If you didn’t receive a response within 2 weeks, but send us a follow-up message.
Do you like these posts? Why, then, don’t you pay me a coffee to help with the blog hosting cost and as a caffeine incentive to keep me going through the long hours of the night?(Suggested amount: £2.00 or USD $3.00 or 2.50€ or whatever you want to give).
You may donate through my Patreon Page or through PayPal directly.
Please rate this post by clicking on the desired star (1 = Awful, 5
= Excellent)


You must be logged in to post a comment.