This GPS file represents the route I took between these two locations during my Via Francigena pilgrimage by bike from Canterbury, in the UK, to Rome, in Italy.
The route contains mistakes and tracks I may not recommend you to take, so it is important to read the respective posts for more context.
Before I go on to my own introduction of the Faith’s Way, you may want to watch the Instituciona video below, produced by the Friends of the Caminho Association. I think it’s a very well made teaser of the Caminho.
Now… that should have given you a taste for the Caminho, so let’s move onto my own introduction. I speak most of this introduction on the video below, so if reading is not your thing, feel free to watch the video and skip the words.
In September 2017 I completed by bicycle the 571 Km (357 miles) of the Faith’s Way, or Caminho da Fé in Portuguese, which for me turned out to be about 600 Km due to my choices and mistakes. The Caminho da Fe is sometimes also known as the Path of Faith.
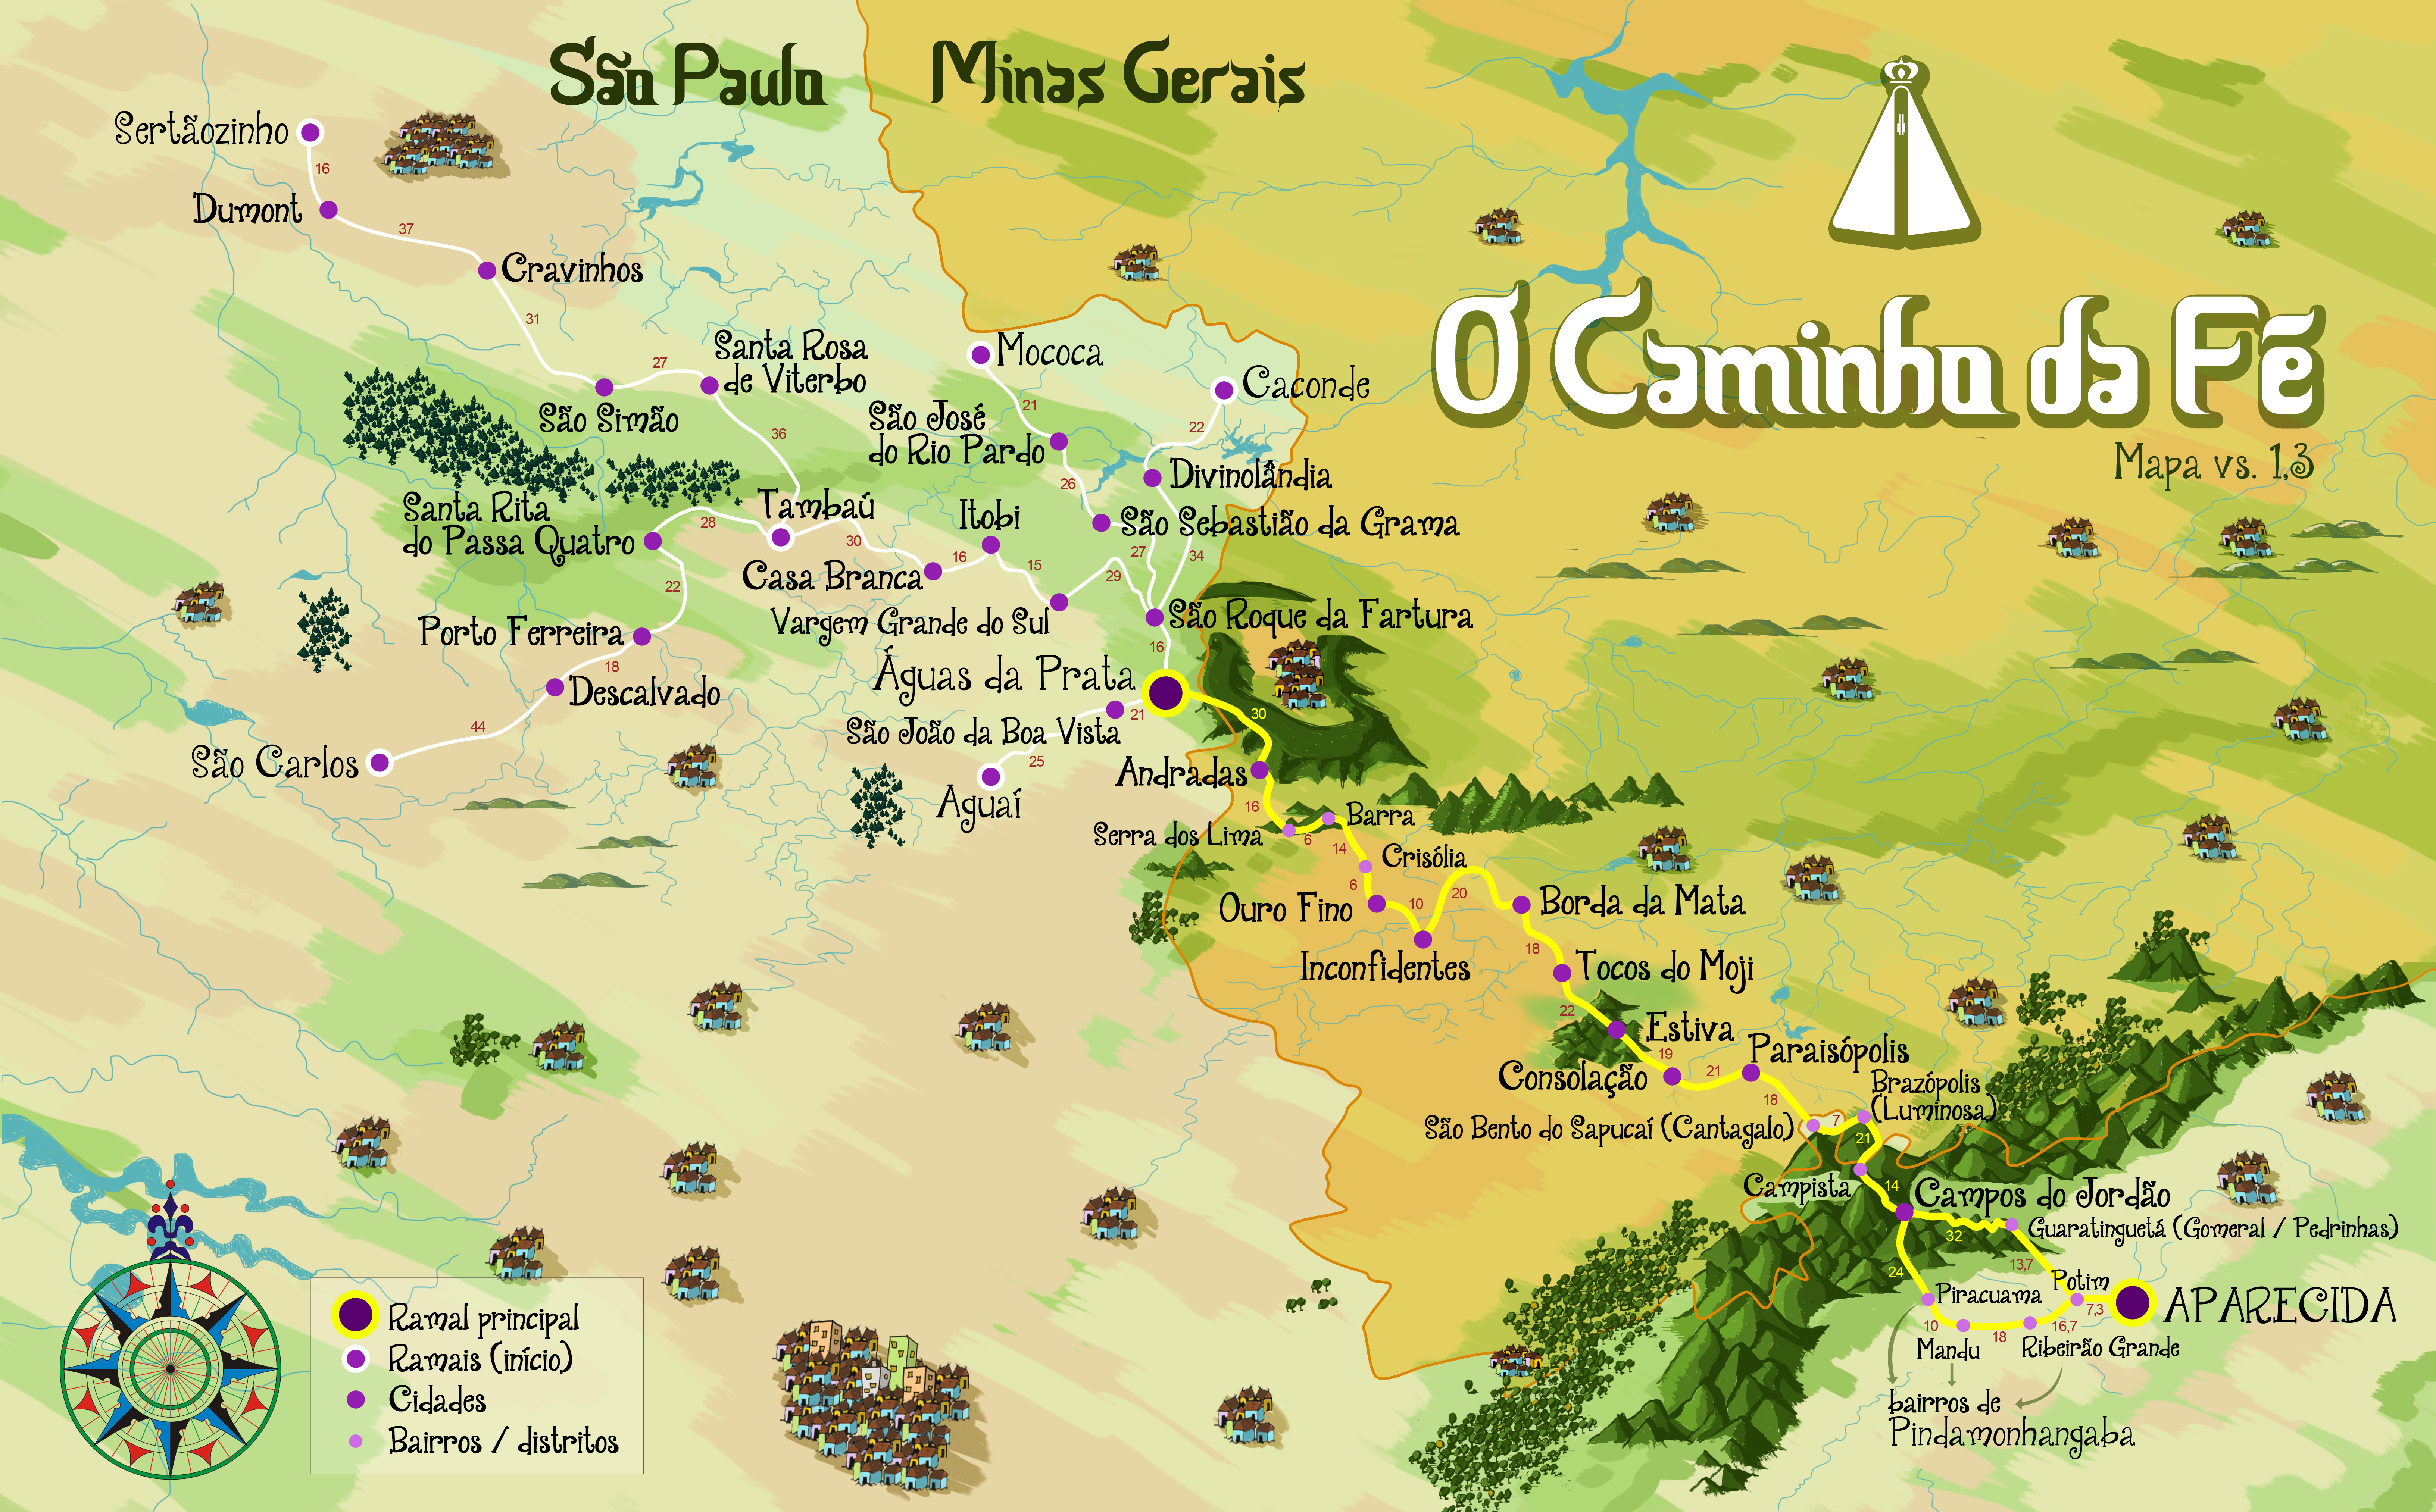
My route along the Faith’s Way from Sertãozinho to Aparecida do Norte.
The Faith’s Way is a pilgrimage route in which the pilgrims may choose to start from different locations, depending on the distance they want to cover. I decided for the longest route starting in the small town of Sertãozinho in the State of São Paulo.
I am posting this introduction mainly for those who have never heard of this pilgrimage route, but also for those who may already have heard of it, but have not attempted to do it yet.
The English version of this post will be rather different than the Portuguese one. Reason being is that there is already a great amount of information available in the web about the Faith’s Way, but mostly in Brazilian Portuguese.
So, while for Portuguese speakers I can just point them in the right direction and provide them with the web links, in English I think I need to provide a little more contextual information to improve understanding and be worth your time. If you can, however, read in Portuguese, a good point to start is the web site of the Friends of the Caminho Association on www.caminhodafe.com.br. I’ve been told that the English version of their page is in the works though.
There are also numerous online groups (Facebook, WhatsApp, etc) where thousands of pilgrims and pilgrims to be can exchange information and provide virtual help and support. Again, I am unaware of the existence of such groups in English Language. Please leave a comment below if you would like me to create one.
The Faith’s Way, or the “Caminho” was the brain child of 3 Brazilian Compostela pilgrims, who, after having completed the pilgrimage in Spain a few times had the idea of creating a similar pilgrimage route in Brazil, linking their home town of Águas da Prata (which translates to Silver Waters in Portuguese) in the State of São Paulo to the Sanctuary in Aparecida.
The Sanctuary in Aparecida had been a pilgrim destination for generations already, but there wasn’t up to that point an organized pilgrims’ path with hostels and support along the route, as there is on the Camino de Santiago de Compostela.
By sharing my experiences on the “Caminho” my goal is to help spread the word of this pilgrimage route outside of Brazil and, perhaps, help those who may be interested in walking or cycling the route, by showing them what to expect along the way, at least if they chose to do the same route and in the same weather conditions I did mine.
Please help me achieve my goal by clicking the “Like” or the Thumbs-up button in YouTube, leaving your questions and comments and sharing this post with others who might be interested in these types of adventure or alternative forms of traveling. Together with this post I have also published a short interview with Mr Almiro Grings, the creator of the Caminho. I recorded the interview during my passage at the Friends of the Caminho Association, which also doubles as a pilgrims’ hostel, in the town of Águas da Prata, when I got there during my pilgrimage. The video is in Portuguese with English subtitles.
Well, those that follow this blog will know that the Caminho is not my first long distance cycling pilgrimage. It is in fact the 3rd one.
It is honestly not that easy to explain in detail why, in the past 3 years, I have been doing this because everyone was different, but the most simple and concise answer would be: I like the Physical and mental challenges and also the opportunities of introspection that such long bike rides allow, which are actually quite similar to those walking the way, but obviously not as time consuming.
I chose to do the Caminho from the town of Sertãozinho mainly for two reasons:
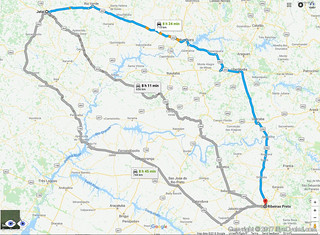
Because there was a certain logistical advantage for me personally to start the pilgrimage from there. There is a direct bus connection between the small town I was living, at that time, in Brazil and the city of Ribeirão Preto in the state of São Paulo. Ribeirão Preto is situated just 20 Km (13 miles) away from Sertãozinho and therefore I would not need to change buses (which I ended up doing anyway, but it was beneficial and not as complicated as I thought it would be). A plus if you are carrying your luggage plus a dismantled bike with you in the bus.
Because the route starting from Sertãozinho was, at the time I did it, the longest path to the sanctuary of Aparecida and I was keen to spend more time on the road.
Official Map of the Faith’s Way (Caminho da Fé)
If you look at the map of the Caminho, available for download from the web page of the Friends of the Caminho Association, you’ll see that you may start your pilgrimage in in many of the so called “branches” of the route or in most towns / places along the way.
The key to starting your pilgrimage and officially becoming a pilgrim is the pilgrim’s credential which you’ll find in many (but not all) places along the way.
All branches combine in Águas da Prata, which was where the Caminho was first created and from there the route to Aparecida follows the original path.
I already published all my experiences on the Camino de Santiago in 2015 in the EyeCycled blog and in the YouTube channel, but I am still working on the posts and videos of the 2016 Via Francigena pilgrimage to Rome.
With this post I am starting the pilgrimage posts and videos of the Caminho da Fé which will follow the same basic principles of previous pilgrimage posts. As my goal is to show how my pilgrimage developed, I typically turned the camera on at the start of the day’s journey and turned it off when I reached my destination for that day.
By reading or watching my experiences, future pilgrims can perhaps use them as a guide and decide to follow the same route I did, or not.
As no one in their right mind would watch several hours of cycling videos, I recorded the entire journey using a type of video recording called “Time-Lapse“. In this type of recording the camera takes a high resolution picture (4k) every 0.5 seconds and internally builds a video with them at the end of the recording.
This makes the video look very accelerated in time. In fact, each 10 minutes or so in real life represent about 10 seconds of video footage, so it is possible to watch an entire day in the journey in just a few minutes without missing a single meter of the track.
The disadvantage of these types of recordings are, obviously, the speed in which everything is shown and the vibration of the camera which in an accelerated speed is much more pronounced and notable.
This can be reduced with a device called a Gimbal, whose function I already explained in a previous blog post and videos in the channel. The Caminho was the 1st time I used this device in a consistent manner and for long distances and periods of time.
Although the gimbal helps reduce the effects of the vibration it does not eliminate them completely, due to the potholes, stones, gravel and uneven surfaces of the path, mostly on dirt roads and footpaths.
My intention is to publish posts and videos about the Caminho da Fé every two weeks, but I already know this may be just wishful thinking due to upcoming periods of intense travel and work. If you look at the map of the Caminho again, you’ll see that between Sertãozinho and Aparecida there are 21 major tracks. My intention is to publish a time lapse video for each one. I also want them to be bilingual, so current expectations are that I need to produce at least 42 videos, not counting this introduction video and other, shorter videos I recorded along the way.
This also added to the fact I will publish 1 blog post for each day of my journey in English and Portuguese as well, containing pictures, tips and highlights, so I am not making promises I won’t be able to keep. It will be done when it’s done, regardless of how long it takes.
One could say, there is a reason it is called this pilgrimage is called “The Faith’s Way”… having faith in yourself in generally a requirement. I have faith I’ll complete this work and count with your support in doing so.
I don’t do this work expecting a financial benefit in return, but I have costs to maintain the blog, such as hosting and domain reservation, and this work demands a lot of my time. In fact, it takes me a lot longer to do this as it did take me to ride the entire way, so if you are feeling generous, please go to me Patreon page through which you can contribute with a small donation to help maintain the blog running with coffee to keep me going late nights.
Statistics, expenses and my daily log on the Faith’s Way
The Excel file below contains the statistics of the journey (as collected by my Garmin Edge 810), such as distances, Elevation, Speeds, Average Heart Beat, etc, as well as the expenses, accommodation and the notes I recorded along the way.
Day ZERO: My trip by bus from Jataí to Sertãozinho
I decided to write a little about how I got to the starting point of the pilgrimage, not because it may help you direclty, but because it may get you to understand the logistics of getting to the starting point. As previously mentioned, I had to find a way to get to starting point of the pilgrimage, which I chose to be the town of Sertãozinho in the federal state of São Paulo. I was living in a small town called Jataí, in the state of Góias at the time. If you live outside of Brazil you will probably start your journey from a much bigger city, likely a capital and will have to find your own way to get to the starting point. There are buses from the city of São Paulo directly to Sertãozinho and flights to Ribeirão Preto, which is just 20 Km away from Sertãozinho.
I tried in vain to find someone who had a car and wanted to share this adventure with me, but it is hard to find someone with the willingness to do it and, most importantly with the time, which is a significant length of time away from work, family, etc.
Our bus was stopped by the Federal Highway Police at the station near the city of Uberaba in the state of Minas Gerais.
As I couldn’t find anyone, I started to look at the options of getting to Sertãozinho from Jataí. Jataí is a small town and doesn’t have an airport the offers regular flights. Sertãozinho is also a small town, but quite near from a bigger city called Ribeirão Preto. Ribeirão has a regional airport with flights to/from a number of destinations, including the capital of the state of Goias, Goiânia. The problem is that a trip to Goiânia is 320 Km and would have to be made by bus anyway, so as there was a directly bus connection from Jataí to Ribeirão Preto, I decided on this option. It would be a longer and less comfortable journey, but it would be direct and cheaper also. I spent R$ 135.00 on the bus ticket. The distance between Jatai and Ribeirão Preto was 715 Km, but the journey, which should have taken about 12h, was delayed for more than 2h at the station of the Federal Highway police in Uberaba, state of Minas Gerais, as they stopped and searched to bus due to an apparently anonymous tip-off they received that someone in that bus would be smuggling drugs to Sâo Paulo and the tip-off proved to be right. They found the smuggler together with 10 Kg of Cocaine Paste. Expect the unexpected!
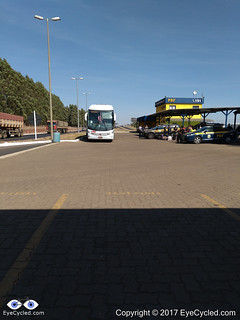
Urban bus from Sertâozinho to Ribeirão Preto in the background
In Ribeirão Preto I had to option of assembling the bike and riding the 20 Km to Sertãozinho, which I was advised against due to some areas of high incidence of crime I had to go through, or take an urban bus from Ribeirão Preto to Sertãozinho. As I arrived at Ribeirão Preto’s bus station, I asked around and found out from which platform the bus to Sertãozinho was departing. I had to take the lift downstairs, turn left, walk a few meters and take another lift upstairs to the platform where the local buses departed. The bus to Sertãozinho was already there and was about 3/4 full.
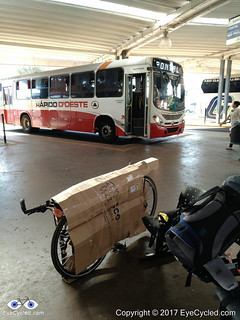
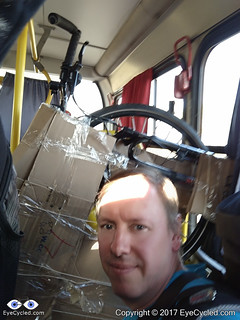
Me, in the bus from Ribeirão to Sertãozinho, seating in the seat usally reserved for disabled passengers and holding the bike upright.
The problem was that that bus was a urban type and had no boot or facilities to carry bikes, so the driver told me to seat in the seat reserved for disabled people and hold the bike upright.
The journey to Sertãozinho was short, about 30 min. Upon arriving at Sertãozinho’s bus station, I assembled the bike and rode to the hotel (about 1.5 Km away). Did the check-in in the Agapito Hotel, the only hotel in the official list of accommodation of the Friends of the Caminho Association, and got my pilgrim’s credential. In the evening I met with a TV crew from Globo TV, Brazil’s largest TV network.I knew they were coming as I was told by the hotel receptionist when I called to make my reservation a few days before. We went out for a meal that evening, talked about a lot of things, incl. my previous pilgrimages and agreed on an interview in the morning the next day.
If you have any questions, don’t hesitate to comment or send me a message through the contact form. Please subscribe to my Blog and/or to my YouTube channel if you don’t want to miss the next one and help me spread the word by liking and sharing my Facebook Page and Tweeter feed also.
Thank you all for your time and “Bom Caminho!”. (more…)
Please rate this post by clicking on the desired star (1 = Awful, 5
= Excellent)
This post complements the post I published on the 10th of August 2016 in which I described the experiences I had on the 3rd of August 2016 while riding between Tergnier and Reims, including the additional (and unnecessary, might I add) ride from the Auberge de Villequier, where I spent the night before, back to Tergnier . I am not going to repeat the content of that post in this one again, but I will try to add a few highlights for each one of the stages below. I encourage you to read the previous post before continuing on this one.
Starting a bike ride under heavy rain is always a challenge for me. Yet, I don’t mind if it starts to rain in the middle of the ride. Go figure!
The extra 15 or so Kilometres I rode to and from the Village of Villequier (Auberge where I stayed that night) should be deducted from the total distance to Rome. It was an unnecessary detour
The translation of the word “Auberge” (hostel) has different meanings in different languages. In Spanish (Albergue) those are the most common pilgrim accommodations along the Camino de Santiago. In French they are similar to a hotel. In Portuguese (Brazil) they are usually understood as being a shelter house for the homeless.
Be prepared to push your bike up to the cathedral / town centre in Laon. Very steep inclines.
Laon’s Tourist Information office is conveniently located right besides the cathedral. You can get your pilgrim’s credentials stamped there.
When leaving Laon, if using Google Maps to navigate, beware the App will lead you to a footpath which has very narrow restriction bars at the end. Thankfully, even with all the panniers and load on the bike, I’ve managed to get passed them by raising the bike vertically, but it wasn’t easy.
During a water rest at the church in Corbeny I looked at the guide and decided to skip Hermonville and ride straight to Reims. I wanted to stay in Reims and didn’t want to arrive too late there, so I could have a chance to walk around to city to get to know it a little. I think it was a wise decision, but that was, I believe, the last time I decided to skip a stage in the guide. It wouldn’t have taken me much longer to ride to Hermonville and from there to Reims.
The road to Reims was quite busy and no hard shoulder to ride on. Although I did not feel unsafe, I would advise caution. I am inclined to believe the Lightfoot recommended route is probably a better option in terms of vehicle traffic.
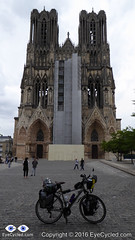
Reims is a city worth spending time. The cathedral is pretty amazing, even with all the scaffolding at the time. The city centre is lively with lots of things to see. The opera house (which I called a theater in the video) has some pretty interesting colour changing lighting in addition to being a very interesting building. Reims is also the French capital of Champagne and you will find references to it in many places like in the tourist information office. You can book visitations and Champagne tasting tours to many of the local producing houses. According to Wikipedia, Champagne ages in the many caves and tunnels under Reims, which form a sort of maze below the city. Carved from chalk, some of these passages date back to Roman times. The a look at the footage I recorded during my short walk around the city centre.
If you have any questions, don’t hesitate to comment or send me a message through the contact form.
Please subscribe to my Blog and/or to my YouTube channel if you don’t want to miss the next one and help me spread the word by liking and sharing my Facebook Page and Tweeter feed also.
Thank you for your time! (more…)
Please rate this post by clicking on the desired star (1 = Awful, 5
= Excellent)
it gives me great pleasure to announce to you all that next week I will start my 3rd Christian Pilgrimage by bike. It’s called “Caminho da Fé” which literally translated to English means “The Faith’s way”, but it is also sometimes translated as “The walk of faith”. This pilgrimage route is now considered to be the Brazilian equivalent of the way of St. James or Camino de Santiago, which I’ve done in 2015.
There is extensive material about the “Caminho da Fé” on the Internet, but in Portuguese only. I could not find much in English, so the English version of this post will be more detailed than it’s Portuguese one, so to give you guys more background information of what the pilgrimage is all about (most links on these page will open to English Language resources though).
Brazilians have been walking to the Basilica of the National Shrine of Our Lady of Aparecida for generations. Many to fulfil religious promises (i.e. to obtain a cure for some illness or for other types of graces), others for cheer devotion. With 18,000 m2 (190,000 sq ft), the basilica is the 2nd largest catholic church in the world losing only to St. Peter’s Basilica in Vatican City.
Map of the “Caminho da Fé” (click to open. Source AACF)
In 2003 a group of pilgrims who had walked to Santiago de Compostela a couple of times decided to create a pilgrimage route between Aguas da Prata in the Federal State of São Paulo and the Basilica, in Aparecida do Norte, 318 Km away on the designed route (walking paths). Currently, however, the route has many, so called, “branches” all of them starting from different cities, but passing through Aguas da Prata, on the original route designed in 2003. These, in turn, have also a few options which may increase or decrease the distance between the starting point and Aparecida do Norte. The branches are as follows:
#
Branch
Distance in Km
Option 1: Via the town of Pindamonhangaba
Distance in Km
Option 2: Via the town of Guaratinguetá
1
Aguaí to Aparecida
364
341
2
Aguas da Prata to Aparecida
318
295
3
Caconde to Aparecida
390
367
4
Mococa to Aparecida
408
385
5
São Carlos to Aparecida
536
513
6
Sertãozinho to Aparecida
571
548
7
Tambaú to Aparecida
424
401
Source: AACF (Friends of the “Caminho” Association. Site in Portuguese only)
I’ve chosen the longest path, starting from Sertãozinho, not necessarily because I want to ride more (although this was one of the reasons), but because of logistics. There is a direct bus from my current whereabouts to Ribeirão Preto, a city only 20 Km from Sertãozinho, so I only need take 1 bus journey (of 12 h though) to get to my starting point.
My entire journey will start on the early hours of Sunday, the 18th of September, with the bus to Ribeirão Preto. From Ribeirão Preto to Sertãozinho there is a short distance of just over 20 Km, perfectly doable by bicycle, but I’ve been advised to avoid this track because it goes through some high crime areas between the 2 towns (in Brazil, unfortunately, this is a constant worry).
So, as I arrive in Ribeirão Preto I may take yet another bus journey, a short one though, to Sertãozinho, or, if I am feeling adventurous, ride my bike (generally speaking armed thieves steal the entire bike with everything on it, and on the rider… it would be a shame if my pilgrimage was to end before it could even begin though).
In Sertãozinho I will overnight in the Agapito Hotel, one of the few places where you can buy the pilgrim’s credentials, which, exactly like in the Way of Saint James, you will need to stamp along the way in order to obtain the certificate of completion as you arrive in the Basilica in Aparecida do Norte.
Typical “Caminho da Fé” Pilgrim’s Credentials (extrenal link. Click to open it on source site)
From Sertãozinho I’ll let faith take me (no pun intended). I was going to purchase the excellent “Caminho da Fé” guide (link in Portuguese only) from Antonio Olinto, but I didn’t get to do it, so I will simply follow the yellow arrows (another thing copied from the the way of St. James / Camino de Santiago).
My two previous pilgrimages experiences taught me a lot and minimised a number of fears I had before I started. This one, in Brazil, is a bit different than the previous two as it introduces the fear of being victim to the social / economic situation of the country. Not that being a victim of crime isn’t a possibility during the Camino de Santiago where even murders of pilgrims are know to happen, but it is a question of the likehood of it happening, which in Brazil is much higher than in countries of the European Union.
The good thing about starting my pilgrimage on the 19th of September, though, is that I apparently will not be doing it alone, as I originally thought I would. I found out today that a crew of the Brazilian TV network “Globo” will be recording a program about the “Caminho da Fé” and that the main reporter, who I had the pleasure of talking to on the phone today, will also be riding on a bike all the way to Aparecida, supposedly followed by his TV crew. Who knows, I might even appear on the telly, which is an unexpected surprise. Life does have a way to surprise you, if you give it a chance.
As usual, I will try to post as much as I can along the way, but experience has thought me that any posts are more likely to happen on the EyeCycled Facebook page than on the blog. So, please, if you have not done so yet, and would like to follow me on this little adventure, make sure you like the page.
If you’ve seen my previous post, you’ll be aware that I recently lost a “non-human” friend, my trusted Dell XPS 15 notebook, which I used to edit the videos for the YouTube channel and create content for the blog. As with previous pilgrimages, I fully intent to cover the entire route of the “Caminho da Fé” with time-lapsed videos and bring as much info and media to you as possible. Without a proper computer that might take awhile though, but don’t give up on me. Like “Arnie”, I’ll be back!
“Buen Camino!” or in this case “Bom Caminho!”
PS. If you can read in Portuguese, the site of the AACF (Friends of the “Caminho” Association) is an excellent source of information.
Post about the 4th (and 5th) day of journey, published on 10th August 2016
This post complements the post I published on the 10th of August 2016 in which I described the experiences I had while riding between Péronne and Tergnier, including the additional (and unnecessary, might I add) ride from Tergnier to the Auberge de Villequier, where I spent the night. I am not going to repeat the contents of that post in this one again, but I will add a few highlights for each stage below. I encourage you to read the previous before continuing on this one.
To go or not to go? Woke up many times during the night to the sound of heavy rain. In the early morning I decided to wait in the tent to see if the rain would stop. It meant that by the time I was done with breakfast and packing it was past 11am in the morning, but I think it proved to be the right decision this time (aided by some weather forecast on the phone). Wasn’t really looking forward to packing my gear under rain. The rain resumed just after I left, so I guess I can consider it a lucky dry window, just long enough for me to pack my gear.
Château de Péronne
After leaving the Camping Site the first stop was at Péronne’s tourism information office in the town centre to collect a stamp on my Pilgrim’s Credential. As I was late I couldn’t really explore the town. As with many other towns and villages I’ve been through, Péronne looked like it would have been worth at least a few hours, if I had time to spare.
Again and again, Google Maps is good, especially to those like me that are “navigation challenged”. One problem for cyclists is that it tries, as much as it can, to guide the cyclists away from heavy vehicle traffic. Yes, this is good, but it also means it guides you to paths that during or after heavy rain might be very challenging to transpose. As I left Pèronne Google Maps instructed me to leave the “D” road I was to some dirt paths that were very muddy, only to guide me back to the same “D” road about 1.5 Km later. When you don’t know the way, the decision is not always easy. Overall Google Maps helped me more than it hindered me though.
The ride to Trefcon was uneventful and the village itself is tiny and it appeared to be completely deserted.
It rained basically all day that day (on and off) and after leaving Trefcon the route was mostly on good roads up to the town of Montescourt-Lizerolles, where Google Maps instructed to take a path alongside the railway. The terrain was somewhat challenging as the Swalbe Marathon tyres I have in the bike are not really suited for them. After overcoming the path, I decided not to follow the route Google had planned and take my chances on the major “D” road, the D1, that took me straight to Tergnier. The traffic was intense and the road had guard-rails and no hard-shoulder. I don’t recommend this route, but on hindsight I believe it was the right decision, albeit somewhat riskier than to stick (no pun intended) to the dirt paths.
Riding under constant rain is not really fun, but the main challenge, besides the muddy paths, was the strong wind which slowed me down considerably and took away the high visibility orange flag I had in th back of the bike. I arrived in Tergnier tired and feeling a bit ill, probably due to the wet conditions (I am slightly asthmatic and humidity is not a good thing for me). The town hall was closed, so I turned to Google again for a place to sleep and the 1st option Google gave me was a hotel / hostel in the nearby village of Villequier.
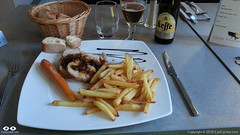
Dinner at the Auberge de Villequier
The concept of “nearby” changes when you are travelling on the bike though. It took me almost 1h riding in the wrong direction (as I found out the next day) to get there, but the Auberge is lovely and the owners were very nice to me. The room was small, but big enough to wash and dry my wet clothes and dry the tent and camping equipment. Also enjoyed a very nice meal that night, my personal reward for a hard day of cycling under rain.
Took very few pictures during the day. The rain was the biggest contributor to this, but in all honesty I did not feel like there were a lot of picture worthy moments anyway.
If you have any questions, don’t hesitate to comment or send me a message through the contact form.
Please subscribe to my Blog and/or to my YouTube channel if you don’t want to miss the next one and help me spread the word by liking and sharing my Facebook Page and Tweeter feed also.
Thank you for your time!
Please rate this post by clicking on the desired star (1 = Awful, 5
= Excellent)
VF post from 8AUG16, from Bruay-la-Buissière to Péronne
This post complements the post I published on the 8th of August 2016 in which I described the experiences I had while riding between Bruay-la-Buissière and Péronne. I am not going to repeat the contents of that post in this one again, but I will add a few highlights for each stage below. I would strongly encourage you to ready the August, 2016 post before continuing on this one, though.
Via Francigena can be just bike touring, of course, but if you want your Testimonium when you get to Rome, you have to present your pilgrim’s credential and it needs to have stamps in it. They do do a deep analyses of the stamps, but they will expect that in a 2,000 Km bike ride you will have collected a few. In the digital age is getting more and more difficult to find stamps… so analogical (illogical?). In many of the small towns and villages the chance of you to find a government facility (town hall, tourist information office, etc) will depend on the day of the week (Weekends? No chance) and the time of the day as some of these facilities will be closed, e.g. lunch time, or may have public opening hours. I really tried getting my pilgrim’s credential stamped but as it was the case in Ablain-Saint-Nazaire and others, as I got there I could not find anything open. Even the pharmacy was closed.
Arras is spectacular. Worth a visit if you can afford staying for a day. It’s a UNESCO World Heritage site and is more than 2,000 years old.
There is a “Route 66” café in Ervillers, between Arras and Bapaume, with a big statue of “the King” (Elvis). Coming across that reminded me of a friend who was about the ride the entire route 66 by bicycle. Her name is Cacá Strina. Check out her page here.
Don’t completely trust technology. Have always some low tech option to fall back if technology fails you. For some reason I lost GPS connection between Baupame and Péronne and I was relying on Google Maps entirely. At the very least download the offline maps over a WiFi connection, if possible, before you leave. Getting to Péronne was no problem, I simply follow the signs, but finding the Municipal Camping site took some time and effort (about 5 Km more than necessary).
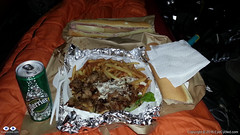
Tent Feast (Large Kebab Plate)
By the time I setup camp, had a shower and was ready to go out to find something to eat, the nearby supermarket in Péronne was already closed and after almost 30 min walking the only place I could find was a kebab trailer. So I ordered an extra large Kebab plate for dinner (and a baguette sandwhich for breakfast next day) and had a feast in the comfort of my tent. In small towns it may not easy to find a place for a meal at night. Keep that in mind.
Video of Lightfoot Guide Stage 14, From Bapaume – Péronne
Video Length: 5 min 38 sec To skip introductions and recommendations jump to time stamp 0:40 in the video timeline.
The next video is a time-lapse recording of my “awesomely akward” tent pitching skills. Took me “only” 20 min to pitch the tent. Thank God I don’t do this for a living… 🙂
In the municipal camping site of Péronne in France. Between the 3rd and 4th day of my Via Francigena pilgrimage. It raining a lot during that night and in the morning. Didn’t have a good night of sleept that day.
If you have any questions, don’t hesitate to comment or send me a message through the contact form.
Please subscribe to my Blog and/or to my YouTube channel if you don’t want to miss the next one and help me spread the word by liking and sharing my Facebook Page and Tweeter feed also.
Thank you for your time!
Please rate this post by clicking on the desired star (1 = Awful, 5
= Excellent)
"Life is a pilgrimage. The wise man does not rest by the roadside inns. He marches direct to the illimitable domain of eternal bliss, his ultimate destination", Swami Sivananda
This post complements the post I published on the 2nd of August 2016 in which I described the experiences I had while riding between Alembon and Bruay-la-Buissière. I am not going to repeat the contents of that post in this one again, but I will add a few highlights for each stage below. I would strongly encourage you to ready the August, 2016 post before continuing on this one, though.
Route:From the Rural Gite in Alembon to the Ibis Style Hotel in Bruay-la-Buissière via Licques, Tournehem-sur-la-Hem, Thérouanne, Amettes and Bruay-la-Buissière
Distance: 86.02 Km
Departure time from Alembon:10:29am
Arrival at Destination:5:58pm
Duration of day’s Journey:7h 29min
Expenses this day:Total = € 99.00
€30.00 – Food
€69.00 – Accommodation (Ibis Styles Hotel Bruay-la-Buissière)
Everything was going well, until… The unexpected, yes the unexpected again… By 9:30am I had packed everything and was ready to leave the Gite. I then realised my CatEye cycling computer was missing. Looked in the front bag, as I was certain I had put it there the night before. Wasn’t there, of course. Went back to the room and looked everywhere as I thought it might have fallen of the front bag during packing. Wasn’t there, of course. So all what was left was to look for it in the panniers, which were already neatly locked to the bike. Well, a pilgrim has go to do what a pilgrim has got to do. Looked for it in the front panniers as these were a lot easier to remove. Not there, of course. Took everything off the back of the bike again and looked in one pannier (not there, of course) and then the next, and bingo! It had fallen into the pannier as I was packing my things. I was happy not to have lost it, although I knew it was with me the night before, but the unpacking and packing took me almost 1 full hour. I didn’t do that mistake again…
Do not underestimate the SUN! The day before had been rainy and not particularly hot.
50 Shades of Red
I had seen on the phone’s Weather App that this day was supposed to be cloudy, but not rainy. It didn’t occur to me that I no longer was under British Weather. The day turned out to be very hot and sunny and I hadn’t passed any sunscreen on my skin. By the middle of the afternoon I was already feeling the damage the sun had done to my skin, which now looked very burned. The sunscreen was on the very bottom of one of my rear panniers. I should have stopped and passed the sunscreen on, but the thought of removing everything on the back of the bike (I had an intricate system there) was not appealing, so I continued. By the time I realised my mistake it was too late. The result was some heavy sun burns and sun fever by the time I got to Bruay-la-Buissière. As it was Sunday I knew it wouldn’t be easy to find accommodation and I wasn’t feeling very well so I used Google Maps to show me the available hotels nearby and the most affordable was the Ibis Style hotel 5 Km away from the town centre.
Video of Lightfoot Guide Stages 10, From Amettes to Bruay-la-Buissière
Video Length: 6 min 05 sec To skip introductions and recommendations jump to time stamp 0:48 in the video timeline.
The next video was recorded as I was crossing the town of Marles-les-Mines, between Amettes and Bruay-la-Buissière and their Folkloric group parade was about to start at the town’s FÊTE FORAINE.
If you have any questions, don’t hesitate to comment or send me a message through the contact form.
Please subscribe to my Blog and/or to my YouTube channel if you don’t want to miss the next one and help me spread the word by liking and sharing my Facebook Page and Tweeter feed also.
Thank you for your time!
Please rate this post by clicking on the desired star (1 = Awful, 5
= Excellent)
Post about Via Francigena, Day 1, written during the pilgrimage.
Introduction
This post complements the post I published on the 30th of July in which I described the experiences I had while riding between Canterbury and Alembon.I don’t think I need to repeat the same things here, so if you didn’t get a chance to read about this day on that post, I would strongly encourage you to do so before continuing on this one.So, in this post I am skipping the story and just adding some data, the GPS route, the pictures and the videos of that day’s ride.
Do not ride on the A2! Use the improved Lightfoot GPS route which you can download from here (Scroll down to the “Bike Touring Route” section and clink on the + to expand). Also read / watch my post / video from the 8th of June 2016 of my bike ride between Canterbury and Dover on the Regional Cycle Route 16, which more closely matches the official route. The GPS route I took that day is available in that post.
Rain and bad weather in the UK and strong sun just after crossing the channel.
If you don’t have time to get a stamp on your pilgrim’s credential in Dover, after you board the ferry go to the information desk on board and ask them to stamp your credentials. Better than nothing.
In Calais and other towns, do use the services of the tourism information offices, if you can. You can always get your pilgrim credentials stamped there, but keep in mind that during the weekends or certain times during weekdays they are most likely closed, especially in small towns.
When you buy a new SIM card for your phone abroad, it can take quite some time until it properly registers on the network and you have full access to the Internet again. Download offline maps if using Google Maps for Navigation or use something that does not rely on an internet connection (I used Garmin Navigation
Gite in Alembon
If you cannot find pilgrim accommodations, where available, stay at a rural Gite. They are cheap and the people are very nice. I totally recommend the one I stayed in Alembon if you want to stop there. Keep in mind Alembon is a tiny village. There is nothing to do around, I mean, no restaurants, shops, etc, but if my experience is a reference Madam Levray will take very good care of you. She is very used to having pilgrims in the house. Before me she told me she received a pilgrim’s couple who were doing the pilgrimage on horsebacks I believe.
Video of Lightfoot Guide Stages 01 and 02, from Canterbury to Dover Ferry Port (UK)
Video Length: 6 min and 14 sec To skip introductions and recommendations jump to time stamp 1:17 in the video timeline.
As I mentioned above and in my earlier post if you are planning on riding between Canterbury and Dover (either as a pleasure ride or as part of your pilgrimage) I do NOT recommend you do what I did. Do not take the A2. The reasons for this recommendation would be self-evident if you watched the video above.
I know I am repeating myself here, but I feel some repetition is granted. I recommend you either follow the Lightfoot Improved GPS route (which link to download is up above) or follow the same route I took on June 2016 on the regional cycle route 16. For your convenience the video of that route is down below.
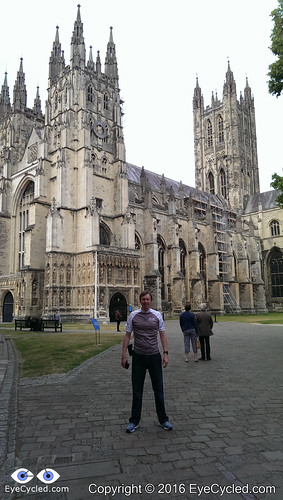
… and this is how the Cathedral looked like on that sunny day in June 2016…
If you have any questions, don’t hesitate to comment or send me a message through the contact form.
Please subscribe to my Blog and/or to my YouTube channel if you don’t want to miss the next one and help me spread the word by liking and sharing my Facebook Page and Tweeter feed also.
Thank you for your time!
Please rate this post by clicking on the desired star (1 = Awful, 5
= Excellent)
I honestly tried to publish content about my Via Francigena Pilgrimage by bike last year, but life got in the way and the ideas I had in my head for the blog posts and videos were perhaps a little out of my league.
Some time ago, as I was editing the 3rd video, I believe, I decided that I before I started the series of Via Francigena Blog posts I should publish an introduction first. I looked back into my “old” plans and realised things didn’t quite go as planned, but that they could probably have the potential of being worst if I hadn’t planned.
This introduction allows me to share my original plan with you and compare it with some of the real life post-pilgrimage information I collected. Perhaps it can be useful to other pilgrims.
In this introduction I also want to explain why I will be doing things in a certain way (by “things” I mean, the posts, the videos, etc). Call it the publishing “strategy”, if you like.
So, here it goes… the introduction to my Via Francigena Blog Series.
Click on the links below to jump directly to that section.
I could answer this with “Google is your friend“, or I could just provide a number of links to web resources such as this one, this one and this one, but they would not be my answer or at least answer what Via Francigena was to me.
In 2015 a friend and I decided to do the Camino de Santiago by bike. I had done some shorter bike trips before, but this was, at the time, the longest bike ride of my life. I loved it! Since coming back I was looking for the next challenge. For various reasons a number of ideas were raised and dropped. Some would take too long and be too expensive requiring me to take a license from work or quit my job. Not quite sure how I got to know about the Via Francigena (VF), but as a pilgrimage it is quite akin to the Camino de Santiago, so much in fact that is often also called “Camino di Roma” and it was probably during my research to write about my experiences with the Camino that I came across the details for the VF.
I really needed a challenge to get my mind off certain things that were consuming me during that period. Therapy and medication wasn’t helping much, so I started planning and the more I put my head to it, the more I was certain it was a feasible adventure, not too hard and not too easy. I found out that I was OK to spend the expected amount of money needed, but getting the approval from my company for the extended holiday period required for the trip, plus a few extra days for contingencies, wasn’t too easy.
It took me 29 days to complete the pilgrimage end to end, so my plan is to write at least 29 posts, as short as they may be, one for each day.
To promote consistency and order to the posts, I will divide each post in the respective Lightfoot Guide stages I covered on that day. More about the Lightfoot guide stages below.
For those old enough to understand this, it is not only Frank Sinatra that did things in his own way… I did my Via Francigena in my own way too… but, of course, like the Beatles (and Joe Cocker) with a little help from my friends.
First I bought the electronic version (PDF) of the Via Francigena Lightfoot volume set, containing 4 volumes. I do recommend them to you, but to be brutally honest, I don’t know if it was a worthwhile investment for me.
Lightfoot Via Francigena Guides, 4 Volumes
You can acquire the guides in paperback format at a cost of €67.99 or in digital PDF format at lower cost of €38.99 (at the time of writing) which comes watermarked with your name and email address to prevent misuse. I would recommend the e-book version as you honestly would not benefit from carrying 4 volumes of books, with hundreds of pages each, on your bicycle panniers (or backpack if doing by foot).
Although the guides are extremely detailed, I’ve personally found the maps very confusing to follow on my bike, but, please, don’t take me as reference as I am a terrible map reader anyway. I believe they would be a much better help to those doing the pilgrimage on foot. The most useful aspect of the guides for me was to provide direction, hints and tips and the list of pilgrim accommodations.
The Lightfoot guide divides the Via Francigena into 98 stages, which are, presumably, the segments covered by Archbishop Sigeric, the Serious, on his 80 days return journey from Rome to Canterbury after receiving his Cope and Pallium (a circular band of white wool with pendants, worn by archbishops) from the Pope.
I deliberately missed some of these stages, such as the one from Calais to Wissant, and a few more during the journey because of various reasons, but I did cover most of these stages and the posts and videos will focus on them for each day of the pilgrimage.
You will be able to download the GPS files of the routes I took every day, but they include mistakes and tracks I would not recommend to you, so it would be important to read the posts for some context if you want to avoid making the same mistakes I did.
I am an Engineer by formation and a project manager by trade. With this in mind, how can you expect me to go into anything without at least a minimum amount of planning? It is in my nature…
So I am making available here the original planning document in PDF format. I don’t mind sharing the original Microsoft Word document, nor any of the other supporting documents (Excel Spreadsheets, Microsoft Project Plan, PowerPoints, etc), but if you want them you’ll have to message me requesting them. They might be useful to you, if you are planning on doing your own Via Francigena.
Keep in mind, they should only be used as a guide. When I did the Camino de Santiago in 2015 I heard many times that although the route might be the same, the Camino is different for each person. That is one of the truths about pilgrimages: The Camino is yours… a very individual thing. Even if you do it more than once, they will always be different. When I did the Camino de Santiago in 2015 I met pilgrims who had done it several times and confirmed to me that every time they did it, was different, even if walking or riding the exact same route. That is perhaps one of the things that make this type of adventure so appealing to many. There will be decisions to be made along the way and a variety of random things that may force you to change your plans or your route, like road closures, weather conditions, sickness, mechanical failures, little accidents and so on… (knock on wood).
I know this may sound ridiculously obvious, but I don’t think I can over-emphasize that you should not rely too much on other people’s experiences as a recipe for success, if there is such a thing as a successful pilgrimage.
Now, this is not going to sound positive in terms of my planning skills, but no plan I’ve ever made worked out 100%. Other project managers might understand and accept this, however, one thing stands out with project planning: “Fail to plan is planning to fail”. At the very least a good project plan gets you thinking about what you want to achieve and how to achieve it. It is no guarantee of success, especially if you never done before, whatever you are doing, but it is better than to face the challenge completely unprepared.
I decided not to write a lengthy analysis about the things that worked and the things that didn’t. At the end of this series I may do that, but by then, if you have the intention of following the series, you’ll probably know that already.
I attempted to collect a lot of data during the journey, and that failed. I think I over-estimated my ability to do the collection while ensuring I was on the right track, got to the top of that mountain and was not run over by a truck or a car. It is a lot to take in and I had my hands full most of the time, but it wasn’t a complete disaster either.
Those that have done any amount of cycle-touring in their lives will know that at the end of the day you will be tired, dirty and hungry. The last thing on your mind would be “I need to record the stats / log for the day”. It wasn’t easy to get in front of a computer to write anything after a challenging day of riding 8 to 9 hours on a bike, yet I did it most days (feel free to leave me your kudos in the comments).
I was using multiple files as I originally thought it would be easier to separate the information, but upon my return I combined everything into a single file which I make available for download below. It contains all of the expenses, categorized by food, accommodation, repairs, transportation and extras as well as route and track information and a few other “bits and bobs” which might be useful to those attempting to do the same. I originally planned to collect information about other pilgrims, signage along the route and so on, but that was too much.
Video creation is by far the most consuming task in the project. I learned that after coming back from doing the Camino de Santiago in 2015. While it took me about 2 weeks to complete that pilgrimage, it took me a year to write about it and that is alright, after all this is my hobby and not my day job.
After the “Camino” I produced at least 1 time-lapsed video for each day of the journey. Some of these videos became a bit too long and I became a bit frustrated that after all the work I had put in them, almost no one was watching them ’till the end. So, for this series of posts I decided on a different approach: I’ll create shorter videos, more specifically breaking them down by stages, the same stages defined by the Lightfoot guide I used. Although there are 98 stages in the guide, I don’t expect to produce 98 videos as I skipped some of the stages.
As the videos were recorded in time-lapse mode with a GoPRO 4 Silver, that means they are very shaky and fast (the series 4 does not have digital image stabilization built in), so I want to leave a few hints and tips on how to best use the videos. I thought the best way to do that would be in a video itself, so, here it goes…
The photos will all be in Flickr as I found media to be very difficult to handle in WordPress itself. There will be albums containing all the photos for each day of the journey and all albums in be joined in what Flickr calls a “collection”.
Unfortunately, if you want more context to the photos you’ll have to read the blog posts as I simply don’t have the time and the will power to write descriptions for each of the thousands of pictures there.
I live in a small town called Bracknell in the county of Berkshire, England. The distance between my home and Canterbury is roughly 100 miles or 160 Km, so I got a good friend of mine to drive me to Canterbury the day before. I also had the company of my older son.
I had a reservation at the local Youth Hostel and after leaving the bike and gear in the hostel we all left to walk around Canterbury and find a place to eat dinner.
You can read a lot about Canterbury in Wikepidia, so I will just refrain from copy and pasting and leave you the invitation to click on the link above to learn more about this historic town, a UNESCO World Heritage Site, which has been inhabited since pre-historic times and played an important role in British history.
There isn’t actually much more to say about that day. After having dinner, my friend and my son drove back home and I spent some time in the hostel writing this blog post here.
At that point I was still deluding myself that I would be able to write one short post for each day of the journey. I did write several, but I now know better.
I don’t want to repeat in this post what I wrote on the above mentioned one, but I thought it was OK to, at least, point back to it and also share the pictures of the day.
Please subscribe to my Blog and/or to my YouTube channel if you don’t want to miss the next one. Please help me spread the word by liking and sharing my Facebook Page and Tweeter feed also.
Thank you for your time!
Please rate this post by clicking on the desired star (1 = Awful, 5
= Excellent)
As suggested by my host in Alembon the day before, 8:00am I was downstairs for breakfast. Got to taste all the home made compote she does and home baked cake as well.
After breakfast I started packing. I confess, this is one of my weak points and something I definitely need to get better at. The Camino de Santiago has taught me a few lessons last year, which I seemed to have forgotten, but the Via Francigena is being quick at reminding me of them.
Before I left home I packed everything according to item type, e.g. clothes and footwear all in one pannier, electronics in another, 1st aid kit and items of personal hygiene in another and so on…
The thing is, when you are on the move and need something you don’t want to be opening several different panniers to get items you may need. The lesson I learned on the Camino was to pack a pannier with the most likely things you are going to need during the day (in the case of the Camino I packed it in a rucksack, as I had only 2 panniers then, where I now have 4), so you’ll only need to open one bag during the day, unless something out of the ordinary happens, which is not uncommon. I am, therefore, attempting to change the packing accordingly and moved several items around the panniers.
When I finished packing everything (took me about 25 min… yes, I am slow) brought everything downstairs, where the bike was, and started to load them in the bike. About 15 min later, when all panniers and the camping bag were loaded and fastened, I realised I was missing my Cateye cycling computer, which I thought I had placed in the handlebar bag together with the Garmin Edge 810. It wasn’t there. Went back to the room and searched everywhere as I knew I had it the day before… couldn’t find it. There was only one option left: Search in the panniers, which, as I mentioned before, were already loaded in the bike. I’ll give you one chance to guess if it was in the 1st pannier or in the last. Did you guess? Of course it was in the last. It must have fallen in the pannier as I was rearranging the packing. Altogether, I literally spend 1h looking for the damn thing. That meant I left the B&B only around 11:30am. For a pilgrim this is almost time of arrival, not time of departure. Anyway… need to give no excuses to anyone as I am alone, but it was a bit stressful. My own fault.
From Alembon I rode to Licques, where I managed to get a stamp from a water park there, as everything else was closed. Then to Tournehem-sur-la-Hem, where there was also nothing open. Not to say nothing, the church was open, but there was no one in it. From Tournehem my next destination was Thérouanne, where, according to my host the day before, there was a pilgrim’s hostel, but… everything was closed. I wasn’t planning to stay there anyway, as I wanted to ride more, so I rode further to Amettes where there is another hostel with special rates for pilgrims (€13/night). Guess what? Closed!
In all the villages I rode through everything was closed. Even the petrol stations were closed. if I wanted to setup camp somewhere I would have to go hungry as I couldn’t find anything open to buy food. I also couldn’t get any stamps on my Pilgrim’s credential which, upon arrival in Rome, is the document you have to show.
So I decided to continue riding to Bruay-la-Buissière as I knew it was a bigger town and there was bound to be something open. As I got there I asked several people about “auberges” or hotels but I couldn’t find any near, so I turned to Google which offered me a few, with one of the cheapest being the Ibis Style in the outskirts of town. Had to ride another 4 or 5 Km to get there and the daily rate wasn’t the €53 Google suggested, but €69 with Breakfast. By that point it was late and I was too tired to go searching for something cheaper, so that is where I stayed. The room was great and the hotel was near several restaurants. Had a really good meal at the 3 Les 3 Brasseurs.
When I left Alembon in the morning, the day was a bit unsettled and that made me forget to pass on the sunscreen on my skin. I live in the UK, so this is something we use very little there 🙂
The sunscreen was on the bottom of one of my panniers, which I really didn’t want to take off the bike again. The result was a really bad sun burn and fever at night which made for an uncomfortable night. I should have stopped to get the sunscreen… lesson number… ? (who’s counting anyway).
Well, that was it. I’m attaching a few pictures to this “post by email” which I hope will be self-explanatory. If you have any questions, just drop me a comment.
Before I close the post, have you made your donation to Mind UK, which is the charity I am sponsoring during this ride? Common, 20 quid will not be much at the end of the month and it’s all for a good cause.
Flickr API error: Invalid API Key (Key has invalid format)
Please rate this post by clicking on the desired star (1 = Awful, 5
= Excellent)