I am mourning the death of very dear and close companion of mine. My Dell XPS 15 Laptop 😭.
It was the tool I used to edit my cycling videos and to write my blog posts.
Unfortunately I am in a situation that prevents me to buy a replacement right now and the computer I am using to write this post is old and not powerful enough to encode even the less demanding of videos, so please forgive me in advance if you don’t hear from my in a few months. Any posts I may write in the period will lack videos or things that require more computing power.
In the mean time, I will look for alternatives, but I am not enthusiastic about the prospects as my laptop will probably need a motherboard replacement, which is almost as expensive as a brand new one itself.
I had just finished editing all the videos for day 5 of my Via Francigena pilgrimage last year and was (slowly) uploading them to YouTube (it takes almost 10 h to upload these videos with my current bandwidth). I managed to upload the 1st of the 3 videos for day 5 and had the other 2 ready for upload in my laptop’s hard drive, which I now have no access to (my laptop had a special mSATA drive as the boot drive and that is where the videos are). If I do, however… somehow, manage to access the other 2 videos I will try uploading them to YouTube and will publish the post.
I am also preparing for my upcoming cycling pilgrimage on the “Caminho da Fe” (Faith’s way) which is the Brazilian equivalent of the Caminho de Santiago. I should start next week if everything goes as planned, but I will write a separate post once everything is confirmed.
Apologies once again, but assuming you’re all used to travelling by bike you will know that “shit happens!”
The original quote is “There are no strangers here; Only friends you haven’t yet met.” and it is attributed to William Butler Yeats an Irish poet who won the Nobel prize for Literature in 1923.
This saying became ingrained in the Irish culture as the Irish are known for their hospitality and friendliness towards strangers.
Even with the current dangers of being too open to strangers, online or not, whenever I can I try to live by this, especially if I find strangers who share the same passions I do.
Through the passion of cycling, I’ve made “virtual friends” (Facebook mostly) in practically all continents of the planet, the vast majority of them, I’ve never seen personally. Maybe some of the people reading this post will recognize themselves in this category and will understand that the power of the Internet plus a shared passion is all you need to bring people together, regardless of physical distance or language barriers (Google Translate and others are also a big help).
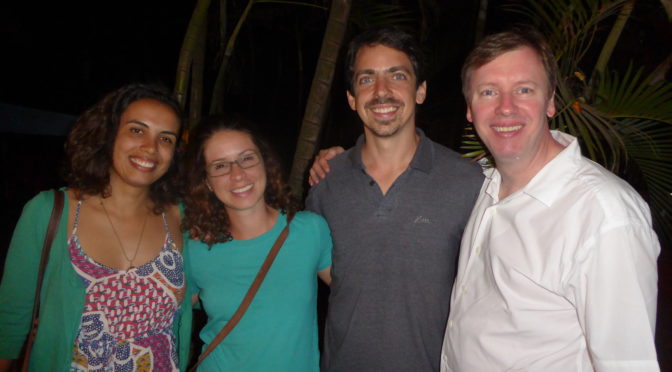
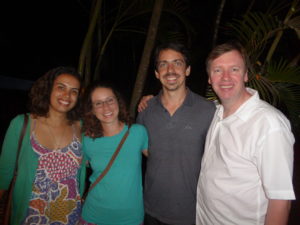
Despite all the technological advances, in my humble opinion, nothing replaces the joy of meeting someone new in person, that is why it makes me so happy when I have the opportunity to actually meet face to face some of my “virtual friends”. A couple of weeks ago I had such an opportunity… 🙂
From left to right, Ada Cordeiro, Julie Assêncio, Thiago Ruiz and I.
I met Julie Assêncio and Thiago Ferreira Ruiz, a couple I’ve been following for a few years and Ada Cordeiro, a young lady I’ve also been following since the beginning of her South American tour about 2 years ago. They have all completed their journeys and are back to their (it I may say so) “normal” lives, in Brasilia, Brazil’s Federal Capital.
The English and Portuguese versions of this post are different because their blogs are available in Portuguese only, so I want to give the English speakers reading this post a little more background info.
Julie and Thiago started their 10,000 Km cycling tour in Portugal in 2014, which took them to 20 different countries in a period of about 18 months. Portuguese speakers can, obviously, go to their Blog and read about their amazing journey themselves.
In Europe their journey took them to Portugal, Spain, Andorra, France, Italy, Slovenia, Croatia, Bosnia and Herzegovina, Serbia, Bulgary, Turkey and Holland. They also pedaled in Índia, Nepal, Malaysia, Thailand, Cambodia, Laos, Vietnam and upon returning to Brazil they pedaled from Rio de Janeiro to their home adding more than 1,000 Km to their journey in Brazil as well.
Ada Cordeiro is a young lady I have been following through Facebook and other social media means since the start of her incredible 23,000 Km journey by bicycle around South America. Her blog is apply named “PedalADAs” in which the “ADA” part refers to her first name and “Pedal” means is Portuguese the same it does in English (the foot-operated levers used for powering a bicycle or other vehicle propelled by the legs, if you are in doubt 🙂 ).
In Portuguese “Pedalar” is the act of pedaling… well, enough of that… I think you get the point 🙂
This video summarizes in 5 min her incredible journey.
Even if you are not able to read in Portuguese, I suggest you visit their blog anyway, if only for the wonderful pictures they posted along the way.
Anyway, I just wanted to leave a record of my meeting with them as an evidence that anything is possible, because as I started to follow them I would have never expected to meet them in person.
If you are reading this and are still not a member of my circle of virtual friends, please don’t hesitate to send in a request, but also don’t be mad at me if I do some checking first, such as to loo through your profile and call you in messenger for a chat.
It’s a shame that a certain degree of care is necessary in our society these days.
I am on holidays… but not on holidays from my bike. Cycling is one of the things I like to do most and there is no holiday, or life, without it. I am trying to cycle at least 3x a week, but I have avoided cycling alone here because of the risk of being robbed and having my bike stolen. Unfortunately this is a real and relatively likely occurrence here.
Over the past few weeks I have recorded a few rides and some video clips I want to share with you, so you have an idea of what it is to cycle over here. I am also preparing myself to this year’s pilgrimage on the so called “Caminho da Fé” (Faith’s way).
Will write more about this at the end of this post. For now let’s see the videos, shall we?
I believe these are the 2 biggest lakes in town, but I might be wrong. I did this ride with my brother and our destination was in fact the thermal waters club located on the shores of the Bom Sucesso lake.
I think the distance between the 2 lakes is just under 16 Km, but we rode alongside the lake for a while until we went to the club. The Thermas Park Club is a publicly own club of thermal waters in which the water comes out of a deep well apparently more than 1,000m deep. The average temperature of the water is 40 Celsius. A very relaxing bath at a reasonable price.
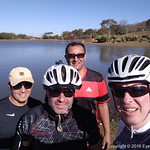
Saturday bike rides with friends
Group of friends of our Saturday bike ride (1 is missing)
Every Saturday morning I join a small group of friends to ride approx 25 Km. The bike ride includes a breakfast stop at the farm of one of the members of our group where we enjoy some local culinary delights, such as “Pão de Queijo” (cheese bread), Banana cake, local pastries, coffee, freshly milked milk from their own cows and fried eggs from their own chickens. What more can I ask for.
On our way back I recorded a short clip of the descent into town including a “selfie” with the team (one was missing that day) at the JK Memorial lake (JK stands for Juscelino Kubitschek, Brazil’s 21st president, who choose the town of Jataí on the 4th of April 1955 to announce the construction of Brazil’s new capital, Brasilia, hence the reason for the memorial).
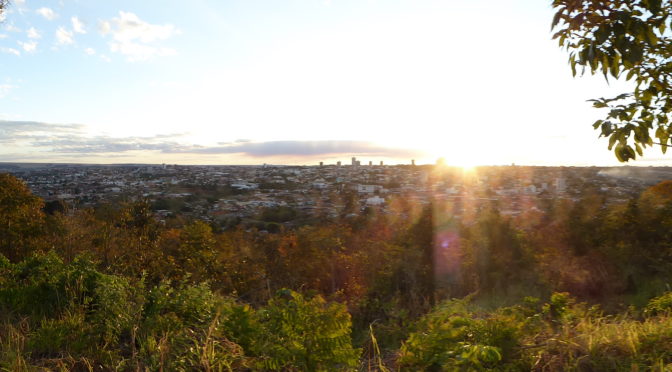
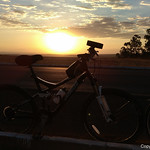
Sunset cycling with my girlfriend.
The 3rd and last video clip of this post was last week, recorded with my mobile phone while an early evening ride with my girlfriend. During the ride we witnessed one of nature’s most spectacular scenes: The sunset.
I experienced the sunset in many places on Earth, but the sunset here was a little bit more special here than elsewhere, first because of the company I was sharing the moment with and second because the air is very dry here, so you get a very clear view. I had a great time, but don’t take my word for it, watch the video until the end.
If you want to see the pictures taken during these rides, take a look at the Flicker Album below (includes pictures taken in other occasions, not only during the rides above)…
Flickr API error: Invalid API Key (Key has invalid format)
Caminho da Fé
As I mentioned at the beginning of this post, I plan to do another cycling pilgrimage this year.
Although not as extensive as the Via Francigena, that I’ve done last year, or the Camino de Santiago, that I’ve done in 2015, the “Caminho da Fé” (Faith’s way) is equally challenging due to the difficult terrain, mostly on farm roads (sandy ones likely) and the need to overcome 3 mountains along the way. My biggest challenge has been, so far, the logistics of getting to the starting point with my bike and then back from the town of Aparecida do Norte (the pilgrimage’s destination) to Jataí.
As I will likely be by myself (still on the look for partner though) the best option appears to be a bus from Jataí to the city of Ribeirão Preto (about 700 Km by bus), in the state of São Paulo, then ride the 20 Km from Ribeirão to the town of Sertãozinho (the furthest point from Aparecida do Norte), overnight in a pilgrim’s hotel, and start the ride to Aparecida do Norte (estimated distance of 540 Km) the next day.
It has been a bit difficult to estimate the duration of this pilgrimage as I keep getting conflicting information (some say a week, others 15 days and some took 19 days to complete). The return is a little bit more challenging as it likely will require 2 bus trips, the first from Aparecida do Norte to the city of São Paulo (the capital of the state of São Paulo) and then from there back to Jataí, a bus trip of more than 1,000 Km by bus.
I was planning to do this in August, but due to some personal reasons I’ll have to transfer it to September.
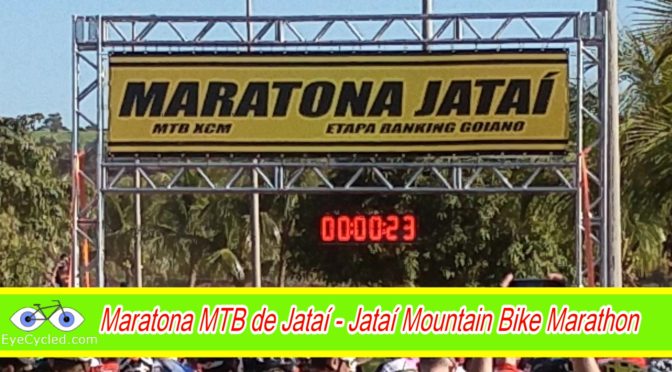
On the 9th of July I attended the Mounting Biking Marathon in the town of Jataí, in the state of Goias, Brazil.
It was my first riding experience in Brazil in 15 years (or more) and to me it was very challenging due to the terrain.
I am somewhat used to riding MTB tracks as the Swinley Forest in Bracknell have several, but this type of mountain biking is completely new to me.
Although there were some climbs to conquer, there wasn’t much in term of “mountains” to overcome, but the terrain presented some completely new challenges to me… Fine fine, powder like, sand banks, some of them so deep that a 3rd of the wheel would sink in them, providing virtually no traction and at times completely locking the wheel in place.
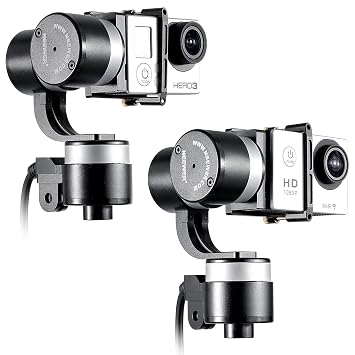
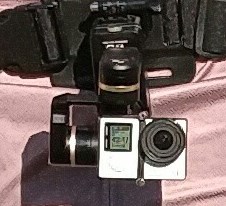
The video is rather long (30 minutes), but I hope you can enjoy portions of it, if not all. Was recorded with my GoPRO 4 Silver on a Feiyu Tech Wearable Gimbal.
Post about the 4th (and 5th) day of journey, published on 10th August 2016
This post complements the post I published on the 10th of August 2016 in which I described the experiences I had while riding between Péronne and Tergnier, including the additional (and unnecessary, might I add) ride from Tergnier to the Auberge de Villequier, where I spent the night. I am not going to repeat the contents of that post in this one again, but I will add a few highlights for each stage below. I encourage you to read the previous before continuing on this one.
To go or not to go? Woke up many times during the night to the sound of heavy rain. In the early morning I decided to wait in the tent to see if the rain would stop. It meant that by the time I was done with breakfast and packing it was past 11am in the morning, but I think it proved to be the right decision this time (aided by some weather forecast on the phone). Wasn’t really looking forward to packing my gear under rain. The rain resumed just after I left, so I guess I can consider it a lucky dry window, just long enough for me to pack my gear.
Château de Péronne
After leaving the Camping Site the first stop was at Péronne’s tourism information office in the town centre to collect a stamp on my Pilgrim’s Credential. As I was late I couldn’t really explore the town. As with many other towns and villages I’ve been through, Péronne looked like it would have been worth at least a few hours, if I had time to spare.
Again and again, Google Maps is good, especially to those like me that are “navigation challenged”. One problem for cyclists is that it tries, as much as it can, to guide the cyclists away from heavy vehicle traffic. Yes, this is good, but it also means it guides you to paths that during or after heavy rain might be very challenging to transpose. As I left Pèronne Google Maps instructed me to leave the “D” road I was to some dirt paths that were very muddy, only to guide me back to the same “D” road about 1.5 Km later. When you don’t know the way, the decision is not always easy. Overall Google Maps helped me more than it hindered me though.
The ride to Trefcon was uneventful and the village itself is tiny and it appeared to be completely deserted.
It rained basically all day that day (on and off) and after leaving Trefcon the route was mostly on good roads up to the town of Montescourt-Lizerolles, where Google Maps instructed to take a path alongside the railway. The terrain was somewhat challenging as the Swalbe Marathon tyres I have in the bike are not really suited for them. After overcoming the path, I decided not to follow the route Google had planned and take my chances on the major “D” road, the D1, that took me straight to Tergnier. The traffic was intense and the road had guard-rails and no hard-shoulder. I don’t recommend this route, but on hindsight I believe it was the right decision, albeit somewhat riskier than to stick (no pun intended) to the dirt paths.
Riding under constant rain is not really fun, but the main challenge, besides the muddy paths, was the strong wind which slowed me down considerably and took away the high visibility orange flag I had in th back of the bike. I arrived in Tergnier tired and feeling a bit ill, probably due to the wet conditions (I am slightly asthmatic and humidity is not a good thing for me). The town hall was closed, so I turned to Google again for a place to sleep and the 1st option Google gave me was a hotel / hostel in the nearby village of Villequier.
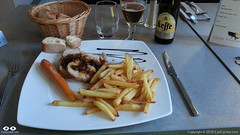
Dinner at the Auberge de Villequier
The concept of “nearby” changes when you are travelling on the bike though. It took me almost 1h riding in the wrong direction (as I found out the next day) to get there, but the Auberge is lovely and the owners were very nice to me. The room was small, but big enough to wash and dry my wet clothes and dry the tent and camping equipment. Also enjoyed a very nice meal that night, my personal reward for a hard day of cycling under rain.
Took very few pictures during the day. The rain was the biggest contributor to this, but in all honesty I did not feel like there were a lot of picture worthy moments anyway.
If you have any questions, don’t hesitate to comment or send me a message through the contact form.
Please subscribe to my Blog and/or to my YouTube channel if you don’t want to miss the next one and help me spread the word by liking and sharing my Facebook Page and Tweeter feed also.
Thank you for your time!
Please rate this post by clicking on the desired star (1 = Awful, 5
= Excellent)
According to Wikipedia a Gimbal is a pivoted support that allows the rotation of an object about a single axis. Interestingly , gimbals pre-date Jesus Christ by almost 300 years, yet if you are not a rocket or aeronautical engineer or a film maker you’re likely to never have heard of this device.
As this post got a little longer than I originally expected I also recorded a short video to demonstrate the device.
Further down the page you’ll see a few recorded test rides I did with the gimbal mounted on the handlebar and on a chest strap.
When I started recording my bike rides the one thing that became impossible to miss is the shaking, especially if the camera is mounted directly onto the bike and not worn by the cyclist (like on top of a helmet or on a chest strap).
Digital Image Stabilization can significantly improve the image quality, but there is a limit to what it can do, at least in commercially affordable cameras. As the 1st action camera I bought didn’t have it, before going on the Camino de Santiago I decided to invest a little more and bought myself a Sony HDR-AS30V which I reviewed, or rather, wrote about in July 2015 (it was a long post about all the cameras of my life).
I like this Sony camera, but as I started to do more and more videos I took yet another step and spent a little more money on a more professional GoPRO 4 Silver camera, which I also wrote about on this post in November 2015. Even in a similar configuration it is hard to miss the fact that the GoPRO records almost 3x more information than the Sony Camera does (the file sizes are an indication, even if not a very scientific one), yet the GoPRO still didn’t solve the problem of the shaking. As a matter of fact, it made it even worse as in generation 4 GoPRO took away digital image stabilization completely. So, the result ended up being a very nice, but “shaky” Ultra-Def picture which can be seen in all videos I recorded during my Via Francigena pilgrimage to Rome last year, made worse by the fact I record everything in time-lapse, so everything looks extremely accelerated.
Looking into solutions to minimize the shaking is when I found there are such things as 3-axis motorized devices that keep the camera steady, as well as things like mechanical steady cams often used by film makers, which are however, bulky and large as they work with counter balancing weights. The solution appeared to be one of these devices that would mechanically keep the camera steady. To fully stabilize a camera the device needs to move in all 3-axis (X, Y and Z in 3 dimensions), so it needs to have 3 motors, hence the title 3-axis gimbal (there are gimbals that stabilize the camera in only 1 or 2 axis as well).
GoPRO launched itself such a device in October 2016 called the “Karma Grip” to fit as a stand-alone device or the be used in conjunction with their Drone of the same name (the “Karma Drone”… GoPRO has a lot of Karma). By doing that GoPRO actually entered this action-cam accessory market quite late as many Chinese companies were already profiting from it for years. At £250 (or USD 320 at time of writing) it was just as expensive as my GoPRO 4 Silver itself, and just under the Black version, their flagship model (now replaced by their GoPRO 5 camera).
Even though, as I mentioned before, Chinese manufacturers appeared to be quick to profit in this action camera / GoPRO corner, this market is relatively new and the options are relatively limited. I watched quite a few YouTube videos reviewing some of these devices. At the end, price together with the fact I wanted to use one for cycling became the strongest factors.
For those who money is not an issue, one new device launched earlier this year (2017) appeared to check all my boxes as it is also additionally waterproof, but at a cost of £350 (even more than the GoPRO one), the Removu S1 gimbal was even more out of reach.
Even on the lower end part of the market, gimbals are selling for £150 to £200, which I considered to be too much money to spend on a hobby for an amateur, not to mention it becomes one more thing to carry and charge during bike rides… Yet I bought one, after all. So what made me change my mind?
Watching my own videos made me change my mind! I think I am a bit of a perfectionist, I am afraid (not easy to be a perfectionist on a low income, but I try). While on my cycling trips I spent a lot of time caring about these things… making sure the camera is rolling and everything else is as good as it can be on my cheap setup, sometimes even to the point of feeling a little bit guilty as I should just be enjoying myself. After the trip I spend countless hours editing these videos, making sure I can make them as good as they can be, taking into consideration my equipment, skills and knowledge limitations. I’ve learned a lot over the past 2 years and I was becoming a bit irritated with the stabilization barrier. So much time and effort only to be challenged by a simple mechanical issue (actually simple in terms… “stability” of all sorts has been humankind’s’ greatest challenge for ages).
Neewer Zhiyun Z1-Rider 3-Axis Gimbal
So, when I saw a product being sold at a discount price in Amazon, I bit my lips, opened my pocket and went for it. That was a Neewer Zhiyun Z1-Rider. Before you become all too excited, let me quickly tell you that I returned it to Amazon right after my 1st use. I was so disappointed…
In all fairness, I purchased it on an Amazon Warehouse deal, which are not brand new, but this item was listed as “like new”. Perhaps I did receive a faulty item, but to start with the item I received wasn’t exactly the item Amazon had pictured in the page. The Gimbal I received had no tripod screw mount on the bottom and had several exposed wires which immediately made alarm bells sound in my head. GoPRO and other Action Camera gimbals are supposed to be used in rather rough conditions. Having those tiny, and extremely fragile looking, exposed wires did not inspire my confidence. I think later models have solved that issue, but I didn’t have one of those, I had that one. Yet, I decided to give it a go.
On my very 1st use the device could not keep the camera steady for even a few seconds after movement started, tending to point the camera downwards and to the left. At the end of a 15 min ride the bottom motor appeared to developed an even bigger fault being unable to stabilize the camera at all in that axis.
As I was completing the returns form in Amazon, my frustration with having bought a, pardon the word, “crap” device grew, but I continued to watch the market and then I came across a device I had already previously seen in YouTube reviews, the Feiyu FY WG 3 axis Wearable Gimbal.
Feiyu FY WG 3 axis Wearable Gimbal Stabilizer for Gopro Hero 3+ and 4
At least this device withstood the 1st and 2nd rides, so for now it is a keeper. Having had the bad experience before, I actually was already quite excited about this one right at the start during the unboxing. The device feels a lot sturdier and the build quality feels a lot better, just by touching it. It’s an all metal construction, which makes it a little heavier, but then what difference can a dozen grams make for an amateur? In terms of performance I was a bit on edge, but then as I don’t know if any other motorized gimbal is able to perform to my desired standards I am taking it easy on it.
The main problem when recording time-lapse videos from a handlebar mounted camera is vibration, as you perhaps have seen in the review video I posted on top. Unfortunately none of the two gimbals I tried could compensate for these very fast types of tiny movements. I actually don’t know if there is an affordable device in the market today that could do that, so if you know of one, I’d appreciate if you could drop me a comment in this post or send me a message through the contact form.
If you want more detail in terms of the gimbal’s operation, feel free to download the device’s manual straight from the Feiyu Tech’s web side, which also has a number of other downloads available such as the latest gimbal firmware, the software to update the firmware and the USB driver (windows and Mac, I believe).
I think I said and wrote enough… So let’s take a look at the test ride videos, shall we?
This 7 min video shows a test ride where I mounted the gimbal on the bike’s handlebar side by side with the Sony HDR-AS30V I mentioned above. Unfortunately the gimbal was too close the the Sony, so the GoPRO caught the view of the Sony cam on it’s left hand side. Still a watchable video though and I think it should give you an idea not only of the performance of the gimbal, but also of the gimbal vs. Digital Image Stabilization (on the Sony cam)
The next 13 min video is a test ride I did from Slough to Eton with my friend Fernando. We both had good reasons to ride this day (not that we need one). Fernando had just purchased his new touring bike and I wanted to test the gimbal mounted on a GoPRO chest strap.
Feiyu Tech Wearable Gimbal mounted on a GoPRO Chest Strap
The results are encouraging and wearing it so close to my body reduced the vibrations on the camera quite significantly (and when I tell my girlfriend that I am a stable guy she doubts me, here is the scientific proof of that), but the chest strap had to be quite tight to support the extra weight of the gimbal, which became a bit uncomfortable over time. On this ride I had also mounted the gimbal on a too low position with the GoPro mount attachment connected to the back of the gimbal body, near the battery compartment as shown the the picture below.
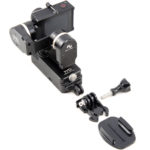
GoPRO attachment mount on the back near the battery compartment.
On my return ride (the next video) I moved the position of the camera in the chest mount used the attachment on the bottom of the gimbal and the camera in inverted position. There improved the picture, but forced me to tighten the chest strap even more. Not sure it is something I would like to wear for 8 to 10 hours non-stop as that is sometimes the length of time I record time-lapse video in 1 day of touring. Time will tell…
So, the next video 1 min video is a time-lapse video recording of a portion of the return journey from Eton to Slough with the bottom of the gimbal attached to the chest strap.
So, I think this is it. Was my 1st “gadget” post in quite a long while, I had to make it count 🙂
Hope this was useful to someone and if you like it please, share, comment and subscribe.
Thank you for your time!
Note: Some links on this page lead to Amazon product pages. If you decide to buy from them I get a small commission. Feel free to shop around though.
Do you like these posts? Why, then, don’t you pay me a coffee to help with the blog hosting cost and as a caffeine incentive to keep me going through the long hours of the night?
(Suggested amount: £2.00 or USD $3.00 or 2.50€ or whatever you want to give)
Please rate this post by clicking on the desired star (1 = Awful, 5
= Excellent)
VF post from 8AUG16, from Bruay-la-Buissière to Péronne
This post complements the post I published on the 8th of August 2016 in which I described the experiences I had while riding between Bruay-la-Buissière and Péronne. I am not going to repeat the contents of that post in this one again, but I will add a few highlights for each stage below. I would strongly encourage you to ready the August, 2016 post before continuing on this one, though.
Via Francigena can be just bike touring, of course, but if you want your Testimonium when you get to Rome, you have to present your pilgrim’s credential and it needs to have stamps in it. They do do a deep analyses of the stamps, but they will expect that in a 2,000 Km bike ride you will have collected a few. In the digital age is getting more and more difficult to find stamps… so analogical (illogical?). In many of the small towns and villages the chance of you to find a government facility (town hall, tourist information office, etc) will depend on the day of the week (Weekends? No chance) and the time of the day as some of these facilities will be closed, e.g. lunch time, or may have public opening hours. I really tried getting my pilgrim’s credential stamped but as it was the case in Ablain-Saint-Nazaire and others, as I got there I could not find anything open. Even the pharmacy was closed.
Arras is spectacular. Worth a visit if you can afford staying for a day. It’s a UNESCO World Heritage site and is more than 2,000 years old.
There is a “Route 66” café in Ervillers, between Arras and Bapaume, with a big statue of “the King” (Elvis). Coming across that reminded me of a friend who was about the ride the entire route 66 by bicycle. Her name is Cacá Strina. Check out her page here.
Don’t completely trust technology. Have always some low tech option to fall back if technology fails you. For some reason I lost GPS connection between Baupame and Péronne and I was relying on Google Maps entirely. At the very least download the offline maps over a WiFi connection, if possible, before you leave. Getting to Péronne was no problem, I simply follow the signs, but finding the Municipal Camping site took some time and effort (about 5 Km more than necessary).
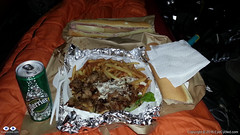
Tent Feast (Large Kebab Plate)
By the time I setup camp, had a shower and was ready to go out to find something to eat, the nearby supermarket in Péronne was already closed and after almost 30 min walking the only place I could find was a kebab trailer. So I ordered an extra large Kebab plate for dinner (and a baguette sandwhich for breakfast next day) and had a feast in the comfort of my tent. In small towns it may not easy to find a place for a meal at night. Keep that in mind.
Video of Lightfoot Guide Stage 14, From Bapaume – Péronne
Video Length: 5 min 38 sec To skip introductions and recommendations jump to time stamp 0:40 in the video timeline.
The next video is a time-lapse recording of my “awesomely akward” tent pitching skills. Took me “only” 20 min to pitch the tent. Thank God I don’t do this for a living… 🙂
In the municipal camping site of Péronne in France. Between the 3rd and 4th day of my Via Francigena pilgrimage. It raining a lot during that night and in the morning. Didn’t have a good night of sleept that day.
If you have any questions, don’t hesitate to comment or send me a message through the contact form.
Please subscribe to my Blog and/or to my YouTube channel if you don’t want to miss the next one and help me spread the word by liking and sharing my Facebook Page and Tweeter feed also.
Thank you for your time!
Please rate this post by clicking on the desired star (1 = Awful, 5
= Excellent)
"Life is a pilgrimage. The wise man does not rest by the roadside inns. He marches direct to the illimitable domain of eternal bliss, his ultimate destination", Swami Sivananda
This post complements the post I published on the 2nd of August 2016 in which I described the experiences I had while riding between Alembon and Bruay-la-Buissière. I am not going to repeat the contents of that post in this one again, but I will add a few highlights for each stage below. I would strongly encourage you to ready the August, 2016 post before continuing on this one, though.
Route:From the Rural Gite in Alembon to the Ibis Style Hotel in Bruay-la-Buissière via Licques, Tournehem-sur-la-Hem, Thérouanne, Amettes and Bruay-la-Buissière
Distance: 86.02 Km
Departure time from Alembon:10:29am
Arrival at Destination:5:58pm
Duration of day’s Journey:7h 29min
Expenses this day:Total = € 99.00
€30.00 – Food
€69.00 – Accommodation (Ibis Styles Hotel Bruay-la-Buissière)
Everything was going well, until… The unexpected, yes the unexpected again… By 9:30am I had packed everything and was ready to leave the Gite. I then realised my CatEye cycling computer was missing. Looked in the front bag, as I was certain I had put it there the night before. Wasn’t there, of course. Went back to the room and looked everywhere as I thought it might have fallen of the front bag during packing. Wasn’t there, of course. So all what was left was to look for it in the panniers, which were already neatly locked to the bike. Well, a pilgrim has go to do what a pilgrim has got to do. Looked for it in the front panniers as these were a lot easier to remove. Not there, of course. Took everything off the back of the bike again and looked in one pannier (not there, of course) and then the next, and bingo! It had fallen into the pannier as I was packing my things. I was happy not to have lost it, although I knew it was with me the night before, but the unpacking and packing took me almost 1 full hour. I didn’t do that mistake again…
Do not underestimate the SUN! The day before had been rainy and not particularly hot.
50 Shades of Red
I had seen on the phone’s Weather App that this day was supposed to be cloudy, but not rainy. It didn’t occur to me that I no longer was under British Weather. The day turned out to be very hot and sunny and I hadn’t passed any sunscreen on my skin. By the middle of the afternoon I was already feeling the damage the sun had done to my skin, which now looked very burned. The sunscreen was on the very bottom of one of my rear panniers. I should have stopped and passed the sunscreen on, but the thought of removing everything on the back of the bike (I had an intricate system there) was not appealing, so I continued. By the time I realised my mistake it was too late. The result was some heavy sun burns and sun fever by the time I got to Bruay-la-Buissière. As it was Sunday I knew it wouldn’t be easy to find accommodation and I wasn’t feeling very well so I used Google Maps to show me the available hotels nearby and the most affordable was the Ibis Style hotel 5 Km away from the town centre.
Video of Lightfoot Guide Stages 10, From Amettes to Bruay-la-Buissière
Video Length: 6 min 05 sec To skip introductions and recommendations jump to time stamp 0:48 in the video timeline.
The next video was recorded as I was crossing the town of Marles-les-Mines, between Amettes and Bruay-la-Buissière and their Folkloric group parade was about to start at the town’s FÊTE FORAINE.
If you have any questions, don’t hesitate to comment or send me a message through the contact form.
Please subscribe to my Blog and/or to my YouTube channel if you don’t want to miss the next one and help me spread the word by liking and sharing my Facebook Page and Tweeter feed also.
Thank you for your time!
Please rate this post by clicking on the desired star (1 = Awful, 5
= Excellent)
Post about Via Francigena, Day 1, written during the pilgrimage.
Introduction
This post complements the post I published on the 30th of July in which I described the experiences I had while riding between Canterbury and Alembon.I don’t think I need to repeat the same things here, so if you didn’t get a chance to read about this day on that post, I would strongly encourage you to do so before continuing on this one.So, in this post I am skipping the story and just adding some data, the GPS route, the pictures and the videos of that day’s ride.
Do not ride on the A2! Use the improved Lightfoot GPS route which you can download from here (Scroll down to the “Bike Touring Route” section and clink on the + to expand). Also read / watch my post / video from the 8th of June 2016 of my bike ride between Canterbury and Dover on the Regional Cycle Route 16, which more closely matches the official route. The GPS route I took that day is available in that post.
Rain and bad weather in the UK and strong sun just after crossing the channel.
If you don’t have time to get a stamp on your pilgrim’s credential in Dover, after you board the ferry go to the information desk on board and ask them to stamp your credentials. Better than nothing.
In Calais and other towns, do use the services of the tourism information offices, if you can. You can always get your pilgrim credentials stamped there, but keep in mind that during the weekends or certain times during weekdays they are most likely closed, especially in small towns.
When you buy a new SIM card for your phone abroad, it can take quite some time until it properly registers on the network and you have full access to the Internet again. Download offline maps if using Google Maps for Navigation or use something that does not rely on an internet connection (I used Garmin Navigation
Gite in Alembon
If you cannot find pilgrim accommodations, where available, stay at a rural Gite. They are cheap and the people are very nice. I totally recommend the one I stayed in Alembon if you want to stop there. Keep in mind Alembon is a tiny village. There is nothing to do around, I mean, no restaurants, shops, etc, but if my experience is a reference Madam Levray will take very good care of you. She is very used to having pilgrims in the house. Before me she told me she received a pilgrim’s couple who were doing the pilgrimage on horsebacks I believe.
Video of Lightfoot Guide Stages 01 and 02, from Canterbury to Dover Ferry Port (UK)
Video Length: 6 min and 14 sec To skip introductions and recommendations jump to time stamp 1:17 in the video timeline.
As I mentioned above and in my earlier post if you are planning on riding between Canterbury and Dover (either as a pleasure ride or as part of your pilgrimage) I do NOT recommend you do what I did. Do not take the A2. The reasons for this recommendation would be self-evident if you watched the video above.
I know I am repeating myself here, but I feel some repetition is granted. I recommend you either follow the Lightfoot Improved GPS route (which link to download is up above) or follow the same route I took on June 2016 on the regional cycle route 16. For your convenience the video of that route is down below.
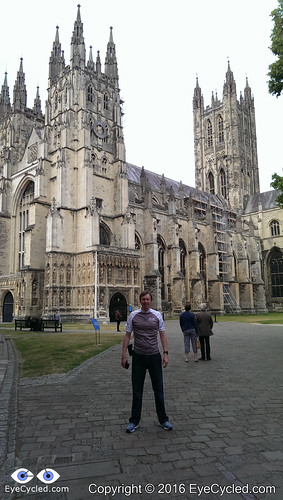
… and this is how the Cathedral looked like on that sunny day in June 2016…
If you have any questions, don’t hesitate to comment or send me a message through the contact form.
Please subscribe to my Blog and/or to my YouTube channel if you don’t want to miss the next one and help me spread the word by liking and sharing my Facebook Page and Tweeter feed also.
Thank you for your time!
Please rate this post by clicking on the desired star (1 = Awful, 5
= Excellent)
I honestly tried to publish content about my Via Francigena Pilgrimage by bike last year, but life got in the way and the ideas I had in my head for the blog posts and videos were perhaps a little out of my league.
Some time ago, as I was editing the 3rd video, I believe, I decided that I before I started the series of Via Francigena Blog posts I should publish an introduction first. I looked back into my “old” plans and realised things didn’t quite go as planned, but that they could probably have the potential of being worst if I hadn’t planned.
This introduction allows me to share my original plan with you and compare it with some of the real life post-pilgrimage information I collected. Perhaps it can be useful to other pilgrims.
In this introduction I also want to explain why I will be doing things in a certain way (by “things” I mean, the posts, the videos, etc). Call it the publishing “strategy”, if you like.
So, here it goes… the introduction to my Via Francigena Blog Series.
Click on the links below to jump directly to that section.
I could answer this with “Google is your friend“, or I could just provide a number of links to web resources such as this one, this one and this one, but they would not be my answer or at least answer what Via Francigena was to me.
In 2015 a friend and I decided to do the Camino de Santiago by bike. I had done some shorter bike trips before, but this was, at the time, the longest bike ride of my life. I loved it! Since coming back I was looking for the next challenge. For various reasons a number of ideas were raised and dropped. Some would take too long and be too expensive requiring me to take a license from work or quit my job. Not quite sure how I got to know about the Via Francigena (VF), but as a pilgrimage it is quite akin to the Camino de Santiago, so much in fact that is often also called “Camino di Roma” and it was probably during my research to write about my experiences with the Camino that I came across the details for the VF.
I really needed a challenge to get my mind off certain things that were consuming me during that period. Therapy and medication wasn’t helping much, so I started planning and the more I put my head to it, the more I was certain it was a feasible adventure, not too hard and not too easy. I found out that I was OK to spend the expected amount of money needed, but getting the approval from my company for the extended holiday period required for the trip, plus a few extra days for contingencies, wasn’t too easy.
It took me 29 days to complete the pilgrimage end to end, so my plan is to write at least 29 posts, as short as they may be, one for each day.
To promote consistency and order to the posts, I will divide each post in the respective Lightfoot Guide stages I covered on that day. More about the Lightfoot guide stages below.
For those old enough to understand this, it is not only Frank Sinatra that did things in his own way… I did my Via Francigena in my own way too… but, of course, like the Beatles (and Joe Cocker) with a little help from my friends.
First I bought the electronic version (PDF) of the Via Francigena Lightfoot volume set, containing 4 volumes. I do recommend them to you, but to be brutally honest, I don’t know if it was a worthwhile investment for me.
Lightfoot Via Francigena Guides, 4 Volumes
You can acquire the guides in paperback format at a cost of €67.99 or in digital PDF format at lower cost of €38.99 (at the time of writing) which comes watermarked with your name and email address to prevent misuse. I would recommend the e-book version as you honestly would not benefit from carrying 4 volumes of books, with hundreds of pages each, on your bicycle panniers (or backpack if doing by foot).
Although the guides are extremely detailed, I’ve personally found the maps very confusing to follow on my bike, but, please, don’t take me as reference as I am a terrible map reader anyway. I believe they would be a much better help to those doing the pilgrimage on foot. The most useful aspect of the guides for me was to provide direction, hints and tips and the list of pilgrim accommodations.
The Lightfoot guide divides the Via Francigena into 98 stages, which are, presumably, the segments covered by Archbishop Sigeric, the Serious, on his 80 days return journey from Rome to Canterbury after receiving his Cope and Pallium (a circular band of white wool with pendants, worn by archbishops) from the Pope.
I deliberately missed some of these stages, such as the one from Calais to Wissant, and a few more during the journey because of various reasons, but I did cover most of these stages and the posts and videos will focus on them for each day of the pilgrimage.
You will be able to download the GPS files of the routes I took every day, but they include mistakes and tracks I would not recommend to you, so it would be important to read the posts for some context if you want to avoid making the same mistakes I did.
I am an Engineer by formation and a project manager by trade. With this in mind, how can you expect me to go into anything without at least a minimum amount of planning? It is in my nature…
So I am making available here the original planning document in PDF format. I don’t mind sharing the original Microsoft Word document, nor any of the other supporting documents (Excel Spreadsheets, Microsoft Project Plan, PowerPoints, etc), but if you want them you’ll have to message me requesting them. They might be useful to you, if you are planning on doing your own Via Francigena.
Keep in mind, they should only be used as a guide. When I did the Camino de Santiago in 2015 I heard many times that although the route might be the same, the Camino is different for each person. That is one of the truths about pilgrimages: The Camino is yours… a very individual thing. Even if you do it more than once, they will always be different. When I did the Camino de Santiago in 2015 I met pilgrims who had done it several times and confirmed to me that every time they did it, was different, even if walking or riding the exact same route. That is perhaps one of the things that make this type of adventure so appealing to many. There will be decisions to be made along the way and a variety of random things that may force you to change your plans or your route, like road closures, weather conditions, sickness, mechanical failures, little accidents and so on… (knock on wood).
I know this may sound ridiculously obvious, but I don’t think I can over-emphasize that you should not rely too much on other people’s experiences as a recipe for success, if there is such a thing as a successful pilgrimage.
Now, this is not going to sound positive in terms of my planning skills, but no plan I’ve ever made worked out 100%. Other project managers might understand and accept this, however, one thing stands out with project planning: “Fail to plan is planning to fail”. At the very least a good project plan gets you thinking about what you want to achieve and how to achieve it. It is no guarantee of success, especially if you never done before, whatever you are doing, but it is better than to face the challenge completely unprepared.
I decided not to write a lengthy analysis about the things that worked and the things that didn’t. At the end of this series I may do that, but by then, if you have the intention of following the series, you’ll probably know that already.
I attempted to collect a lot of data during the journey, and that failed. I think I over-estimated my ability to do the collection while ensuring I was on the right track, got to the top of that mountain and was not run over by a truck or a car. It is a lot to take in and I had my hands full most of the time, but it wasn’t a complete disaster either.
Those that have done any amount of cycle-touring in their lives will know that at the end of the day you will be tired, dirty and hungry. The last thing on your mind would be “I need to record the stats / log for the day”. It wasn’t easy to get in front of a computer to write anything after a challenging day of riding 8 to 9 hours on a bike, yet I did it most days (feel free to leave me your kudos in the comments).
I was using multiple files as I originally thought it would be easier to separate the information, but upon my return I combined everything into a single file which I make available for download below. It contains all of the expenses, categorized by food, accommodation, repairs, transportation and extras as well as route and track information and a few other “bits and bobs” which might be useful to those attempting to do the same. I originally planned to collect information about other pilgrims, signage along the route and so on, but that was too much.
Video creation is by far the most consuming task in the project. I learned that after coming back from doing the Camino de Santiago in 2015. While it took me about 2 weeks to complete that pilgrimage, it took me a year to write about it and that is alright, after all this is my hobby and not my day job.
After the “Camino” I produced at least 1 time-lapsed video for each day of the journey. Some of these videos became a bit too long and I became a bit frustrated that after all the work I had put in them, almost no one was watching them ’till the end. So, for this series of posts I decided on a different approach: I’ll create shorter videos, more specifically breaking them down by stages, the same stages defined by the Lightfoot guide I used. Although there are 98 stages in the guide, I don’t expect to produce 98 videos as I skipped some of the stages.
As the videos were recorded in time-lapse mode with a GoPRO 4 Silver, that means they are very shaky and fast (the series 4 does not have digital image stabilization built in), so I want to leave a few hints and tips on how to best use the videos. I thought the best way to do that would be in a video itself, so, here it goes…
The photos will all be in Flickr as I found media to be very difficult to handle in WordPress itself. There will be albums containing all the photos for each day of the journey and all albums in be joined in what Flickr calls a “collection”.
Unfortunately, if you want more context to the photos you’ll have to read the blog posts as I simply don’t have the time and the will power to write descriptions for each of the thousands of pictures there.
I live in a small town called Bracknell in the county of Berkshire, England. The distance between my home and Canterbury is roughly 100 miles or 160 Km, so I got a good friend of mine to drive me to Canterbury the day before. I also had the company of my older son.
I had a reservation at the local Youth Hostel and after leaving the bike and gear in the hostel we all left to walk around Canterbury and find a place to eat dinner.
You can read a lot about Canterbury in Wikepidia, so I will just refrain from copy and pasting and leave you the invitation to click on the link above to learn more about this historic town, a UNESCO World Heritage Site, which has been inhabited since pre-historic times and played an important role in British history.
There isn’t actually much more to say about that day. After having dinner, my friend and my son drove back home and I spent some time in the hostel writing this blog post here.
At that point I was still deluding myself that I would be able to write one short post for each day of the journey. I did write several, but I now know better.
I don’t want to repeat in this post what I wrote on the above mentioned one, but I thought it was OK to, at least, point back to it and also share the pictures of the day.
Please subscribe to my Blog and/or to my YouTube channel if you don’t want to miss the next one. Please help me spread the word by liking and sharing my Facebook Page and Tweeter feed also.
Thank you for your time!
Please rate this post by clicking on the desired star (1 = Awful, 5
= Excellent)