Tag Archives: fahrrad

Camino de Santiago: Day 2 - From Roncesvalles to Puente la Reina.

If you are the type of person who doesn´t like reading, I made it easy for you. The video below is an almost exact transcript of this post, with a few minor differences, so feel free to watch the video and skip the post if you want.

So… you like to read then? Good for you, because I lied 🙂

I provide more information on text than I do on video and to complement the text I added some links to interesting pages I found while doing some research as well.
Leaving Roncesvalles

We´ve done this on the 26th of May 2015 and according to my Garmin it took us just under 8 and a 1/2 h to complete the 80 Km that separates Roncesvalles from Puenta la Reina where we decided to stay for the night. Together with me was Fernando, my Pilgrimage partner.

Having done only 30 Km the day before we wanted to push ourselves a little to bring us closer to the average 60 Km per day we planned to do all the way to Santiago. This proved to be unnecessary later, but when you have a scheduled return date you have to account for some spare time in case you run into any problems during the journey. We also had the intention of riding further to Cape Finistere if we got to Santiago with time to spare.

We left Roncesvalles just before 8:00am and didn´t know exactly where we were going to stop. Puenta la Reina was one of the options. For any visually impaired person listening to this account, the day started wet and rainy. According to Garmin as we started the temperature was 12C falling to 5C 1h later and peaking at 19C around 2:30pm. Although it wasn´t necessarily cold it called for something warm to be worn.
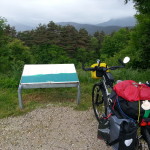
Alto de Erro, 801m.
Alto de Erro, 801m.

Roncesvalles is still situated mid-ways up in the mountain (Pyrenees). The ride starts with an initial descent of about 200m in total with a few ups and downs in the 1st 17 Km until the town of Erro where you start a 3 Km climb to the “Alto de Erro” which is at 801m at its highest point. We stopped for a few minutes there to take some pictures.

River Arga, crossing Zubiri.

I had eaten only a banana and a cereal bar as I left Roncesvalles. This became more or less the norm for me during the ride with a proper Breakfast stop later along the way 1 or 2h later. After our short stop in the Alto de Erro, we rode for another 7 Km and decided to stop for Breakfast in Zubiri which is a little village 28 Km from Roncesvalles. It had taken us 2.5h to get there and by that point I was really hungry.

Tortillas de Patatas (Potato Omelet)

Zubiri is lovely small village. It’s the point where we first met the River Arga which flows parallel to the road almost for about 20 Km thereafter, all the way to Pamplona. The village appears to live entirely of the tourism generated by the Pilgrims as there seem to be too many hostels and hotels for such a small place. My breakfast included 2 pieces of a delicious Potato Omelette or “Tortillas de Patatas” as it’s known in Spanish as well as some pastries like a
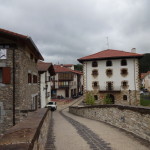
Zubiri viewed from the Stone bridge

Croissant and a chocolate roll served with coffee and a freshly squeezed orange juice. There are many things I miss from my time in Spain but the sweet and freshly squeezed orange juice is one of the things in the top of the list. This simply does not exist in Britain and even in places where natural orange juice is served the taste is nowhere near that of the sweet and non-acidic Spanish oranges. After Breakfast we walked to the very old looking stone bridge of the village, took some pictures, stamped our pilgrims´ credentials and continued to Pamplona.
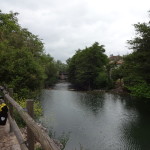
River Arga on the outskirts of Pamplona

Moving on, we continued on the N-135 road or “Carretera”, as it´s called in Spanish, all the way to the outskirts of Pamplona where we took a cycle path along the river Arga. The Arga also crosses a portion of Pamplona. As we got to the outskirts of Pamplona we stopped for a minute contemplate and take a few pictures of the serene scenes the river Arga was providing.
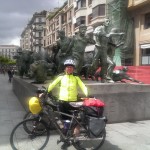
Bull running Monument (Encierro)

Our passage through Pamplona was very quick. Pamplona is where the famous running of the bulls happen, known in Spanish as the “Encierro“. We only stopped for a few minutes at the bull run monument in the city centre and at the pilgrim´s office to stamp our credentials. At that point in the journey we thought we were pressed for time and we didn´t want to arrive too late in our destination that day. We also knew we were coming back to Pamplona anyway since it was there that we were going to return the rental car we reserved to drive back from Santiago.
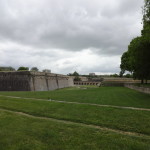
The Citadel in Pamplona

We crossed the city and got a bit lost in the park where the Citadel is located, but that allowed us to stop for a minute and take a few pictures. Really impressive example of an old military complex. As we left the city and started to get into more rural areas we met a local cyclist who advised us to avoid the walker´s path up to the “Alto del Perdón” (Mount of Forgiveness), which is one of the
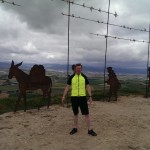
Alto del Perdón
Alto del Perdón

many landmarks along the Camino. The company that runs the wind turbines on that mountain has created a number of bronze sculptures to celebrate the Pilgrims who climb it. The road route is about 4 Km longer than the walker´s path. Even though I perfectly understand Fernando´s reluctance to take the walkers´ path, I confess I was a bit disappointed. I only realised how big the challenge was going to be when I got up there and saw all the bikers pushing their bikes up. We took the NA-6004, then a left turn on the NA-1110, which runs parallel to the A-12 motorway, in the direction of Astrain. The climb is long but perfectly rideable even when you leave the NA-1110 to climb the NA-6056 in the direction to the mountain alongside the wind turbines.

Panoramic View from Alto del Perdón

I believe getting to the top of the “Perdón” provides the Pilgrim with the first real feeling of achievement in the Pilgrimage. The altitude recorded by my Garmin was 682m, which is by far not the highest mountain along the way, but perhaps because it’s so well known, or perhaps it’s because of the long challenging climb, I think there is something about that view on both sides that made an impression on me.

Alto del Perdón
Alto del Perdón

On one side you see Pamplona in the background and on the other you have the view of the entire valley where Puenta la Reina is situated. It´s a really magnificent view, but I guess the pictures are worth more than a thousand words. Oh by the way, if you ever wondered why there are so many wind turbines in Spain, the noise you´ll hear in a moment should provide a clue. As the saying goes, everything that goes up must come down, so no surprise that after the Perdón you´re in for a long descent. The NA-6056 which is the minor road alongside the Wind Turbines requires attention because it´s littered with pot holes, but once you are back to the NA-1110, an excellent main road, the pavement is smooth and allows for much higher speeds. In fact, it was on this descent that I achieved the highest speed in the entire journey and probably the highest speed of my life on a bicycle so far: 74.8 Km/h (or 48 mph) according to my Garmin Edge. A great rush of adrenaline.
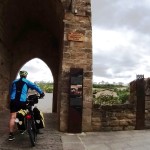
Arriving in Puente la Reina

The distance between the Alto del Perdón and Puente la Reina is about 10 Km and it´s mostly descent, so after the Perdón you get to Puente la Reina pretty quickly. What a lovely town Puente la Reina is and its impressive main landmark: The romanic bridge over the river Arga (yes the same that crosses Pamplona). It was built by Queen Mayor (hence the name Puente la Reina or “Bridge of the Queen”) to allow pilgrim´s to easily cross the Arga.

Puente la Reina (The Queen´s Bridge)

We stayed at the “Albergue de peregrinos de los padres reparadores” (Pilgrims´ Hostel of the Fathers´ repairers?) which cost just €5 a night. The Albergue is very simple and if you are too fussy you will have issues with the shower rooms and the fact that there are almost no power outlets in the bedrooms, so people that want to charge their phones or gadgets fight for the few there are. One pilgrim actually left his phone in the bathroom to charge and stayed there for almost an hour while the phone was charging, something I would never do.
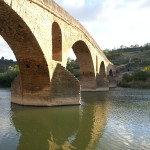
Puente la Reina
Puente la Reina

In the next day as we were leaving the Albergue we met Paula for the 1st time. Paula was from Brazil and was doing the pilgrimage by bike, with the main difference that she was on the road much longer than we were, since she started from the Notre Dame cathedral in Paris. Well, that´s it. I will try to produce one post every week. Even though I am benefiting from this writing exercise (especially in German), it hasn´t been easy to find the time to do this in 3 languages. I will complete this Pilgrimage series in all languages, but I may decide concentrate everything only in English in future “adventures”.

<< Previous Day                                                                                      Next Day >>

Please rate this post by clicking on the desired star (1 = Awful, 5 = Excellent)
[Total: 5 Average: 5]

Camino de Santiago: Day 0 and 1 - Bracknell to Saint Jean Pied de Port and Roncesvalles


This is the first post of my Camino de Santiago Pilgrimage. I intend to write at least one for each day of the Pilgrimage. In this post I decided to include also something about “Day Zero” of our ride. I am calling day zero our journey from England to France by car. Other people in England might benefit from this experience (if not then I just wasted my time). Feel free to scroll down straight to Day 1 if you want. I am also trying something new for me: Doing “voice-overs”. This is definitely taking me out of my comfort zone, so please be kind.

Day 0, Sunday, 24th of May 2015

The 4 of us… – Fernando (who did the Pilgrimage with me), Mara and her daughter Luize (who I met through BlaBlaCar), and myself – … left Bracknell at around 5:30 in the morning to get the 7:30 Eurotunnel train. All the details are in the video below, if you are interested:

It took us an entire day to reach Saint Jean. We arrived in Biarritz short before 8:00pm and in Saint Jean around 9:00pm. A drive of more than 15h. Even though my friend Fernando drove most of the time, I was exhausted when we arrived. Driving is no longer the same pleasurable experience now as it used to be in the past.

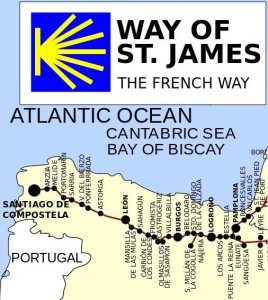
Saint Jean Pied de Port is the start of what is called the French way (route) of the Camino which became the main route few hundred years ago because of conflicts and unrest in the northern most part of Spain at the time. The ancient route is known today as “Camino Primitivo“. The French way is about 820 Km long, depending on the route you take and not accounting any distance if you get lost.

We stayed at the Gite Ultreia. The hostel was simple, but friendly. Bernard, our host, made us feel quite at home. The beds were comfortable, had clean sheets on them and the hostel offered a blanket (not all do, hence the reason you must take a sleeping bag with you, even if you are not camping). The overnight price of the hostel, booked from the UK, was 22€ incl. Breakfast. Except for the hostel we stayed for 1 night when we arrived in Santiago, this was the most expensive we paid in the entire Camino. The hostel closed at 10pm (as most do), so we left our bikes and luggage there and went to find a place to have a quick bite. Thankfully there was a bar right in front which was still open, but their kitchen was already closed. All we got was a Bayonne Ham sandwich and beer and, honestly, the Sandwich wasn´t very good and the ham had a lot of hard bone in it, but it was enough to calm down the hunger. Our bedroom had 4 beds and we shared it with a Brazilian lady from Rio and a gentleman from Australia.

Day 1, Monday, 25th of May 2015

If you saw any of my previous posts you will know that I usually leave the camera rolling, taking pictures at 5 second intervals and then compile them all into a short movie of the ride. This was my intention with the Camino also and I´ve managed to successfully capture every day, except the first day. Well, I did actually capture the pictures, but due to an oversight on my part end up losing all for this day 🙁

The video below is a compilation of the few pictures I took with another camera (and my phone) as well as some clips Fernando recorded with his GoPRO.

On this day, breakfast included coffee, various types of bread, Jam and a few pastries (no ham, cheese, eggs, bacon or anything like that, but you can cook them yourself if you buy them the previous day). Whether you are walking or cycling the Camino I would strongly recommend not to really just on breakfast and take food with you, especially if you are going to take the walkers route/track.

Parking sorted
Parking Sorted. When we returned car was exactly as we left it.

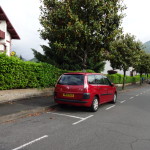
As we were going to leave the car parked in Saint Jean for 3 weeks, we were advised by our host not to leave the car parked in the town centre. He told us, however, about a quiet residential street nearby where, he said, we could leave the car and that it was quite safe and problem free, so the first thing we did after breakfast was to move the car to that place. He was right! As we

returned 3 weeks later the car was exactly as we had left it (with the exception of the huge amount of leaves accumulated on the bonnet as I parked it under a tree – Probably good to avoid, but I was thinking about shading it from the sun).

The ancient stone wall that protected the town in medieval times.

With Breakfast, parking and packing done our early start ended up turning into a 10am start, but we had to go to the pilgrim´s office first to get our official Pilgrimage credentials. There was a small queue in the office, so 10am became 11am including a quick stop for a prayer in the church.

Finding our way out of Saint Jean was easy.

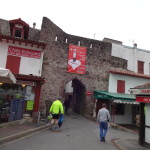
Town Gate
Ancient Town Gate

The town is small and the streets are well sign-posted. We had a few hills to climb straight away, but mostly was relatively flat for the initial 5 Km or so and then you start to climb. Having seen the accounts of people who cycled the walkers path we knew this wasn´t a route we wanted to take. The path up is riddled with rocks,

Old bridge over the river Nive

sand and obstacles which, even if you are strong enough and had no load on the bike, would still be very challenging to ride. Even harder for amateur cyclists like me (perhaps “pros”

would manage it). The video below is something I found in YouTube of someone who has walked the walker´s path (used with permission).

So we took the road, which I presume was easier from that point of view, but that doesn´t mean it was easy.

Pushing my bike up the Mountain

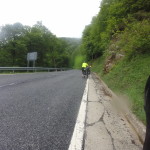
After the initial 7 Km from Saint Jean, as I mentioned before, the route is essentially a continuous climb of about 20 Km with gradients that very from 5% to about 15% in some places. I´d estimate 80% was “rideable” and in 20% we decided to push our bikes up.

We did not meet a lot of bicycle pilgrim´s that day. Turned out the Monday the 25th of May was a bank holiday in France, so there was little traffic of all sorts on the roads, which was probably better. It was also a grey and wet day with some light rain throughout. There was a large group of cyclists on road bikes and no luggage (they were probably dispatching the luggage to the next location by taxi). In one of those climbs we met Michael that was already more than a month on the road, cycling from his home in Germany to Santiago and further. We all had dinner together that night and also met Michael on many other occasions afterwards, during the journey.

Summit of Pass Ibañeta

According to GPS data it took us just under 5 h to do 30 Km. That appears to be very typical for crossing the Pyrenees. I must confess, I was expecting to be able to ride a greater distance on the 1st day, but the climb is very demanding and by the time you get to Roncesvalles you will be already pretty tired.

Hostel in Roncesvalles (Albergue)

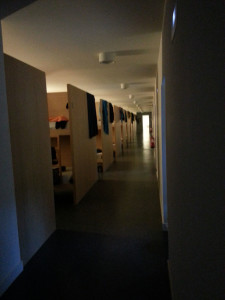
The hostel in Roncesvalles (or Albergue as it’s called in Spanish), is an experience you should not miss. It’s essentially a 12th century building, which was recently renovated. It contains large halls with a capacity of 120 beds in each hall, or 60 bunk beds divided into “alcoves” with 2 bunk beds in each alcove where 4 people (or pilgrims)

Hostel in Roncesvalles. Large halls with 120 beds (60 bunk beds)

sleep. Each pilgrim has a small locker (requires a 1€ coin), but there are only 2

power sockets in each alcove. Challenging when 4 people want to charge their phones at the same time. It was likely the biggest hostel I stayed in the entire Camino. The staff on duty that day was composed mainly of Dutch volunteers. The groups of

Bunk bed in the hostel. 2 bunk beds by alcove or cubicle.

volunteers who run the hostel change from time to time, so you may get different groups at different periods of the year. At the end of the hall there are male and female toilets/bathrooms. In the male section I could only see 3 toilets to the left with a set of 4 sinks in the middle and 3 shower rooms on the right. I have not had to wait long to use any of these facilities that day.

Although I have not used them, I am aware the Albergue also has a fully fitted kitchen and a large dining area.

One thing that was a bit annoying, was that every hour or so, one of the carer takers of the hostel would walk the full length of the hall. Probably to see if everyone was behaving appropriately. The noise of his steps have woken Fernando up a few times that night and a good night sleep is an important factor for those that will be walking or cycling all day next day. If you easily wake up with noise during sleep I would strongly advise that you bring ear plugs with you as with so many people sleeping in the same place, Albergues are not really a silent place during the night (think of snorers and other types of noises people make when they are asleep).

20150525_173321
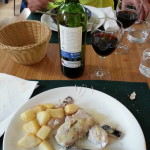
Dinner at the Pilgrim´s Restaurant. The Pilgrim´s menu is 10€ and has 3 choices (1st dish, main meal and desert). The price includes wine.

We had dinner at the Pilgrim´s restaurant and the pilgrim´s menu was 10€. I had pasta as a starter and fish as main meal with some yogurt as a desert. All served with plenty of water and wine. It was delicious. You have usually 3 choices on pilgrim´s menus. Roncesvalles is a tiny place and there are not many options, but there are a few more places you can get a meal.

Catholic Mass in the Roncesvalles Chappel.
Catholic Mass in the Roncesvalles Chapel.

After dinner we walked to the chapel to attend the catholic mass, which is celebrated in several different languages.

The hostel also closes at 10pm and around 11pm everybody is already asleep. Well,I was anyway.

Next Day >>

Please rate this post by clicking on the desired star (1 = Awful, 5 = Excellent)
[Total: 9 Average: 4.4]

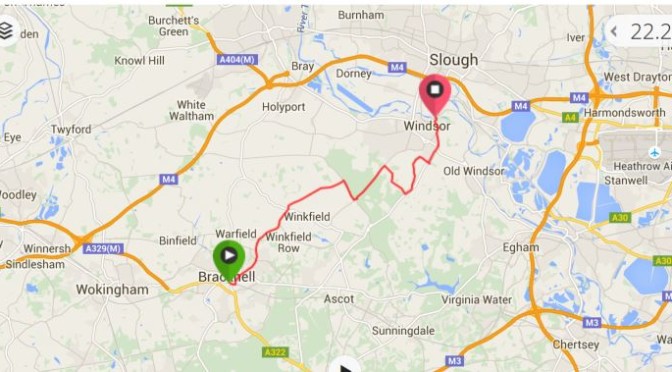
Bike Ride: Bracknell Station to Windsor Chocolate Theater Café Bar

Saturday, 18th of July 2015 Stats:

  • Distance: 19.01 Km or 11.85 miles
  • Time: 51 min 16 Sec (49 min and 29 Sec of moving time)
  • Average Speed: 22.2 Km/h (23 Km/h average moving speed)
  • Max Speed: 49.3 Km/h
  • Elevation Gain: 107 m
  • Calories: 674 C
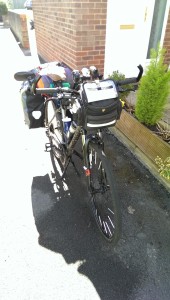
  • Bike: Specialized Crosstrail Disc, converted for touring.
  • Temperature: 22.1C

Healthier, cheaper, almost as fast as by bus and much more fun…

Please rate this post by clicking on the desired star (1 = Awful, 5 = Excellent)
[Total: 1 Average: 5]

Bike ride to and around the Isle of Wight


The week before Easter 2015 I´ve spent 3 days riding to and around the Isle of Wight. These are the posts of my experience:

  1. 30/Mar/2015: Ride to Ryde (from my home to the city of Ryde in the island)
  2. 01/Apr/2015: From Ryde to Ventnor over the Needles Park (Gun batteries)
  3. 02/Apr/2015: From Ventnor back to Ryde and with the Hovercraft back to Portsmouth.

Still learning how to use WordPress. I think this is the best method to collate them together. If anyone has a better solution, I am all hears.

Hope this is useful to someone. Thank you for your visit!


Please rate this post by clicking on the desired star (1 = Awful, 5 = Excellent)
[Total: 1 Average: 5]

Action Cameras for Cycling (Sony HDR-AS30V)

My 1st Gadget post… How exciting!
To save you time (?), this post is not really a typical product review. I prefer to leave this to specialists, such as Techmoan, who is my favourite reviewer for these things. This post is rather an account of my personal experiences and impressions with my current Sony camera and a few others I´ve owned over the years. So, if you are looking for a good product review or you don´t like reading, please watch Techmoan´s reviews on the Sony Action Cams or the many others he has on his site. Keep in mind the review below is really for the Sony HDR-AS10/15 models while mine is a newer AS30V, but they are almost identical:

He has also made a comparison video between the Sony AS10 and the GoPRO Hero3.

I´ve always been sort of a geek. Less so in more recent years, however, once a geek always a geek, it seems. And in my geeky interests one of the things that I have always been keen about was cameras (video recording). I acquired my first ever digital camera in 1998 (a Fujifilm DX-10) while on a trip to the US and it it´s max resolution was 0.8 megapixel (1024×768 pixel), could not record videos, had a 2 MB (not GB) SmartMedia card (later I bought 8 and 16 MB cards) and a RS232 serial interface for (slowly) transferring the pictures (this was before USB). This camera was stolen in Brazil in 2002 when the entire bus I was travelling in with everyone in it was kidnapped and held hostage by criminals for almost 3h (thankfully no one got hurt).

Mini DV Camera
Mini DV Camera

Not accounting for the many consumer photo/video cameras I had along the years, there have been those I bought specifically to record activities such as car trips and bike rides.

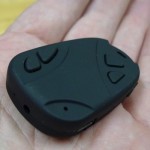
Keyring Camera
Keyring Camera

Years ago I bought a very cheap Mini DV camera such as this one. Few months later I bought a keyring camera like this. Their size was ideal, but they all had big drawbacks such as low image resolution and short battery life.

SJ1000 Action Camera

I later bought a SJ1000 which I have used to record bike rides until the Sony arrived and still use as a car trip recorder. I also had a Kodak ZX1 for a while, but that was quite disappointing. Given this is old stuff I´ll refrain from writing more about them, but you have the links, if interested, and you will still find them on sale.

Although a geek, I´ve been a rather “economic” one, never allowing myself to spend a lot of money on this “addiction” because of the other priorities of life (such as the kids´ University fund). The Sony HDR-AS30V was my first entry into a more sophisticated category of device.

Even though, at the time of purchase, the AS30V was not the entry level, it was also not the top Sony product in this category. Sony had already released the AS100V as their top of the range product. I did consider a GoPro, but their prices, even for the entry level version, were still a bit more than I was willing to pay at the time and, perhaps because of the way I am, I felt a bit annoyed with the “GoPRO Cult” many owners appear to belong to.

To start with, I do not recommend the Sony camera, even though there are many things I like about it. It may sound conflicting with what I wrote above, but for the price of this camera I´d recommend you actually spend a bit more and go for a GoPro or spend less and go for one of the Chinese made SJ series (with reservations given the lack of image stabilization).

Thumbs-Up IconThings I like about this camera:

    1. The picture and sound quality are truly exceptional. I did quite a lot of comparing with the likes of GoPROs, the Garmin Virb and some cheaper Chinese clones and I believe it’s in a pair with the GoPRO (perhaps better) and beats the VIRB hands-down when it comes to picture quality.
    2. The Image stabilization in video recording is great. It manages to eliminate most shaking even in very rough and uneven surfaces.
    3. Who said TV killed the Radio Star? It has a lot of radios built in… GPS, WiFi and NFC. WiFi for live video streaming to a smartphone and NFC for quick connection with the phone (which would be good if it worked well, but I don´t know if the problem is in the camera or in my phone, so giving it the benefit of the doubt).
    4. It has the ability to shoot stills at 11.9 MP (real pixel density, not interpolated), although the max resolution of time-lapsed pictures appears to be 1080p max.
    5. It has an external MIC connector
    6. It has several options of recording modes, even though I only ever used one.
    7. It comes with a 5m waterproof casing which is more than enough for my bike rides and surprisingly lets a reasonable amount of sound get through, not that this wold be a major advantage when is raining anyway.
    8. It can record while charging (although there appear to be some limitations, read below)
    9. Easy to use interface (buttons, menu layout, etc)
    10. Sufficient display for config and settings.
    11. Reasonable battery life for this type of device.
    12. It is not limited to 32GB MicroSD cards (with other limitations, see below)
    13. Built quality of the device is very good… the Sony brand is very reliable in this category.

thumbs-down-36-000000Things I don´t like:

    1. First and foremost, the provided PC software is awful. Yes, it has a few interesting features,butonmyDellXPS 15 with Windows 8.1 it crashes all the time. So let me write a few more bullet points about the things I don´t like in the software…
      • It wants to organize your life for you. I like to be in charge and do certain things manually. Goes away and starts scanning everything every time it loads (there might be those that may like this, I don´t)
      • It can only use GPS information for videos, not stills. It can produce videos with map overlays and other trip information such as speed, distance, etc. Example below:

        These are not very precise though. A positive here though (sorry to be mixed with the negatives) is that the software is also able to produce PiP videos where, for example, the Sony Camera records a forward facing video and another camera records a backwards facing video. You can then have the backwards video in a the corner of your forwarding facing one (never tested this though).
      • Even though the camera can take photos at time intervals, the software does not have the option to produce time-lapsed videos with them.
      • If the card is full, when connected to the PC it takes ages (really… something like 10 min) for the software to show the pictures in its interface. Something is not right here, as when I connect the camera, I can open the card as a storage device in windows and am able to see the pictures immediately.
      • The transfer of the files from the camera to the PC is not as fast as it could be.
      • When transferring the files to the PC, the folder creation process uses a dd-mm-yyyy format, which might be OK for most, but I would rather prefer yyyy-mm-dd for easiness of sorting and I could not find a place to configure this in the software. It appears to pick the folder format from the configured Windows taskbar date format. I changed the taskbar Clock format to show the day of the week and it started to produce folders with the day of the week as well.
      • Video editing is very limited and not very intuitive. Of course, Sony wants you to buy Sony Vegas, or Movie Studio or some other PRO video editing suite. Greedy bastards.
      • My Dell XPS 15 has a Ultra high 4K resolution display. The software can´t handle this screen size very well and absolutely doesn´t know how to handle screens with different DPI scales (not only a problem for this software though). For example, interface text gets so small it´s unreadble and if I am using the notebook screen I have to guess while typing a title as the interface is all messed up in that field.
    2. Things I don´t like in the camera itself…
      • Minimum interval for time-lapse pictures is 5 seconds. Too long in my opinion. Ideal would be if 1 and 3 seconds options existed also, which the hardware could check against the speed of the card inserted in the camera (I have a fast 64GB Samsung EVO card). It can also only shoot pictures at 1080p, which is sufficient for Full-HD time-lapse videos, but not enough to use as stills.
      • The camera does not give write access to the card when connected. This means you can´t delete files in the card, so you cannot free space deleting the pictures or videos you don´t like without taking the card out of the camera. You have to transfer all the files (even those you don´t want) and format the card to free space. I´ve heard the GoPro has the same limitation apparently (?).
      • NFC doesn´t work properly with my phone: I have a HTC One M8 phone with NFC and it rarely works for quick connection with the camera. Tried touching the phone to the NFC point in the camera in many spots and angles. Quicker to connect manually.
      • The WiFi connection is not stable. Disconnects often over time, even though I only use it to adjust the camera position. I have also purchased a DSC QX-10 camera that has the same (and perhaps even worse) problem.
      • The camera design: Its round on the bottom. It won´t stay upright without the waterproof casing. This is weakness that Sony has apparently recognized and fixed in later models.
    3. Even more things I don´t like about Sony…
      • Although they answer reasonably quickly, Sony´s support is awful. They don´t know their own products very well and contacting them is generally a waste of time, unless you have hardware issues under warranty.
      • Sony´s overall post-sales attitude: They sent me an email asking to provide feedback. I provided respectful feedback (such as this one) and they said my feedback wasn´t acceptable and invited me to re-write it. I didn´t, because I didn´t want to spend another 20 min writing the same things to get rejected again, but I wouldn´t have included it here as a negative if they were receptive to negative feedback. Organizations should not ask for feedback if all they want to hear from their customers is the stuff that helps them sell more. It´s just unfair to those that have given their time to them and perhaps made them aware of things they could improve upon.

Now, a few practical things I found out about this camera while using it that I did not see in Techmoan’s review or anywhere else.

  • Number of files apparently limited to 40,000: While I was riding my bike from Santiago de Compostela to Finisterre the camera beeped and I could see it had stopped taking time-lapsed pictures. I stopped the bike to look what was going on and the display was showing “Max”. I immediately related that to storage space and started to curse Sony, because the 64 GB MicroSD card only half full. So I replaced the card in the camera with a 32 GB card and everything started working again. Only later I realised the “Max” message was not related to the amount of storage being used in the card, but the number of files. Because I was taking time-lapsed pictures with 5 seconds intervals that meant that, by the end of the day, the camera had taken between 2,000 and 4,000 pictures, or in other words, JPG files. When the number of files in the camera reached 40,000 the camera stopped working. While this doesn´t comply with FAT16 (you can have more than 65K files in each folder, except the root) it´s the best explanation I can provide as recording video the camera does fill the 64GB storage space of the card, but obviously with less files. So, if you are planning long periods taking time-lapse pictures keep this in mind.
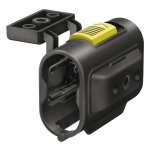
  • Sony Skeleton Frame for the HDR-ASxxx Cameras
    Sony Skeleton Frame for the HDR-ASxxx Cameras

    Little issues with bottom cap/lid: Another thing is the hinge that secures the bottom cap or lid in the camera tends to bent and break. Most of the time I use an accessory called “Skeleton Frame” (which was also included in Techmoan´s video review above). It´s a bit of an ugly and odd thing, but is the only mount that provides access to the bottom connectors, such as the USB and MIC. So while in the skeleton case the camera can continue to be charged while recording (for obvious reasons the waterproof case does not have any holes). With the constant opening and closing of the cap/lid to attach the USB charging cable the hinge on my camera is at the point of rupture now.

  • Foggy/misty lens: Now, this one I saw in Techmoan´s review to be honest, but also experienced it myself. In cold days condensation starts to build inside the waterproof camera case, because the camera, while recording, warms up and the exterior of the case is very cold. This tends to fog the lens from the inside. It seems Sony knew very well of this issue, but instead of “out-engineering” it so that it didn´t become an issue, they apparently saw the opportunity to sell little sachets of “anti-fog” materials that magically fit in a space right underneath the camera within the case. Greedy bastards, huh?
  • The camera can record while charging, but that depends on the charger´s power. If you plug the camera in a charger port that provides less the 1A of charging current the camera appears simply to ignore the charger and use battery power instead. Luckily the “PowerBar” (external battery) I use while riding has a 1.3A port and even a 2.1A port which provide more sufficient power for camera operation and charging.

Well, I think this is all I have to say about the Sony Action Camera

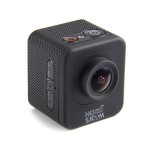
SJ M10 Action Camera

Few weeks before I left to Saint Jean Pied de Port for my pilgrimage, I bought also a SJ M10 based on the review I saw in Techmoan´s site. One of my latest videos, riding a recumbent bike, was filmed with this little camera. It doesn´t have WiFi or any of the fancy radios that the Sony does, but it does a brilliant job at its core which is recording videos. There is, however, no image stabilization on video recording which is a shame. You do get quite shaky videos with this camera if mounted on a handlebar, for example. Keep also in mind, this camera cannot handle MicroSD card sizes bigger than 32GB. It suffers from a few of the same issues I highlighted in the Sony such as the min interval for time-lapse photos is also 5 seconds, for example.

Despite these shortcomings, I really like this camera and it costs less than 1/2 of what I paid for the Sony (in promotional price), is very compact, comes with a lot of different cases and does a brilliant job in my opinion.

On the bright side it has a small 1.5″ display in the back to help frame the picture. If you are on a budget, but still want a good action cam that you can also use as a trip recorder in your car I totally recommend this one.

Please rate this post by clicking on the desired star (1 = Awful, 5 = Excellent)
[Total: 4 Average: 4.5]

Riding around Bracknell on a Recumbent Bike.


Right then… created this video as a request from a family member who, after watching my previous video (with the camera mounted on the bike itself) asked me if I could produce a video of me riding it.

Keeping in mind we are all amateurs here, OK. Don´t go expecting Hollywood style production. Having said that, I think my friend Gyuszi did a rather good job with the camera. Thank you Gyuszi!

Here it is Rafa!

Few comments… after seeing me from an “outside” perspective, I noticed that I appeared to be too “cramped” in the bike. Believe me, that is not how it feels at all. Nevertheless, I noticed also a few improvements I can do, which I think will make the ride even more comfortable, such as reducing the size of the steering bar and trying somehow to change the position to a less reclined one. Not sure yet if this is possible at all on this bike, but I´ve managed to gain about 3 cm in hight just by pumping more air into the suspension.

Hope it can be useful to others as well. Thanks for watching!

Please rate this post by clicking on the desired star (1 = Awful, 5 = Excellent)
[Total: 4 Average: 3.8]

Camino de Santiago: Hang in there please...

(Disponivel em Português) (Auf Deustch verfügbar)

Camino de Santiago
Camino de Santiago Event Picture

Hi folks,

I know, it’s been a while since my last post. It still will be a while longer until I have gathered all the visual material, my notes and everything else, put it all together and produced the posts I intend to.

To give you an idea I have collected about 90,000 (yeah, 90 thousand) pictures during the 3 weeks of pilgrimage (I simply left the camera rolling and taking pictures every 5 seconds) and have also several hours of video taken between me and my pilgrimage partner.

Just separating the exceptional from the trivial is a daunting task. After that comes a bit of storyboarding, video editing and creation (inc. all the time-lapse videos), YouTube uploads and the writing of the posts themselves (which I´ll try to keep to a minimum).

If you don´t know this already, this blog and my cycling activities are hobbies. They don´t pay the bills (in fact they cost me quite a bit of money), so as I came back from the Pilgrimage I had to devote myself to the boring stuff that pays the bills.

If that wasn´t enough I have also a backlog of post I want to finish and put behind me before I devote myself fully to sharing the experiences on the Camino with you. Excuses, excuses, excuses… (but good ones).

I am just adding the final touches on the post of my last day in the 3 day bike trip to the Isle of Wight the week before Easter (I had started it before I left on the Pilgrimage and did not want to leave it unfinished before devoting myself to posting about the Camino). I will also post a simple video of me riding my Recumbent bike as there was one request from a family member who is interested in these types of bicycles (might be useful for other people too, don´t know). So that is what´s is coming next.

In the mean time, if you are interested, there is a series of great videos recently produced by Cacá Strina, another bike pilgrim (narration is in Portuguese only though).

Her blog can be accessed here: http://www.cacastrina.com/?cat=38 (suggest you go from bottom up i.e. 1st episode on the bottom to 6th episode on the top).

Anyway, this post is just t

o let anyone coming to this site know that I am still here and I will, as promised, be posting about the Camino de Santiago bike pilgrimage.

Hang on in there! Don´t give up on me…

Please rate this post by clicking on the desired star (1 = Awful, 5 = Excellent)
[Total: 3 Average: 5]

Bike ride from Ventnor to Ryde, Isle of Wight.

(Disponível em Português) (Auf Deutsch verfügbar)

The 3rd and last day of my short Isle of Wight tour started rainy and grey. You can see by the pictures in the time-lapse video below.

I knew the day was going to be like that and was expecting it to be much worse than it actually was. About 1.5 hours into the ride the skies cleared and the rain stopped. Still very cloudy, but at least dry.

I had a non-water proof camera mount on the handlebar and the water proof camera casing was mounted on my helmet. Unfortunately I didn´t notice that somehow the camera was bending to the left as you can see at the beginning of the time-lapse video. Once the rain stopped I moved the camera to the handlebar mount as the open casing also enabled the camera to be charged while recording the trip.

The ride started with a climb straight away. Ventnor is very “hilly” and when I planned my route using Google Maps it suggested a more inland route than I had taken in a previous visit to the island (Sustrans Regional Route 67). So, I didn´t get to see much of the village, but I did ride through it during a nice sunny day in August 2014 and the video below I took during that ride.

The coastal route is nicer, but it has climbs of up to 12% incline in places that were challenging enough for an “empty” bike, let alone a fully loaded one.

Lots of flowers along the way
Lots of flowers along the way (click to enlarge)

The route traced by Google Maps took me along Wroxall, Newchurch and when I got to a place known as the Garlic Farm, which is exactly what the title indicates, a garlic farm, but you can

visit the farm and know everything about garlic (something like a Garlic Museum), I realised Google was taking me to a direct route to Ryde, which is not what I wanted. My intention was to bypass the

Cycle way, National Cycling Route 23
Cycle way, National Cycling Route 23 (click to enlarge)

coastal hills, as I had already done them last year, but to go back to the coast shortly after, so I turned back to Newchurch and entered what is known as the Red Squirrel Trail or Sustrans National Cycle Route 23. I really recommend a ride on this route. It´s a pedestrian shared cycle path, but horses are not allowed and it runs alongside the river Yar. Very peaceful and you´ll find a number of people riding it as well.

I met a nice couple and had a quick chat with them. The man was a native of the Isle, but they both lived in California and were there to visit his family.

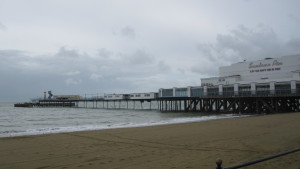
View of Sandown Pier
View of Sandown Pier (click to enlarge)

The destination was Sandown and I got a bit lost after the cycle path ended, so you see in the GPS data a bit a back and forth until I found my way.

Sandown Beach on a nice day in August 2014
Sandown Beach on a nice day in August 2014 (click to enlarge)

Sandown is a nice part of the Island with great sandy beaches and a fun pier with all sorts of entertainments (game machines, bump cars, etc). If you have children they will love it (it reminds Brighton pier).

Sandown Pier
Closer look at Sandown Pier (Aug 2014) (click to enlarge)

Riding along the promenade at Sandown beach is fun, but on sunny days you’ll find it full of people and need to be careful.

After Sandown I made my way to

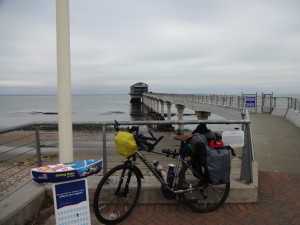
Bembridge Lifeboat Station
Bembridge Lifeboat Station at the end of the bridge. (click to enlarge)

Bembridge where the new Lifeboat Station is located. At a cost of £7

million it’s a state of the art facility where they can launch sea worthy rescue boats over a ramp in a matter of minutes.

Priory Bay Hotel and Gold Course
Priory Bay Hotel and Gold Course (click to enlarge)

After Bembridge I crossed Saint Helens and the grounds of the Priory Bay Hotel and Golf camp (very nice to stay if you have the money) in the direction to the village of Seaview. In Seaview you have a clear view of Portsmouth on the other side of the channel.

View of Portsmouth from Seaview.
10x Zoom view of Portsmouth from Seaview. (click to enlarge)

From Seaview it´s a short trip to Ryde alongside the beach. Having done the trip in this direction (counter clockwise), if you ever go to the Isle of Wight to ride I would recommend that you go the other direction (clockwise). From Ryde to Seaview, Bembridge, Sandown, Shanklin, Ventnor and so on. I think it would be a more scenic route.

This post now concludes the series of posts about my 3 days trip to and around the Isle of Wight. If you have any questions, don´t hesitate to ask. Thank you for your visit!

I´ve added a few more pictures and videos below.

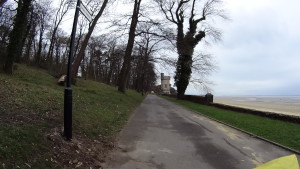
Appley Beach and Appley Tower
Appley Beach with the Appley Tower on the background (between Seaview and Ryde) (click to enlarge)
An interesting picture in every village I rode through.
An interesting picture in every village I rode through. (click to enlarge)
Along the Cycling Route 23
Along the Cycling Route 23 (click to enlarge)
Bicycle tunnel
Bicycle tunnel (click to enlarge)

The video below was taken as I was about the leave the Isle of Wight after a 3 days cycling tour to and around the Island.
Bicycles and Hovercrafts… two very interesting vehicles.

Bicycles are carried free of charge in the Hovercraft and you don’t need to disassemble anything, just remove your bags/luggage from the bike (and item lose item, although I left the water bootles in places and they arrived fine). On the way back my bike´s rear view mirror got broken though. Keep in mind the cargo can only carry 2 bikes at once, but during summer the service runs every 15 minutes.

The next video was shot inside the Hovercraft while “flying” over water to Portsmouth.

<< Previous day

Please rate this post by clicking on the desired star (1 = Awful, 5 = Excellent)
[Total: 2 Average: 5]

Ryde to Ventnor via Needles Park


(Click on the pictures to enlarge them)

This was my 2nd time in the Isle of Wight. I have been here last year with my family and we drove to the Needles Park on the last day of our visit. We could not, however, drive to the Batteries where the big guns used to be. My younger son was already tired and I knew if we walked all the way up hill (it is a considerable walk) I would likely have to carry him.

So in this visit to the Isle of Wight one of my goals was to go the the Needles Battery and see the sea from there.

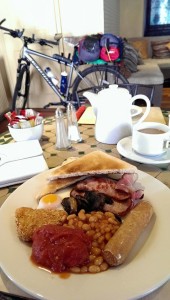
Full English Breakfast
Full English Breakfast at Kasbah

I left Ryde at about 11 in the morning after a nice full English Breakfast in the B&B I was staying, which I do recommend, by the way. It´s called Kasbah and they are very friendly and welcoming. Rather than a traditional B&B it is more like a small hotel, with nice on-suite rooms, TV and comfortable beds.

During Breakfast I phoned a number of B&Bs and Guesthouses in the Village of Freshwater, which is near the Needles Park. No rooms available. Camping was also not an option as it was too cold, windy and rainy at night and even if I wanted to, most camping grounds where not yet open for the season.

River Medina Marina in Newport, Isle of Wight
River Medina Marina in Newport.

So I decided to call B&Bs in my next destination, which was Ventnor, a village about 20 miles or 32 Km away – Success, but at a 40% higher price. With accommodation reserved for the night I started my ride letting Google guide me all the way. The first part of the ride, is the route from Ryde to Newport, the island´s biggest town.

I was already familiar with this route because last year I did a 62 Km ride in one day (1/2 way around the Island) which included this ride from Ryde to Newport. Most of the ride is done on roads, but there are stretches of shared cycle ways. The ride follows the National Cycle Route 22.

Horse riders on the B3401

To my surprise I even found people riding horses on that road, which must have really pissed the drivers behind them 🙂

Had I found accommodation in Freshwater, I intended to take National Cycle Route 23 and ride to Cowes and Yarmouth and then to the Needles (if not too late in the evening) or stay in Freshwater. Given I had to ride south to Ventnor, I decided for a more direct route to the Needles.

Narrow stretch of the B3401 (Calbourne Road) with intense traffic
Narrow stretch on a climb of the B3401 (Calbourne Road) with intense traffic.

There are portions of this ride with high traffic of vehicles, mostly cars, vans, buses and small trucks. One particular point on the B3401 is a considerable climb in a very narrow part of the road.

I think that was the only moment in the 2 days of ride in the Isle of Wight that I was concerned for my safety, but that was a very small distance, of perhaps less than a kilometre. The problem is to climb with a heavy bike, slows you down too much, with cars passing inches from you at times.

The rest of the ride was reasonably uneventful with fields and farms often on both sides of the road.

ZigZag climb to the top of the cliff

When I arrived at the Needles Park was already past 3pm in the afternoon, so I went straight up the cliff in the direction of the batteries. I did have to push the bike a part of the way up as the wind, together with the climb was making it very difficult to pedal on a loaded bike.

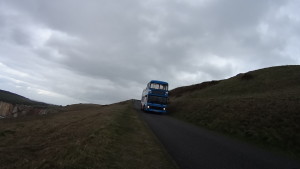
Bus coming down from the top of the cliff
That would have been an easier way to get up there.

You can walk around the new batteries, but there isn´t much to see, apart from the wonderful sea views.

The Needles Rock formation
The Needles Rock formation.

To enter the old batteries, which is maintained by English Heritage you need to pay a fee of £6.00, which, given the time I thought wasn´t worth it. So once I had a look around I rode the way down to the park and had a cup of coffee.

The Needles Rock formation on the background
Selfie with the Needles Rock formation on the background

There I realized I was without mobile phone signal, so I had to guess the way to Ventnor for a mile until signal was restored and I realized I was going slightly off course.

I wanted to ride to Ventnor on the A3055, also known as Military Road, as this is a coastal road that offer excellent sea views along the way.

(I was told there used to be missile silos in the island during the cold war, but could not find any evidence of that... well, they would have probably hidden the silos anyway, right?)
House being transported by a truck
Mobile phones, mobile houses, mobile everything…

About half way there, Google directed me to take a detour, which I knew was to avoid the A3055 because from that point onwards the traffic increases substantially, but also, probably, to spare me from the climbs I knew I had to do, because I had already ridden this part last year (on an “empty” bike though).

Freshwater Bay Beach

Turns out, when I arrived in the B&B in Ventnor my hosts told me there had been a land slide and the road was blocked from a certain point onwards. Had I continued on the A3055 I would have had to turn back and take the detour anyway, so thank you Google.

Riding through little villages and farm houses, using small country lanes was indeed better and although there were a few climbs, they were much less difficult than those on the A3055.

Yellow flowers on both sides and the sea in front.
Particularly nice stretch on the A3055. Yellow flowers on both sides and the sea in front.

As I arrived in Ventnor, the time was 6:30pm, the sun had gone completely bringing the temperature down to a chili 5C.

Were the weather friendlier, I would have probably done a much different ride today, but when you are touring one of the things you do is to improvise.

It rained all night that night and weather was predicting heavy rain the next day (which thankfully didn´t actually happen), so I decided to cut my “Tour de Isle of Wight” short and head home the next day.

The video below is more than 8h of riding compressed in less than 8 minutes (5 seconds time-lapse).

<< Previous day                                                                                         Next day >>

Please rate this post by clicking on the desired star (1 = Awful, 5 = Excellent)
[Total: 2 Average: 5]

Ride to Ryde


Ready to ride
Ready to ride

On the 31st of March I rode from Bracknell to Ryde… a “ride to Ryde” 🙂

I was initially planning to have someone drive me to the Hover Port in Porthsmouth, catch the Hovercraft to Ryde and then spend a few days cycling around the Island, but I felt a bit hypocritical and suddenly “Ride to Ryde” started to appeal to me.

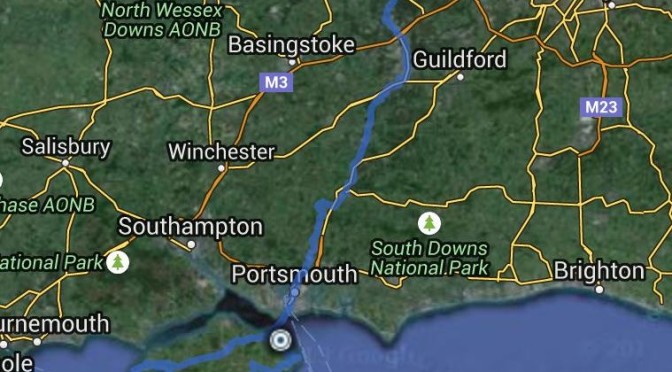
Had a look in Google Maps and it suggested a 65 miles or just under 100 Km route. I knew I could easily do that in a day and I was right.

I planned to leave early in the morning, but these plans never seem to work. I packed the panniers the day before, but a number of small things contribute to leaving only at around 11am.

According to Garmin it was a 7h and 53 min ride to Porthsmouth, but I did stop a few times for water and food.

Nice day for a ride.
Had just left home. Nice day for a ride.

Weather conditions were not ideal. It was sunny when I left, but in the middle of the afternoon the weather changed and, in addition to the cold wind, I had to face rain and even a 20 min period of hail storm on the bike, which wasn´t much fun. If conditions were better and I was in a hurry I could probably do it under 7 hours even with a few short stops.

I did not weigh the load on the bike, but I estimate it must have been about 20 Kg all together, between contents in both panniers, camping equipment and front bag.

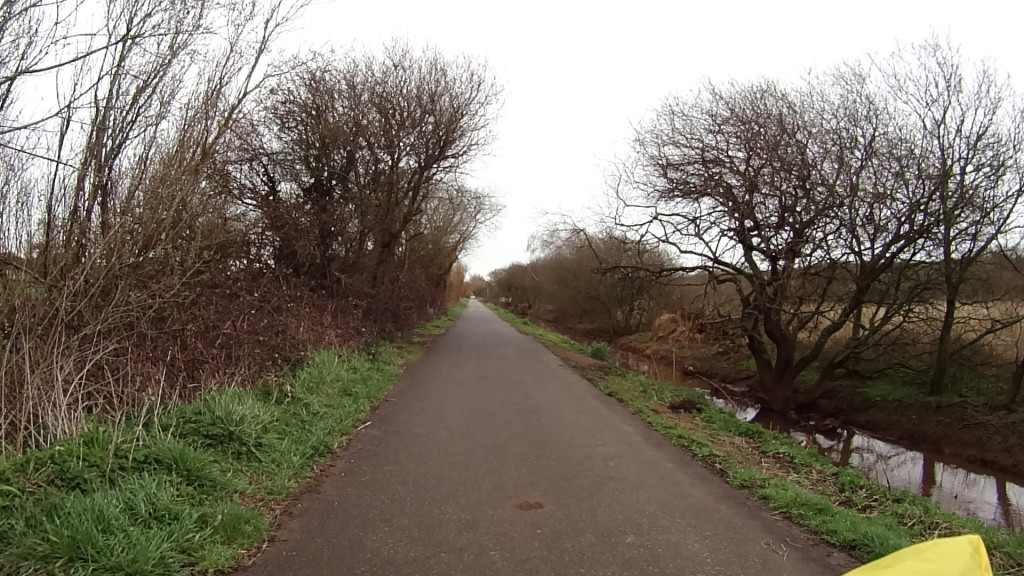
The first part of the ride I was already very familiar with. Down to Crowthorne, then Sandhurst in the direction of Farnborough on the Blackwater Valley Path which is a ride I do recommend for everyone. You ride alongside the Blackwater river and the many lakes and ponds often with vegetation on both sides. Very suitable to families riding together with Children, however, you have to consider it is for the most part not a paved cycled way, so it can get muddy after rain.

Picture of the bicycle, half way there
Half way there

As I approached Farnham, the Blackwater river turns north ways and as I was riding south I had to leave the cycle path to urban roads, which initially are low traffic, but after Farham Google Maps guided me to the A325 which had an intense traffic of cars and heavy load vehicles. If you are taking this route, please be careful and make sure you have good mirrors in your bike. You will need to be aware of what’s coming behind you because the A325 is not a major A road, so there isn’t much space on its sides and some vehicles approach at very high speed at times. Definitely not a place to take your children for a bike ride.

Traffic remained intense and with no cycle paths until I got close to the A3, which I rode along for just a few miles, eventually crossing it and taking some rural lanes as per Google´s guidance.

As I entered the A3 I realized that I had forgotten to start the camera, so a bit to my disappointment I wouldn´t be able to produce a time lapsed video of the entire ride as I intended.

The video below is from that point all the way to the Porthsmouth´s Hover Port and it does give an idea how the ride was. By then the worst weather conditions had already happen.

One of the issues you get when you start to rely exclusively on technology for navigation is that when there is no phone signal, there is also no access to the internet if you have not cached the map on your phone.

As I was riding on those small lanes, letting tractors and a few vehicles pass (in places there was not even enough space for a car and a bicycle side by side), I lost the signal and realized that I did not know where I was and which path to take in the next crossing. Obviously, per Murphy´s law, I took the wrong path, but thankfully it wasn´t long before I realized I was going the wrong way and the signal eventually returned as I climbed up a little hill. If you zoom up the map above you can see the little “bump” about a mile after I crossed the A3.

Muddy Path
Feet are about to become muddy

To correct the mistake Google suggested taking some bridal paths that were quite muddy, which is not fun when you are pulling about 20Kg of stuff on the bike. Lucky me, only a few meters were really bad, the rest were dry and rideable.

By then I was starting to get a bit tired and at the point I quickly appear in the video I wasn´t really looking forward to climbing the hill in front of me. I initially pushed the bike on foot, but luckly, the wind, which was strong all day, helped on that climb for a change and I was able to complete most of it riding.

Cycleways around Portsmouth
Several Cycleways around Portsmouth

Once the hill was behind there was a long descent and at the end the surroundings started to turn very urban again. I found that the urban areas on the outskirts of Porthsmouth and Porthsmouth itself have quite a good number of cycle lanes with cycling permitted bus lanes as well.

Sunset
Sunset in Portsmouth

As I approach Porthsmouth in an area called Cosham, the sun was setting and there is a nice cycle lane alongside some of Porthsmouth´s water channels and the scenery was really nice, despite the strong and cold wind.

The rest of the ride towards the Hover Port practically crossed the centre of Porthsmouth, but most of the path is cycleable in safety, with only a few stretches on streets with high traffic. By then night was falling and thankfully I had just missed the Porthsmouth rush hour.

There is a Hovercraft service to Ryde every 15 or 30 minutes so I did not have to wait long to be able to board and had to remove all panniers and bags from the bike, but the bike was loaded safely and everything arrived in Ryde in good order.

Took me a while to find the B&B I was staying, even though it was very close, because by mistake I started Google Maps with the route planned for a car, so it took me a long way around the place and the street of the hotel is single way, contrary to my direction.

It was a challenging ride for me, because of the less than ideal weather conditions. Very windy, it rained for about 1/4 of the way and even had to endure a hail storm on the bike for about 30 min, but it was fun nevertheless.

This is not a ride I would recommend to the uninitiated.

Thanks for reading. Few more pictures…

Light at the end of the Tunnel
There is always a light at the end of the tunnel.
Hovercraft
Hovercraft

Transfer from Portsmouth to Ryde aboard the Hovercraft.

Next day >>

Please rate this post by clicking on the desired star (1 = Awful, 5 = Excellent)
[Total: 2 Average: 5]